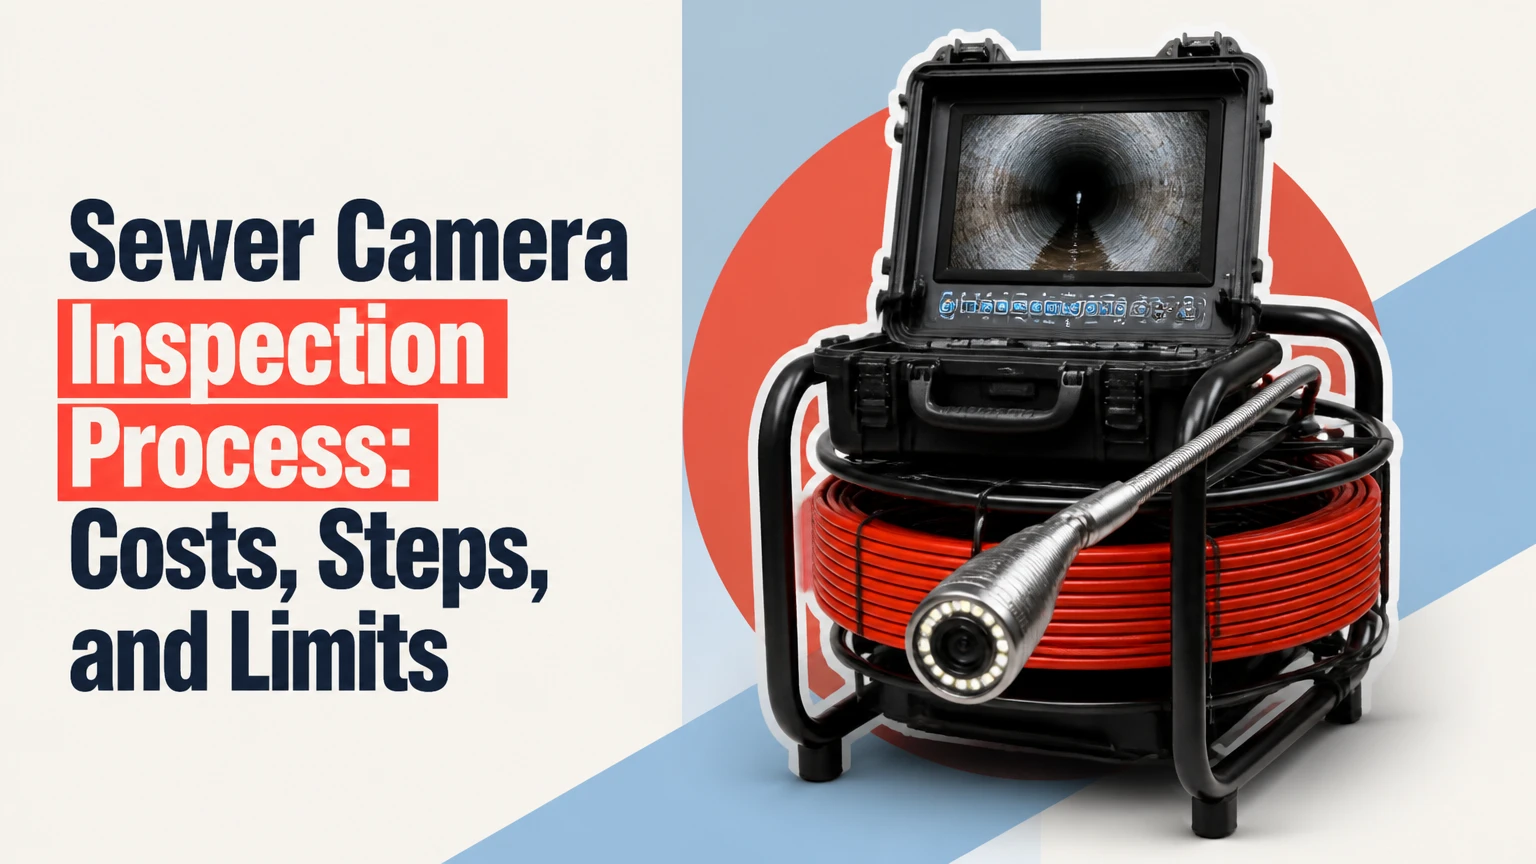
The sewer camera inspection process uses a waterproof camera on a flexible push rod to view the inside of an underground drain or sewer lateral without excavation. A technician enters through a cleanout, records the pipe condition and distance, and may use a radio sonde to locate defects and their approximate underground depth.
Key Facts at a Glance
- A typical residential sewer camera inspection costs about $250-$600 when purchased as a stand-alone service.
- A standard inspection usually takes 30-45 minutes after the technician reaches a usable access point.
- A push camera commonly inspects residential pipes measuring 2-6 inches in diameter and reaches approximately 100-300 feet.
- A sonde allows a technician to mark the camera head’s approximate surface location and depth.
- A camera cannot reliably diagnose a fully flooded, opaque sewer line until water and debris are removed.
- Video evidence identifies visible conditions, but it does not replace excavation, smoke testing, pressure testing, or structural engineering.
What Is a Sewer Camera Inspection?
A sewer camera inspection is a visual examination of a drainpipe, building sewer, or private sewer lateral using a waterproof camera, illumination, recording monitor, and flexible cable. The procedure reveals visible blockages, root intrusion, fractures, separated joints, corrosion, pipe deformation, bellies, and changes in pipe material.
The inspected route usually runs from a building cleanout toward a municipal main, septic tank, or private treatment system. The exact scope depends on access. A camera inserted through a basement cleanout may inspect only the house-to-street lateral, while a roof-stack entry can follow a different branch and miss the buried line entirely.
The purpose is diagnosis, not simply confirmation that water moves. A drain may flow today while roots, a low section, or a partially collapsed pipe creates repeated backups later. A recorded inspection gives the plumber a visual basis for cleaning, repair, replacement, or further testing.
What a Camera Inspection Can Prove
A recording can show the location, appearance, and approximate extent of visible defects. It can also document pipe material, connection points, standing water, sediment, and the direction of travel when the operator narrates the footage.
A recording cannot always prove the pipe’s full structural strength. A small camera may pass through a section that has hidden voids outside the pipe, and a clean surface may conceal defects beneath heavy scale. Video should therefore be interpreted with access conditions, pipe age, material, flow behavior, and maintenance history.
How Does the Inspection Work?
A sewer camera system combines a camera head, LED lights, a semi-rigid push cable, a monitor, and often a sonde transmitter. The camera sends a live image to the monitor while the technician controls speed, cable rotation, and viewing angle.
Modern camera heads often include self-leveling technology that keeps the image upright. Bright LEDs illuminate the pipe interior, but water turbidity, grease, scale, and debris can still reduce visibility. The push rod carries the camera through bends and records distance through a digital footage counter.
The sonde is a small radio transmitter positioned in or behind the camera head. Common locating frequencies include 512 Hz, although equipment and local practices vary. A technician walks above the buried route with a compatible receiver, identifies the strongest signal, and marks the camera’s approximate horizontal position and depth.
Why Distance and Location Matter
A defect description becomes useful only when another person can find the defect again. “Roots in the line” is incomplete; “root intrusion approximately 42 feet from the basement cleanout, near the driveway” supports targeted cleaning or excavation.
The footage counter measures cable paid out, not always the camera’s exact straight-line distance from a property feature. Cable can bow, loop, or follow a curved route, especially in large pipe or standing water. Sonde readings also become less reliable near reinforced concrete, metal utilities, electrical interference, or excessive depth.
Step-by-Step Sewer Camera Inspection Process
Step 1: Identify and Prepare the Access Point
The technician first locates a cleanout, sewer riser, exterior access cap, basement opening, or other entry point. A cleanout is preferable because it avoids removing a fixture and usually provides a more direct route into the private lateral.
The technician should confirm whether the line runs toward the street, septic tank, or building interior before pushing the camera. The access cap may be difficult to remove, damaged, buried, or under pressure from backed-up wastewater. Sanitary protection, gloves, eye protection, and controlled opening procedures are necessary when sewage is present.
Success checkpoint: The camera enters without damaging the cleanout, and the technician records the starting access point.
Common mistake: Entering through a branch drain and assuming the camera is traveling through the main sewer lateral.
Step 2: Connect, Test, and Zero the Equipment
The camera head connects to the push rod, monitor, power supply, recording system, and locator transmitter. The operator tests the image, LED intensity, self-leveling function, recording, footage counter, and sonde signal before entering the pipe.
The distance counter should be reset at the pipe entrance or another clearly documented reference point. The technician should also record pipe diameter, access location, direction of travel, and visible pipe material when known.
Success checkpoint: The monitor displays a stable image, the recording starts, and the footage counter reads zero at the agreed reference.
Common mistake: Starting the counter several feet inside the cleanout, which makes later locating and repair estimates inaccurate.
Step 3: Push the Camera Through the Line
The operator feeds the semi-rigid rod steadily through the pipe, slowing at bends, fittings, joints, and suspected defects. Residential push cameras commonly cover 100-300 feet and work best in approximately 2-6 inch lines, although actual reach depends on cable stiffness, pipe condition, slope, and the number of turns.
The camera should move slowly enough to identify defects but not so slowly that the lens remains submerged in settling debris. The operator may rotate the cable to view the full circumference, especially at joints and cracks.
Success checkpoint: The camera reaches the intended endpoint, such as the municipal connection or septic tank, or the operator documents the exact obstruction preventing further travel.
Common mistake: Forcing the rod through a hard stop. Excessive force can separate a weak fitting, damage the camera, or wedge the camera permanently.
Step 4: Record and Classify What the Camera Shows
The technician records continuous footage and narrates the distance, direction, pipe material, connection points, and defects. A useful report distinguishes between a blockage that can be cleaned and a structural defect that remains after cleaning.
Root hairs, grease, scale, wipes, and sediment may cause a flow restriction without indicating a collapsed pipe. Conversely, a displaced joint, longitudinal fracture, hole, or severe deformation can remain after cleaning and may require repair.
Success checkpoint: Every significant finding has a timestamp or distance, a descriptive label, and a recognizable location reference.
Common mistake: Calling every dark line a crack. Cast-iron scale, mineral deposits, cobwebs, and scratches on the lens can create misleading images.
Step 5: Locate Defects Above Ground
When the camera reaches a repairable or questionable condition, the operator stops and activates the sonde. The locator receiver identifies the signal above ground, and the technician marks the approximate position and depth with paint, flags, or measurements from fixed features.
Sonde locating is especially valuable when a repair would otherwise require exploratory excavation. The marked point should be tied to a driveway edge, foundation corner, property line, or cleanout rather than relying only on temporary paint.
Success checkpoint: The report records the defect’s footage, surface location, approximate depth, and the reference point used for measurement.
Common mistake: Treating the locator depth as a survey-grade measurement. Soil, nearby metal, pipe depth, and receiver technique can affect the result.
Step 6: Retract, Clean, and Document the Findings
The technician withdraws the camera while checking the pipe in reverse, because some defects are easier to see from the opposite direction. The camera head and rod are cleaned and disinfected according to the equipment manufacturer’s instructions.
The customer should receive the raw video when available, a written summary, defect distances, access information, and recommended next steps. A repair estimate should identify whether the price covers cleaning, spot repair, trenchless rehabilitation, excavation, restoration, permits, and connection work.
Success checkpoint: The access point is closed safely, the recording is playable, and the findings are linked to a practical recommendation.
Common mistake: Accepting a verbal diagnosis without retaining the footage or defect map.
Which Camera Type Fits the Pipe?
Push cameras are the normal choice for single-family residential laterals because they fit small pipes, travel through several bends, and require less setup than motorized systems. Larger commercial, municipal, and stormwater networks may require a crawler or lateral-launch camera.
| Camera system | Typical pipe size | Typical reach or capability | Best application |
|---|---|---|---|
| Residential push camera | 2-6 inches | 100-300 feet | House lateral, branch sewer, small drain |
| Heavy-duty push camera | 4-12 inches | 200-500 feet | Long private lateral, light commercial line |
| Mainline crawler | 8-72 inches or larger | 500 feet to several miles with relocation | Municipal sewer, storm drain, large commercial main |
| Lateral-launch crawler | Main 4-12 inches, lateral 2-6 inches | Mainline plus branch launch | Multi-family, campuses, complex commercial systems |
A lateral-launch camera uses a motorized mainline unit and a secondary camera that enters connected branch lines. It can inspect several laterals from one access route, but setup, traffic control, cleaning, and reporting increase the cost.
Crawler systems provide powered travel, pan-and-tilt viewing, stronger lighting, and better performance in large diameters. They are a poor fit for a typical 3-inch residential line because the unit may not fit or may lack enough traction.
Equipment Comparison by Decision Factor
| Decision factor | Push camera | Crawler camera | Lateral-launch camera |
|---|---|---|---|
| Typical residential price impact | Lowest equipment cost | Usually excessive | Usually excessive |
| Smallest practical pipe | About 2 inches | About 6-8 inches, system-dependent | Mainline often 4 inches; lateral about 2 inches |
| Ability to pass tight bends | High, with limits | Low to moderate | Moderate |
| Motorized travel | No | Yes | Yes |
| Branch inspection | Requires another access point | Usually no | Yes |
| Depth and route locating | Sonde-equipped models | Sonde-equipped models | Sonde-equipped models |
What Can a Sewer Camera Find?
A sewer camera can identify visible defects such as root intrusion, grease, foreign objects, collapsed sections, open joints, cracks, corrosion, sediment, pipe bellies, and transitions between clay, cast iron, Orangeburg, PVC, and concrete. The technician must distinguish a flow obstruction from a structural failure.
| Finding | Typical visual appearance | Immediate implication | Usual next action |
|---|---|---|---|
| Root intrusion | Fibrous growth through joint or crack | Recurrent restriction and possible pipe opening | Mechanical cutting, hydro-jetting, repair, or lining |
| Grease buildup | Opaque tan or gray coating | Reduced internal diameter | Cleaning, then repeat inspection |
| Displaced joint | Offset or open connection | Catch point for waste and soil movement | Locate, assess excavation or trenchless repair |
| Pipe belly | Camera dips into persistent water | Solids may settle repeatedly | Confirm grade and consider structural correction |
| Collapse | Camera cannot pass, crushed or irregular walls | Severe obstruction and potential soil loss | Locate and repair or replace |
| Heavy scale | Rough, flaking interior, common in cast iron | Reduced diameter, uncertain wall condition | Descale carefully and reassess remaining wall |
| Orangeburg deformation | Soft, oval, or flattened pipe profile | Structural deterioration risk | Obtain repair or replacement assessment |
A pipe belly is often misunderstood. A camera dipping briefly through water does not automatically prove a failed pipe grade; the operator should determine whether the water remains in the same location during a reverse pass and whether the section causes repeated sediment accumulation.
Pipe material changes deserve special attention. A transition from PVC to clay or Orangeburg can identify the section most vulnerable to root intrusion, joint movement, or deformation, even when the line is currently open.
Can a Camera See Through Standing Water?
A sewer camera can see through clear water, but it cannot reliably inspect a line filled with opaque sewage, grease, mud, or suspended solids. A fully blocked line usually requires drain cleaning or hydro-jetting before the camera can evaluate the pipe wall.
Water is not always a problem. A partially filled pipe can provide a useful image above the waterline, and a waterproof camera can travel through a submerged section when the lens remains clean. Murky water scatters the LED light and produces a gray or black image that can hide cracks and joints.
A careful operator may retract, clean the lens, flush the line, or reverse the flow before repeating the inspection. If the blockage cannot be cleared safely, the report should state that the inspection was incomplete rather than imply that an unseen section is sound.
How Much Does a Sewer Camera Inspection Cost?
A typical stand-alone residential sewer camera inspection costs $250-$600, while commercial inspections commonly cost $500-$1,500 or more. The final price depends on access, pipe length, cleaning requirements, locating, diameter, travel, reporting, and whether the inspection is bundled with another service.
| Service situation | Typical price range | Typical duration | Common price drivers |
|---|---|---|---|
| Residential inspection only | $250-$600 | 30-60 minutes | Cleanout access, line length, recording |
| Camera inspection after drain cleaning | $150-$250 add-on | 15-40 minutes | Existing crew, equipment already mobilized |
| Residential locating and depth marking | $350-$800 | 45-90 minutes | Multiple marks, difficult soil, route mapping |
| Commercial or multi-family survey | $500-$1,500+ | 1-4 hours | Diameter, branches, traffic control, report detail |
| Municipal crawler survey | $1,500+ | Several hours to multiple days | CCTV coding, cleaning, mobilization, footage volume |
These are typical practitioner ranges, not fixed national prices. A quote should specify whether the provider will clear a blockage, inspect both directions, locate defects, supply raw video, and return for a second pass after cleaning.
The repair itself is separate. A localized excavation, trenchless point repair, cured-in-place lining, pipe bursting, or full replacement can range from several thousand dollars to well above $10,000, depending on depth, access, surface restoration, permits, and the length of damaged pipe.
How Long Does the Process Take?
A standard residential sewer camera appointment usually takes 30-45 minutes when a cleanout is accessible and the pipe is open. The appointment can extend to 1-2 hours when the technician must remove a toilet, clear debris, locate multiple defects, inspect branches, or repeat the run after cleaning.
A verbal explanation normally happens on site. Digital video and a written report may arrive immediately or within 24-48 hours, depending on the company’s reporting system and the complexity of the inspection.
| Condition | Added time | Effect on result |
|---|---|---|
| Accessible exterior cleanout | 0-10 minutes | Fastest entry and cleanest documentation |
| Buried or seized cleanout | 15-60 minutes | May require uncovering or replacement |
| Active blockage | 20-90 minutes | Cleaning may be needed before inspection |
| Toilet removal for access | 30-75 minutes | Adds fixture removal and reset |
| Multiple laterals | 30-120 minutes | Requires several camera entries or a launch system |
What Should a Sewer Inspection Report Include?
A useful sewer inspection report names the access point, direction of travel, pipe material, approximate diameter, endpoint, visible defects, footage readings, surface references, and limitations. The report should include playable video with audio or written annotations that match the timestamps.
Look for these items:
- Access description: Exterior cleanout, basement cleanout, toilet, roof stack, or other entry.
- Route and endpoint: Direction toward the street, septic tank, or interior branch.
- Pipe details: Material, estimated diameter, and visible transitions.
- Defect map: Footage, surface location, approximate depth, and defect classification.
- Image limitations: Standing water, lens obstruction, incomplete travel, or inaccessible branches.
- Recommendation: Cleaning, monitoring, locating, repair, replacement, or additional testing.
A report that says “line looks fine” without footage, distances, or limitations has limited value for a home purchase or major repair decision.
When Should You Order a Sewer Camera Inspection?
Home buyers should order a sewer scope during due diligence, particularly for older properties, large trees, shared laterals, slab foundations, additions, or homes with unexplained drainage symptoms. A general home inspection usually cannot assess the buried sewer lateral because the pipe is underground and outside normal visual access.
Property owners should consider an inspection after repeated backups, roots, slow drains across multiple fixtures, sewage odors, unexplained gurgling, or a blockage that returns after cleaning. Investors and facility managers benefit from baseline mapping before renovations, tenant build-outs, paving, or landscape changes.
A sewer camera inspection is especially valuable in these situations:
- The home was built before 2000 and has original clay, cast-iron, or Orangeburg piping.
- A property has mature trees within approximately 10-20 feet of the lateral.
- A previous owner reports repeated snaking or hydro-jetting.
- The sewer line crosses a driveway, retaining wall, patio, or finished basement.
- A repair quote recommends excavation without showing the defect location.
- A septic system has unexplained backup symptoms between the building and tank.
For a buyer, request the raw video and a written report before the inspection contingency expires. A visible structural defect can support a seller credit, repair request, or purchase-price adjustment, subject to the contract and local real estate rules.
Professional Inspection Versus DIY
A homeowner can purchase or rent a small drain camera, but professional inspection is usually safer and more useful when the line is buried, blocked, contaminated, or relevant to a property transaction. Professional systems often include a sonde, distance counter, stronger push cable, recording, and experience distinguishing scale from structural damage.
DIY inspection can be reasonable for a clean, accessible indoor drain where the goal is to identify a nearby obstruction. It is less suitable for a long sewer lateral because consumer cameras may have weak cables, poor lighting, no locating transmitter, limited waterproofing, or insufficient recording quality.
Do not enter a sewer opening that is under pressure, contains deep wastewater, or may expose the operator to hazardous gases. Never enter a manhole. Confined-space sewer work requires specialized training, atmospheric monitoring, ventilation, retrieval systems, and regulatory controls.
Common Failure Modes and Safe Fixes
The Camera Stops at a Bend
A camera may stop at a sharp fitting, offset joint, or damaged section. Reduce force, rotate the push rod gently, and try a controlled reverse before attempting another angle.
If the cable will not move backward, stop pulling aggressively. A licensed technician may need a different camera head, a larger access point, or cleaning equipment.
The Lens Becomes Foggy or Muddy
A dirty lens creates false cracks and obscures the pipe crown. Retract the camera, clean the head with the manufacturer-approved method, and repeat the view from both directions.
A camera should not be rubbed against abrasive scale while the operator tries to clean it inside the pipe. That can scratch the lens and worsen every later image.
The Sonde Signal Disappears
Confirm that the receiver matches the transmitter frequency, inspect battery condition, and move away from vehicles, electrical equipment, reinforced concrete, and metal objects. The operator should verify the signal before marking a repair location.
A missing signal does not mean the camera has stopped transmitting permanently. Distance, depth, pipe material, interference, and low battery power can all reduce locating performance.
The Video Shows Only Black Water
Stop treating the recording as a complete inspection. Clear the obstruction, reduce the water level, flush the line, or return through a different access point before making structural conclusions.
The Camera Enters a Pipe Belly
Do not ram the camera forward or use sudden force. A gentle reverse, slight rod rotation, and controlled push may pass a shallow sag, but a camera trapped in a deep belly requires professional recovery.
What Is a Camera Inspection Not Good For?
A sewer camera is not a complete structural engineering test, leak test, flow test, or proof that every branch has been inspected. The camera sees the interior surface from the entry route, so hidden exterior voids, inaccessible branches, and defects beneath scale can remain undetected.
A clean video also does not guarantee that a line will remain open. Roots can regrow, settlement can continue, and a pipe with a marginal grade may function until additional sediment accumulates. Inspection findings must be combined with backup history, cleaning records, soil conditions, pipe age, and repair consequences.
Additional tests may be appropriate:
| Question that remains | Better complementary test | Reason |
|---|---|---|
| Is the line leaking into soil? | Smoke test or water test | Evaluates leakage or open connections |
| Is the pipe structurally sound outside? | Excavation or engineering review | Reveals bedding, voids, and exterior collapse |
| Is flow capacity adequate? | Cleaning and flow assessment | Separates surface defects from hydraulic restriction |
| Is a roof or branch drain connected? | Separate camera entry or dye test | Confirms connections not reached from the main access |
The Bottom Line
The sewer camera inspection process is a measured diagnostic procedure, not a quick visuality check. A technician enters through a suitable access point, records the pipe interior, measures distance, locates significant findings with a sonde when needed, and reports both visible defects and inspection limitations.
For a residential property, budget approximately $250-$600 and allow 30-60 minutes when the cleanout is accessible. The strongest inspection combines clear video, footage references, surface locating, pipe-material identification, and a written recommendation that separates cleaning needs from structural repair.
Frequently Asked Questions
Does a sewer camera inspection include cleaning?
Usually, no. Some companies discount the camera inspection when it follows drain snaking or hydro-jetting, but customers should confirm whether cleaning is included, required before filming, or billed separately. A clean line generally produces better evidence than a line filled with grease, roots, or sewage.
How far can a residential sewer camera travel?
A typical residential push camera carries approximately 100-300 feet of cable, although bends, pipe diameter, cable stiffness, and defects determine the practical distance. The camera may stop well before the cable limit if it encounters a collapsed section, offset joint, sharp fitting, or heavy debris.
Can a sewer camera find a broken pipe under a concrete slab?
A camera can identify a visible break and a sonde can usually mark its approximate position and depth above the slab. The inspection does not reveal the full exterior soil condition or guarantee that every defect is visible, so excavation or a trenchless contractor’s assessment may still be necessary.
Is a sewer scope required when buying a house?
A sewer scope is not universally required by law or by every lender, but it is a separate due-diligence service rather than a standard home inspection. Buyers of older homes, properties with mature trees, and homes with private or shared laterals have stronger reasons to order one before contingencies expire.
How often should a sewer line be inspected?
There is no universal inspection interval. A baseline inspection during purchase, after repeated backups, before major excavation, or before selling a property is more useful than an arbitrary annual schedule. Properties with documented root intrusion may need periodic cleaning and follow-up video based on recurrence.
What does a normal sewer camera inspection look like?
A normal recording shows a continuous pipe with visible joints, consistent diameter, flowing water or a mostly clear invert, and no persistent roots, open gaps, major scale, or deformation. The report should still identify inaccessible sections, camera limitations, and the endpoint rather than describing the line as perfect.