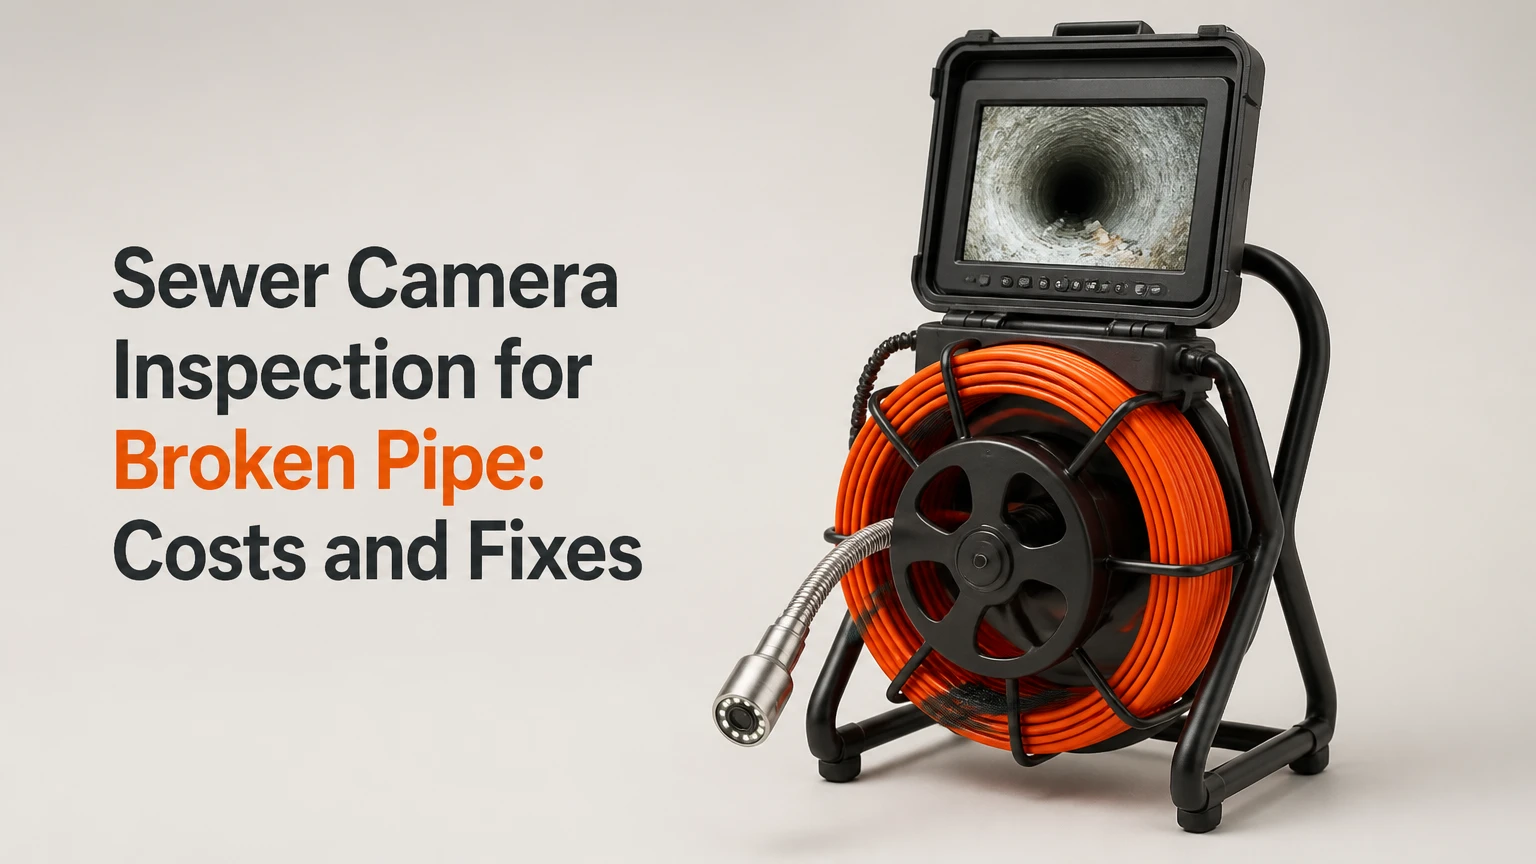
A sewer camera inspection for broken pipe diagnosis uses a waterproof camera to view the inside of a drain line, identify the failure, and locate its position from the surface. A qualified technician can usually document roots, cracks, separated joints, bellies, or collapse before excavation, although standing sewage, mud, and inaccessible sections can limit the result.
Key Facts at a Glance
- A residential sewer camera inspection typically costs $150-$400 and takes 30-90 minutes, depending on access and blockage.
- A push camera can show the pipe interior, but a sonde transmitter is needed to mark a buried defect above ground.
- A camera inspection identifies internal conditions; it does not by itself prove the pipe is watertight or measure exterior soil loss.
- The most useful report includes continuous video, distance readings, pipe material, defect descriptions, photographs, and marked location and depth.
- A camera that stops at one point may indicate collapse, roots, an offset joint, a tight bend, or a pipe-size transition.
- Repair selection depends on defect type, depth, pipe material, access, grade, and whether the line can accept a liner or replacement cable.
What Is a Sewer Camera Inspection for Broken Pipe?
A sewer camera inspection is a visual examination of a buried drainage pipe using a camera attached to a flexible push cable or motorized crawler. For a broken sewer pipe, the inspection determines whether the condition is a crack, open joint, displaced section, crushed pipe, root intrusion, or an apparent defect caused by debris rather than structural failure.
The camera normally enters through a sewer cleanout, although a technician may remove a toilet or use another approved access point. A video transmitter, called a sonde, can help locate the camera head laterally and estimate its depth beneath the ground.
The inspection concerns the private sewer lateral unless the camera travels farther into a shared or municipal main. That distinction affects responsibility. In many properties, the homeowner owns the line from the building to a connection near the public sewer, but local ordinances define the exact boundary.
Which symptoms justify an inspection?
Repeated backups, slow drainage across several fixtures, sewage odors, unexplained wet areas, sinkholes, and roots appearing during drain cleaning justify a camera inspection. One isolated sink clog usually points to a fixture trap or branch drain, while a toilet backup combined with a slow shower and floor drain suggests a mainline problem.
A sewer scope is also valuable during real-estate due diligence, especially for older homes, properties with mature trees, and houses with clay, cast-iron, Orangeburg, or poorly documented private sewer laterals. A single successful drain cleaning does not establish that the pipe is structurally sound.
How the Inspection Locates a Break
A sewer camera locates a broken pipe by recording the camera’s travel distance and using a sonde to trace the camera head from the surface. The technician stops at the defect, detects the sonde’s strongest signal with a locator wand, marks the ground, and records an estimated depth.
The process begins with access and a functional path through the pipe. If the line contains opaque sewage, grease, or sediment, the technician may need to remove the obstruction with a cable machine or hydro-jetter. Cleaning can improve visibility, but aggressive jetting can temporarily move debris or roots, so the post-cleaning video should be retained.
During the inspection, the operator watches the live image and footage counter. The counter is useful for distance from the entry point, but it is not a survey-grade measurement because cable flex, bends, and pushing technique affect the reading.
A sonde locator does not provide GPS coordinates. It detects a radio signal from the camera head, and accuracy can be affected by reinforced concrete, metallic utilities, electrical interference, pipe depth, and an operator’s locating technique. The mark is highly useful for repair planning, but a contractor should verify utilities before excavation.
What should happen during a professional scope?
- Confirm the access point. The technician identifies the cleanout or removes a fixture with permission and protects the interior from contamination.
- Assess water and blockage conditions. Standing water, active sewage, and debris are documented before cleaning or camera insertion.
- Inspect in both directions when possible. Viewing from the building toward the street and back toward the building can reveal a blockage that prevents a complete one-way scope.
- Record the entire accessible segment. The video should show the entry point, distance counter, pipe interior, defects, and endpoint.
- Stop at significant defects. The operator documents the first obstruction, then attempts a controlled advance without forcing the camera.
- Locate the defect above ground. The sonde is traced, and the location and estimated depth are marked.
- Explain the repair implication. The report connects the finding to cleaning, spot excavation, lining, replacement, or further testing.
What Can the Camera Identify?
A sewer camera can identify internal pipe conditions that have a visible opening, shape change, obstruction, or surface intrusion. A camera cannot see soil outside the pipe, confirm every invisible leak, or determine whether a hairline crack extends through the entire pipe wall.
| Finding | Typical visual appearance | Likely implication | Usual next action |
|---|---|---|---|
| Root intrusion | Fine roots or dense fibrous mass at a joint | Open joint or cracked pipe permits entry | Clean, locate, and assess structural repair |
| Offset joint | One pipe section visibly shifted | Joint displacement may catch waste or leak | Locate depth and evaluate spot repair |
| Collapse | Flattened, jagged, or impassable pipe | Passage and structural capacity are lost | Excavate, replace, or assess trenchless work |
| Crack or fracture | Linear split, open gap, or broken wall | Localized structural failure | Locate severity and compare repair methods |
| Belly or sag | Camera enters standing water in a low section | Poor grade retains solids and water | Measure extent and consider regrading or replacement |
| Scale | Flaky buildup inside cast iron | Reduced diameter, not automatically a break | Clean and reassess wall condition |
| Grease blockage | Opaque tan, gray, or black coating | Flow restriction without proven pipe failure | Clean, then inspect again |
| Missing section | Soil, void, or bright opening visible | Severe failure or disconnected joint | Stop use if necessary and plan urgent repair |
A dark image does not automatically mean a collapsed pipe. The lens may be submerged, coated with grease, or aimed into a water-filled belly. Conversely, a clear image does not prove that the pipe is watertight because small external leaks may not be visible from inside.
How do technicians distinguish a break from scale?
Technicians distinguish cast-iron scale from a broken pipe by examining continuity, shape, and flow path. Scale is usually a rough, flaky, circumferential or irregular deposit that leaves a continuous pipe opening, whereas a fracture creates a linear separation, missing wall, displaced section, or visible soil intrusion.
This distinction affects cost and urgency. Heavy scale may respond to descaling or jetting, while a structural crack may require a spot repair or replacement. A report that labels every rough surface as a “broken pipe” lacks sufficient diagnostic precision.
Which Inspection System Fits the Pipe?
A standard push camera is the right choice for most residential sewer laterals between 3 and 6 inches in diameter. Robotic crawlers suit larger commercial or municipal pipes, while micro-cameras serve small interior drains and should not be presented as a substitute for a mainline scope.
| System | Typical pipe diameter | Practical reach | Best application | Main limitation |
|---|---|---|---|---|
| Push camera | 3-6 inches | 100-200 feet | Residential sewer lateral | May stop at collapse or tight offset |
| Self-leveling push camera | 3-6 inches | 100-200 feet | Bends and long home laterals | Higher service price than basic push units |
| Robotic crawler | 6-96+ inches | 500-1,000+ feet | Commercial and municipal mains | Needs larger access and often a clean pipe |
| Micro-camera | 1-2 inches | 30-50 feet | Branch drains, traps, wall piping | Too small for many sewer laterals |
| Lateral-launch camera | 6-24 inches mainline | 100-300 feet into lateral | Large sites with multiple connections | Specialized equipment and operator |
Self-leveling keeps text and the pipe image upright as the camera rotates. It improves interpretation, but it does not make the camera more likely to pass a collapsed section.
How Much Does a Sewer Camera Inspection Cost?
A typical residential sewer camera inspection costs $150-$400, with many straightforward scopes falling near $250-$300. The final price increases when the technician must clear a blockage, expose a buried cleanout, remove a toilet, trace a defect, or inspect a commercial line.
| Service component | Typical price | Typical time | When it applies |
|---|---|---|---|
| Basic residential camera scope | $150-$400 | 30-90 minutes | Accessible cleanout and passable pipe |
| Snaking before inspection | $150-$500 | 30-120 minutes | Soft blockage or limited obstruction |
| Hydro-jetting before inspection | $300-$800 | 1-3 hours | Grease, heavy scale, or roots |
| Toilet removal for access | $150-$300 | 30-90 minutes | No usable cleanout |
| Sonde locating and marking | $75-$250 | 20-60 minutes | Defect must be found for excavation |
| Commercial crawler inspection | $500-$1,200+ | 2-6 hours | Large pipe or extended route |
| Written report and video | Included or $50-$200 | Same day to 24 hours | Depends on provider and documentation |
These are typical U.S. service ranges, not regulated prices. A low advertised fee may cover only a short camera insertion and exclude locating, cleaning, or a downloadable recording. Ask for an itemized estimate before authorizing additional work.
What determines the inspection price?
Access is often the largest variable. A cleanout at ground level reduces labor, while a buried cap under concrete, a seized fitting, or a toilet removal adds time and restoration risk.
Pipe condition also changes the scope. A camera cannot produce a meaningful view through thick sewage or compacted debris, so cleaning may be necessary before diagnosis. In a rental, commercial kitchen, or multifamily building, grease and multiple laterals increase both preparation and reporting requirements.
What Should the Inspection Report Include?
A defensible sewer inspection report should include continuous video, the inspection direction, camera entry point, distance to every finding, pipe material, approximate diameter, defect description, and marked surface location where the sonde was used. A verbal statement that the line is “bad” is not enough to plan excavation or compare repair bids.
Look for these deliverables:
- Downloadable video with an identifiable property address or inspection date.
- A written defect log using terms such as crack, offset, root intrusion, belly, or collapse.
- Distance readings from the access point, with the limitations of cable measurement explained.
- Surface markings or a sketch showing the defect’s horizontal location.
- Estimated depth at the defect, preferably measured with the locator rather than guessed.
- Photographs of the cleanout, access condition, and marked area.
- A statement identifying the portion inspected and any inaccessible section.
- Recommendations that distinguish immediate repair from monitoring or cleaning.
The report should not claim that a camera inspected the municipal sewer unless the equipment actually reached that section. It should also identify whether the video began at the house, street cleanout, property line, or another location.
Choosing the Repair Method
The repair for a broken sewer pipe depends on the defect’s location, length, depth, pipe material, grade, access, and whether the surrounding soil has destabilized. A camera finding establishes the condition, but a qualified contractor must confirm suitability for lining, bursting, excavation, or a localized repair.
| Finding and site condition | Common repair path | Typical project range | Important qualification |
|---|---|---|---|
| Single shallow crack | Spot excavation and replacement | $1,500-$5,000 | Cost rises under concrete or landscaping |
| Short offset joint | Localized replacement or joint repair | $2,000-$6,000 | Root damage may extend beyond visible joint |
| Long cracked clay lateral | Pipe lining or open replacement | $4,000-$15,000 | Liner needs a clean, continuous host pipe |
| Fully collapsed section | Excavation, replacement, or pipe bursting | $4,000-$20,000+ | A camera cannot pass the collapse to inspect beyond it |
| Belly caused by poor grade | Regrading and replacement | $3,000-$15,000 | Lining does not correct a permanent sag |
| Root intrusion with sound pipe | Root removal and periodic treatment | $300-$1,500 initially | Recurrence is likely if the joint remains open |
| Severe cast-iron deterioration | Replacement or approved lining system | $5,000-$25,000+ | Wall condition may require additional assessment |
Trenchless lining is not a universal fix. A liner generally requires a pipe that retains enough shape for cleaning and installation, and it cannot correct a collapsed, severely offset, or chronically sagging host pipe.
Open excavation remains the most direct solution when a section is crushed, too shallow for a trenchless method, contaminated by unstable soil, or inaccessible to lining equipment. Pipe bursting can replace some laterals with less surface disruption, but it requires suitable alignment, access pits, and clearance from nearby utilities.
Why should pressure testing sometimes follow the camera?
A camera shows visible geometry, while a pressure or water-retention test evaluates whether the system holds water. A follow-up test can be useful when the video shows a suspected crack, when a buyer needs stronger evidence, or when a leak is suspected but the interior looks normal.
Pressure testing is not a replacement for visual inspection. Testing may confirm leakage without identifying the defect’s shape or exact location, and improper testing can send water into a damaged building or overwhelm a marginal line. The method should follow local plumbing practice and be performed by a qualified professional.
Camera Inspection Compared With Other Tests
Camera inspection is usually the best first diagnostic step for a suspected buried pipe break when an access point exists. Excavation supplies physical confirmation but destroys surfaces, while pressure testing confirms leakage without showing the internal defect.
| Diagnostic method | Shows defect shape | Locates defect | Surface disruption | Typical use |
|---|---|---|---|---|
| Sewer camera | Yes, internal view | Yes, with sonde | None | Roots, cracks, collapse, offsets |
| Hydrostatic test | No | Usually no | None | Water-tightness confirmation |
| Dye test | No | Broad flow path | None | Cross-connections and drainage tracing |
| Acoustic leak detection | No | Approximate, condition-dependent | None | Pressurized water or leak investigations |
| Exploratory excavation | Yes, direct exterior view | Yes | High | Repair confirmation and replacement |
| Smoke testing | Reveals openings to occupied spaces | General area | None | Odor paths and illicit connections |
A camera inspection cannot see behind a pipe, quantify soil erosion, or assess every exterior corrosion mechanism. If the property has a sinkhole, foundation movement, persistent wet soil, or a suspected leak beneath a slab, a camera may need to be paired with pressure testing, locating, plumbing design, or geotechnical evaluation.
When Visibility Fails
A sewer camera cannot reliably inspect a line filled with opaque sewage, thick mud, grease, or standing water that coats the lens. The correct response is to document the limitation, restore reasonable visibility where safe, and repeat the inspection rather than treating a black screen as proof of collapse.
| Visible problem | Probable cause | Appropriate response | Do not do |
|---|---|---|---|
| Black or muddy screen | Submerged or dirty lens | Pull back, flush, clean, or jet | Approve excavation from darkness alone |
| Camera stops abruptly | Collapse, roots, offset, bend | Mark the stop point and assess access from the opposite end | Force the cable through resistance |
| Camera floats or loses view | Excess water or large pipe | Control flow or use suitable equipment | Assume the pipe is empty |
| Camera repeatedly gets stuck | Rough scale, joint, or deformation | Use a smaller head or controlled cleaning | Twist aggressively and damage equipment |
| No cleanout found | Buried, capped, or concealed access | Use plans, locating, or alternate access | Break concrete without utility checks |
| Video ends early | Reach limit or blocked route | State inspected distance and scope limitation | Call the line fully inspected |
One of the most useful practitioner rules is simple: a camera that cannot pass a defect has located a problem, not necessarily the entire problem. A second access point can reveal whether the obstruction is isolated or whether the downstream line has additional failures.
Common Mistakes During Broken-Pipe Diagnosis
- Accepting a distance without a surface mark. “Forty feet out” is not an excavation location unless the technician traces and marks the route, confirms the direction, and estimates depth.
- Treating repeated snaking as repair. A cable may restore flow while roots continue entering through a broken joint. Recurring backups require structural evidence.
- Confusing scale with collapse. Cast-iron buildup can look severe on video while leaving an open flow channel. Ask whether the pipe wall is fractured or merely coated.
- Forcing the camera beyond resistance. Pushing hard can damage the camera, enlarge a fragile opening, or move a blockage into another section.
- Inspecting only from the street. The direction of travel matters. A camera may pass a defect one way but fail to show its upstream edge from the other.
- Ordering trenchless repair before checking suitability. A liner cannot restore missing pipe, correct a belly, or reliably bridge every offset joint.
A second expert rule concerns repair bids: require every contractor to price the same defined segment, access point, defect length, and restoration scope. Otherwise, a $5,000 quote and a $15,000 quote may describe different projects rather than different prices for the same work.
Guidance for Buyers, Homeowners, and Managers
Home buyers should request a sewer scope before the inspection contingency expires, especially when the property is older, has mature trees, or has a private lateral longer than approximately 50 feet. The buyer should receive the video and a location-specific report, not only a general statement that the line drains.
Homeowners with one minor clog may begin with conventional drain service. Homeowners with repeated mainline backups, sewage in a basement, yard settlement, or roots after recent cleaning should obtain a camera inspection and ask whether the finding is structural, hydraulic, or merely obstructive.
Property managers should retain baseline videos for commercial and multifamily laterals. Annual or biennial review may be reasonable for grease-exposed lines, but frequency should follow blockage history, tenant load, pipe age, and local maintenance requirements rather than an arbitrary schedule.
If raw sewage is present, stop unnecessary water use, keep people and pets away from contaminated areas, and contact an emergency plumbing or cleanup provider. Camera diagnosis can wait until the immediate overflow and electrical hazards are controlled.
Frequently Asked Questions
Can a sewer camera inspection find a leak under a concrete slab?
A sewer camera can find an internal crack, open joint, or separated connection beneath a slab, and a sonde can help locate it from above. The camera cannot prove every slab leak because small leaks may not be visible. Pressure testing, moisture evaluation, or dye testing may be needed when the video is inconclusive.
How deep can a sewer camera inspection locate a broken pipe?
Many residential locator systems can trace a sewer camera several feet below grade, but practical accuracy decreases with depth, reinforced concrete, metallic interference, and difficult terrain. The technician should record an estimated depth at the marked defect and explain that the measurement is for repair planning, not a legal survey.
Can roots break a sewer pipe?
Roots usually enter through an existing crack, open joint, or failed connection rather than penetrating an intact modern pipe wall. Root growth can enlarge that opening, restrict flow, and displace joints. Removing roots restores passage temporarily unless the underlying structural opening is repaired or rehabilitated.
Is a sewer scope required when buying a house?
A sewer scope is not universally required, but many home inspectors and plumbing professionals recommend it as a separate service because standard home inspections generally do not visualize buried private sewer laterals. Local contracts, lenders, insurers, and municipalities may impose additional requirements.
How often should a sewer line be inspected?
There is no universal interval for every property. A baseline inspection is sensible before buying a home, while repeat inspections are more defensible after recurring backups, major landscaping changes, or repair work. Commercial properties with grease exposure may need annual or biennial review based on documented operating conditions.
What should I do if the plumber says the pipe is broken but provides no video?
Request the original video, the inspected distance, the access point, the defect location, the estimated depth, and the written findings before approving excavation. If those records are unavailable, obtain an independent inspection, provided another safe access point exists and the line can be viewed.
The Bottom Line
A sewer camera inspection for broken pipe diagnosis is the most practical non-destructive way to see an underground drain defect before choosing a repair. The strongest inspection combines a complete video, sonde-marked location and depth, precise defect terminology, and an honest statement of inaccessible or poorly visible sections. Use those records to compare spot repair, lining, pipe bursting, and excavation based on the actual failure, not on a generic plumbing estimate.