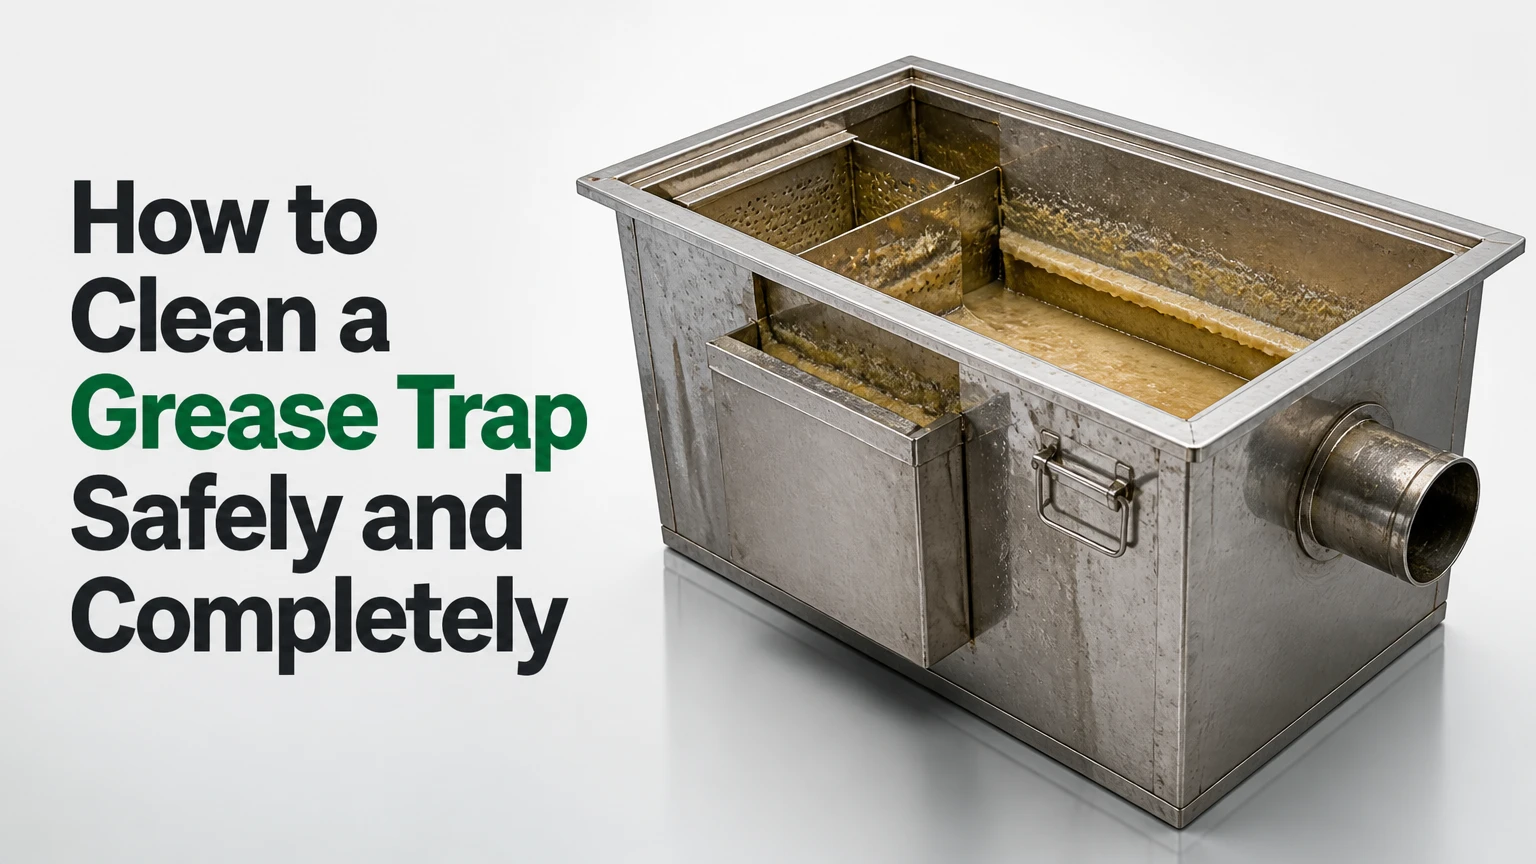
To clean a grease trap, isolate incoming wastewater, remove the lid safely, measure and extract floating grease and settled solids, scrape the baffles and tank, inspect the gasket, then reassemble and refill the unit with clean water. A small indoor trap usually takes 30-45 minutes; outdoor interceptors generally require a licensed pumper.
Key facts
A grease trap separates fats, oils, grease, and food solids from wastewater by slowing flow and using density differences.
Clean a hydromechanical trap when grease and settled solids approach 25% of the liquid depth, or sooner if local rules require.
Never flush grease, sludge, absorbent material, boiling water, or emulsifying chemicals into a drain.
An outdoor gravity interceptor is normally pumped rather than hand-cleaned.
The inlet and outlet baffles must return to their original positions for the trap to work.
Record the date, waste volume, condition of the unit, and disposal destination after every service.
Before You Start
A small under-sink grease trap can usually be cleaned by trained staff with basic tools, but an outdoor interceptor, severe blockage, or strong gas odor requires professional service. Confirm the unit type, local wastewater ordinance, manufacturer instructions, and waste-disposal requirements before opening the lid.
Time, difficulty, and cost
| Task | Typical duration | Typical direct cost | Appropriate operator |
|---|---|---|---|
| Small indoor trap, routine service | 30-45 minutes | $10-$40 in supplies | Trained kitchen staff |
| Indoor trap with hardened sludge | 45-90 minutes | $25-$75 in supplies | Maintenance worker or pumper |
| Outdoor interceptor pumping | 30-90 minutes on site | $200-$600 per visit | Licensed grease hauler |
| Overflow or downstream blockage | 1-4 hours | $300-$1,500 or more | Plumber and pumper |
Costs vary by region, access, waste volume, emergency timing, and whether transport documentation is included. A low-cost DIY cleanup is not a substitute for a legally required pumping certificate.
Tools and materials
Prepare the following before shutting down the sink:
- Chemical-resistant gloves, eye protection, waterproof apron, and slip-resistant footwear
- A plastic scraper, small scoop, disposable measuring stick, and stiff nylon brush
- Heavy-duty leak-resistant containers or lined pails with secure lids
- Absorbent pads, cardboard, floor protection, and a dedicated waste funnel
- Mild dish detergent and warm water for exterior cleaning
- A flashlight, camera, maintenance log, replacement gasket, and manufacturer-approved lubricant
- A wet vacuum only when the equipment is rated for the material and the operator understands electrical safety
A disposable dust mask does not protect against hydrogen sulfide. Strong rotten-egg odor, dizziness, headache, nausea, breathing difficulty, or an enclosed below-grade location means stop, leave the area, ventilate from a safe position, and call a qualified professional.
Which Type of Unit Are You Cleaning?
The cleaning method depends on whether the equipment is a small hydromechanical trap, a large gravity interceptor, or an automatic grease removal unit. The names are often used interchangeably, but their capacities, access points, and service requirements differ.
| Unit type | Typical capacity | Usual location | Correct maintenance method |
|---|---|---|---|
| Hydromechanical trap | 10-200 gallons | Under a sink or indoors | Hand removal or wet vacuum by trained staff |
| Gravity interceptor | 500-2,500+ gallons | Underground outdoors | Vacuum pumping and inspection |
| Automatic grease removal unit | 10-100+ gallons | Indoor dishwashing area | Empty collection vessel and follow service manual |
| Passive floor interceptor | 20-100 gallons | Below or beside floor drains | Hand cleaning or scheduled pumping |
A hydromechanical trap usually has a removable lid and internal baffles. A gravity interceptor may have two or more manholes and can contain hazardous gases, unstable covers, contaminated water, and deep sludge. Never enter an interceptor or lower a person into one.
Automatic units may heat grease and skim it into a separate container. Do not scrape their heating elements, bypass sensors, or add biological products unless the manufacturer specifically permits them.
How Does a Grease Trap Work?
A grease trap separates wastewater because FOGS generally has a lower density than water, while food particles and grit settle downward. Baffles reduce turbulence, allowing floating material to remain at the top, solids to collect at the bottom, and partially clarified water to pass through the outlet.
The inlet must connect to the marked inlet side. Wastewater enters the first chamber, slows, and changes direction around the baffle. Grease rises into the top layer, while heavier solids settle beneath the water. The outlet is positioned to draw from the middle zone rather than the surface or floor.
The trap does not make grease disappear. It stores the material until someone removes it. When the grease cap and bottom solids become too deep, the effective liquid volume falls, retention time shortens, and grease can leave through the outlet.
A practical inspection uses a measuring stick or “sludge judge” to compare the combined grease and solids depth with the liquid depth. The frequently cited 25% rule is a useful operating threshold, but the controlling requirement may be stricter under a city sewer ordinance, health permit, plumbing code, or manufacturer schedule.
How to Clean a Grease Trap
The following procedure applies to an accessible indoor hydromechanical trap. Do not use it for an underground interceptor unless a licensed service provider confirms the method and disposal process.
Step 1: Shut down every connected fixture
Stop all sinks, dishwashers, floor drains, and automatic dosing equipment that discharge into the trap. Tell kitchen staff not to use connected fixtures until the lid is secured.
Wait until the last wastewater has drained. Do not run cold water for ten minutes as a universal rule, because that can add volume without reliably hardening the entire grease layer; allow the trap to cool naturally and follow the equipment manual.
You will know it worked when: no water enters while the lid is open.
Common mistake: Cleaning during food preparation, which causes a sudden discharge into an open trap.
Step 2: Protect the work area and yourself
Place absorbent pads and a rigid floor covering beneath the unit. Put on gloves, goggles, an apron, and footwear with traction. Open doors or use safe ventilation where possible, but do not place a fan so it blows contaminated gas toward another worker.
Do not use an open flame, smoke, weld, or operate unprotected electrical equipment near an open trap. Hydrogen sulfide can accumulate in poorly ventilated spaces, and odor is not a reliable safety test because the sense of smell can become fatigued.
You will know it worked when: the work zone is isolated, dry, illuminated, and free of ignition sources.
Common mistake: Treating a paper dust mask as gas protection.
Step 3: Photograph and mark the assembly
Photograph the lid, inlet baffle, outlet baffle, screens, flow-control device, and gasket before removal. Mark orientation with a removable grease pencil if the manufacturer allows it.
Many cleaning failures begin when a baffle is installed backward or a flow-control insert is omitted. The photo provides a reference when the trap is dirty and component labels are unreadable.
You will know it worked when: every removable component has a documented position.
Common mistake: Assuming both baffles are identical or interchangeable.
Step 4: Open the lid carefully
Loosen fasteners evenly with the correct socket or wrench. Lift the lid slowly from a standing position beside the opening, not with your face directly above it. A stuck cover may require a service technician, especially if corrosion or vacuum pressure has bonded the gasket.
Do not use a crowbar against a plastic tank or force a cover that could crack. Keep bolts and washers in a clean container.
You will know it worked when: the lid is stable, the gasket seat is visible, and no liquid is splashing from internal pressure.
Common mistake: Tearing the gasket and reinstalling it anyway. A damaged seal allows odors and leakage.
Step 5: Measure the grease and solids layers
Insert a clean measuring stick vertically without stirring the contents. Record the total liquid depth, floating grease depth, and settled-solids depth. Measuring before removal shows whether the service interval is adequate.
| Inspection result | Meaning | Action |
|---|---|---|
| Grease plus solids below 15% of liquid depth | Low accumulation | Continue routine inspection |
| Combined layers at 20-25% | Approaching common threshold | Schedule cleaning or pumping |
| Combined layers above 25% | Reduced working capacity | Clean promptly and review frequency |
| Water level above normal or no separation | Blockage or installation fault | Stop and call a professional |
The 25% threshold is not a worldwide legal limit. Washington, DC Water and many municipal FOG programs use a similar maintenance concept, while other authorities specify a fixed calendar, a different percentage, or both.
You will know it worked when: the measurements are written down before the material is disturbed.
Common mistake: Measuring after stirring, which mixes grease and solids and produces an unreliable reading.
Step 6: Remove the floating grease
Skim the top layer with a dedicated scoop and place it directly into a sealed, leak-resistant container. Use absorbent pads to collect thin surface films. Do not send the grease into a sink, toilet, floor drain, trash compactor, or storm drain.
If the grease is liquid, absorbent material can reduce leakage, but the contaminated pads remain grease waste. Do not add kitty litter unless the receiving hauler accepts it and local rules permit that waste classification.
You will know it worked when: the visible surface cap is removed without pushing it through the outlet baffle.
Common mistake: Adding hot water to liquefy the cap. Heat can transport FOGS into downstream sewer piping, where the material may cool and adhere.
Step 7: Remove settled solids and wastewater
Scoop or vacuum the bottom sludge into a separate sealed container. Remove enough liquid to expose the bottom, but do not agitate the trap unnecessarily. A wet vacuum can simplify small indoor units, although the vacuum contents must be disposed of as collected grease wastewater.
Do not save the dirty middle layer for later refilling. Reusing contaminated wastewater returns dissolved grease and bacteria to the cleaned tank and may violate disposal or sanitation procedures. After cleaning, refill with fresh clean water.
You will know it worked when: the bottom, inlet opening, and outlet opening are visible and free of food debris.
Common mistake: Removing only the floating cap. Bottom solids reduce capacity just as seriously.
Step 8: Scrape and wash the internal parts
Remove screens and baffles according to the photographs. Scrape caked grease into the waste container with a plastic tool, then wash parts with warm water and a small amount of mild detergent in a controlled wash area.
Do not use caustic soda, acid drain opener, solvent, bleach mixtures, or unapproved biological additives. Cleaning the tank is different from chemically emulsifying grease. Emulsified grease can pass through the trap and accumulate in the public sewer.
You will know it worked when: the baffles, screens, and tank walls have no thick deposits that can break loose during operation.
Common mistake: Using a metal chisel on a plastic trap, which can create a crack that leaks under the floor.
Step 9: Inspect the trap and reinstall every component
Check the tank for cracks, warped surfaces, corrosion, loose fittings, blocked ports, and a damaged gasket. Inspect the inlet and outlet pipes for signs of bypassing, and confirm the arrows or labels point in the correct flow direction.
Replace a gasket that is brittle, split, flattened, or permanently deformed. Apply lubricant only if the manufacturer specifies the product; silicone grease on a compatible rubber seal can ease installation, but it will not repair a failed gasket.
Reinstall the baffles, screens, flow-control device, and lid in their original positions. Tighten fasteners evenly without crushing a plastic cover.
You will know it worked when: every part matches the pre-cleaning photograph and the lid sits evenly on its seal.
Common mistake: Leaving out the outlet baffle, which allows floating grease to escape directly into the sewer.
Step 10: Refill, test, dispose, and document
Fill the trap with clean water before returning the connected fixtures to service. Water provides the operating liquid volume and helps prevent sewer gases from passing through the drain system. Open the upstream faucet slowly and inspect the lid, fittings, inlet, and outlet for leaks.
Seal waste containers immediately. Use an approved grease recycler, rendering service, licensed pumper, or local disposal route. The US Environmental Protection Agency advises preventing FOG from entering drains because it can cause blockages in building and public sewer systems.
Record the service date, layer measurements, approximate waste volume, defects, gasket condition, cleaning staff, and disposal destination. Keep receipts and pumping manifests when required by the local authority.
You will know it worked when: water flows normally, no joint leaks, the lid seals, and the maintenance record is complete.
Common mistake: Leaving the trap empty after cleaning, which removes the liquid barrier and permits odors to enter the kitchen.
How Often Should It Be Cleaned?
A grease trap should be inspected weekly and cleaned whenever grease and settled solids approach the applicable capacity threshold. Small restaurant traps commonly require service every 1-4 weeks, while outdoor interceptors often require pumping every 1-3 months, but fryer volume, menu, water temperature, and local rules can change the schedule.
| Kitchen profile | Typical trap | Typical service interval | Scheduling trigger |
|---|---|---|---|
| Coffee shop with light food preparation | 20-50 gallon indoor trap | Every 2-6 weeks | 20-25% combined layers |
| Bakery with butter and shortening | 20-100 gallon indoor trap | Weekly to monthly | Rapid surface-cap growth |
| Full-service restaurant | 50-200 gallon trap or interceptor | Every 1-8 weeks | Menu and meal volume |
| High-volume fryer operation | 1,000-2,500 gallon interceptor | Every 4-8 weeks | Pumping record and inspection |
| School or institutional kitchen | Outdoor interceptor | Monthly to quarterly | Local permit schedule |
The best interval is the shortest interval that prevents the combined grease and solids layer from reaching the governing limit. After three documented services, compare accumulation rates and adjust the calendar from measured evidence rather than guessing.
Which Cleaners Are Safe?
Mild detergent and warm water are appropriate for washing removed components and the emptied tank, while boiling water, drain opener, caustic degreaser, acids, and unapproved emulsifiers are inappropriate for routine grease-trap maintenance. Enzyme or bacterial products may be allowed in some programs, but they do not replace physical removal.
Chemical additives can make a trap appear clean while transferring FOGS downstream. That creates a hidden failure: the trap loses visible grease, but the sewer line receives more emulsified material.
Detergent use also matters during normal operations. Use the amount required for cleaning dishes, scrape plates first, and avoid directing concentrated degreaser into the trap. A biological product should be considered only after checking the municipality, permit, and manufacturer instructions.
How Much Grease Is Too Much?
The common operational limit is 25% of the trap’s effective liquid depth for the combined floating grease and settled solids layers, not 25% of the empty tank’s outside height. Local regulators may require earlier service, and a trap with slow drainage or an outlet blockage needs attention regardless of measured percentage.
For example, if the liquid depth is 16 inches and the grease layer is 2 inches while bottom solids measure 2 inches, the combined 4-inch accumulation equals 25% of the liquid depth. That unit is ready for service.
A measurement stick is more reliable than visual judgment because grease can cling to the lid, baffles, and outlet. Record the method used so different staff members can compare measurements consistently.
Why Does a Clean Trap Still Smell?
A clean grease trap can still smell when the gasket leaks, the lid is loose, the trap is not filled with clean water, organic residue remains in the inlet pipe, or the downstream plumbing has a venting problem. Odor alone does not prove that the trap needs another chemical treatment.
Inspect the gasket seat, lid fasteners, water level, inlet screen, and nearby floor drain. Clean the lid underside and external surfaces, but do not seal a vent or permanently caulk a removable service cover unless the equipment design requires it.
Persistent rotten-egg odor, especially with headache or dizziness, warrants immediate evacuation and professional testing. Hydrogen sulfide concentration cannot be judged safely by smell.
What If the Trap Is Blocked or Overflowing?
Stop using connected fixtures, contain the spill, and call a pumper or plumber when wastewater backs up, the trap overflows, or the outlet remains blocked after visible debris removal. Do not repeatedly run water to test a suspected downstream blockage.
| Symptom | Likely location | First response |
|---|---|---|
| Water rises immediately at inlet | Inlet screen or first baffle | Stop flow and remove accessible debris |
| Trap is full but outlet level stays high | Outlet pipe or sewer lateral | Call plumber or pumper |
| Clean trap, slow sink | Building drain downstream | Mechanical inspection or drain cleaning |
| Grease absent, solids present | Bypass or excessive emulsifier | Verify flow direction and chemical use |
| Overflow after rain | Outdoor interceptor or surface intrusion | Inspect cover, tank, and drainage |
Hydro-jetting may be appropriate for a blocked downstream line, but it should follow grease removal and should not be used to hide an overdue pumping schedule. A technician should identify where displaced grease will go before jetting.
Indoor Trap, Outdoor Interceptor, or Automatic Unit?
Indoor hydromechanical traps suit small kitchens with accessible equipment and frequent staff attention. Outdoor gravity interceptors suit higher flows because their larger volume provides longer retention, while automatic grease removal units reduce manual skimming but introduce electrical, heating, and mechanical components.
| Decision factor | Indoor hydromechanical | Outdoor gravity interceptor | Automatic removal unit |
|---|---|---|---|
| Typical capacity | 10-200 gallons | 500-2,500+ gallons | 10-100+ gallons |
| Main labor | Frequent hand cleaning | Scheduled vacuum pumping | Empty external grease vessel |
| Installation | Under sink or indoors | Excavation and access covers | Indoor power connection |
| Main failure risk | Odor, missed cleaning | Blocked outlet, inaccessible lid | Motor, heater, or sensor failure |
| Best fit | Small café or bakery | High-volume restaurant | Limited-space commercial kitchen |
An automatic unit is not “maintenance free.” Collection containers still require emptying, and its moving parts need inspection. An outdoor interceptor is not suitable for hand scooping by untrained staff because the access opening may expose workers to toxic gases and fall hazards.
Disposal and Compliance
Grease-trap waste must remain contained until an authorized disposal or recycling provider accepts it. Requirements differ by city, state, country, sewer district, and waste classification, so a business should verify the local FOG program rather than rely on a generic internet schedule.
Never pour removed grease into a storm drain, sanitary drain, soil, compost system, or ordinary dumpster unless the receiving authority specifically permits the method. Some jurisdictions require licensed transport, manifests, service tags, pump-out reports, or records retained for a defined period.
The US EPA identifies FOG as a cause of sewer blockages, while municipal programs such as New York City Department of Environmental Protection and Washington, DC Water publish local FOG control requirements. Those rules can govern equipment sizing, inspection access, pumping frequency, and documentation.
Common Mistakes and How to Fix Them
- Cleaning only the surface cap: Remove bottom solids too, because settled food waste reduces effective capacity and can block the outlet.
- Using boiling water: Stop adding heat and inspect the downstream line if drainage worsens; transported grease may already have adhered to cold pipe walls.
- Reinstalling baffles incorrectly: Compare the assembly with the photograph and the manufacturer diagram before restoring flow.
- Leaving the unit empty: Refill with clean water after assembly to restore the operating liquid barrier.
- Using a chemical drain opener: Stop chemical dosing, notify the service provider, and disclose the product because it may create a corrosive or hazardous mixture.
- Ignoring an overflow: Contain the spill, protect workers from contact, disinfect according to the applicable food-safety procedure, and arrange professional inspection.
Variations for Difficult Situations
Cleaning after a sewer backup
Treat a backup as contaminated wastewater, not ordinary grease. Keep food, utensils, and staff away from the area, photograph the condition, remove standing water through an approved process, and have the trap and downstream line inspected before reopening the fixture.
Servicing a food truck
Food trucks often use compact traps with limited access and mobile waste constraints. Shut down the water system, prevent waste from entering the roadway, carry sealed containers only as permitted by the vehicle’s waste plan, and use the commissary’s approved disposal route.
Operating in freezing weather
An outdoor interceptor can freeze at the inlet, outlet, lid, or vent when water flow is intermittent. Do not thaw it with an open flame; have a qualified service provider inspect the tank, insulation, pipe slope, and possible structural damage.
Expert Rules That Prevent Repeat Failures
First, measure accumulation rate rather than copying another restaurant’s schedule. Two kitchens with identical 50-gallon traps can require different service intervals because fryer oil, dishwashing volume, menu composition, and plate-scraping practices differ.
Second, dry cleanup protects the trap more effectively than chemical treatment. Scraping pans, wiping plates, and collecting fryer oil before washing reduce the FOGS load at the source, whereas emulsifiers merely improve short-term drain flow.
Third, the outlet is the most informative inspection point. A trap can look relatively clean at the surface while a blocked outlet, displaced baffle, or layer of hardened solids causes slow drainage and sewer discharge.
Fourth, water temperature changes behavior, not storage capacity. Cooler discharge can promote separation inside the trap, but no temperature setting replaces removal of accumulated grease and solids.
Frequently Asked Questions
Can I clean a grease trap without removing the water?
You can skim floating grease without draining all the liquid, but a complete service must remove settled solids and inspect the tank floor, baffles, and outlet. Do not save and reuse dirty wastewater. Remove it into an approved container, then refill the reassembled grease trap with clean water.
Should a grease trap be full of water?
Yes. A grease trap normally operates full to its designed liquid level because the water provides the separation volume and helps block sewer gases. After cleaning, fill it with clean water before using connected sinks. An empty trap can produce odors and may not separate incoming FOGS correctly.
Can I use a wet vacuum on grease-trap waste?
A wet vacuum can remove liquid and soft sludge from a small indoor trap when the vacuum is suitable, electrically safe, and approved for the task. Vacuum contents remain regulated grease waste. Do not discharge them to a drain, and do not use a household vacuum for contaminated wastewater.
How do I know whether the inlet and outlet are reversed?
The tank body, cover, arrows, pipe elevations, or installation diagram usually identify the inlet and outlet. The inlet commonly enters the first baffled chamber, while the outlet draws from the clarified middle layer. If the trap contains water but almost no floating grease, have a plumber verify the flow path.
How long can a restaurant operate after a grease-trap overflow?
A restaurant should stop using connected fixtures immediately after an overflow until the source is contained and the trap and downstream piping are inspected. Reopening depends on cleanup, food-safety requirements, local notification rules, and confirmation that wastewater can flow without another release.
Is professional pumping required for every grease trap?
Professional pumping is not required for every small indoor unit in every jurisdiction, but outdoor gravity interceptors generally require vacuum service, and local rules may mandate licensed hauling for all commercial grease waste. Check the sewer authority, health department, permit, and equipment manual before assigning DIY work.
Conclusion
The safest way to clean a grease trap is to isolate the plumbing, measure the grease and solids, remove both layers into sealed containers, wash the emptied components, restore the baffles and gasket, refill with clean water, and document disposal. For an outdoor interceptor, severe odor, an overflow, or a downstream blockage, use a licensed pumper or plumber instead of attempting DIY work. Follow the same measured schedule every time you clean a grease trap, and adjust it before accumulation reaches the applicable 25% threshold.