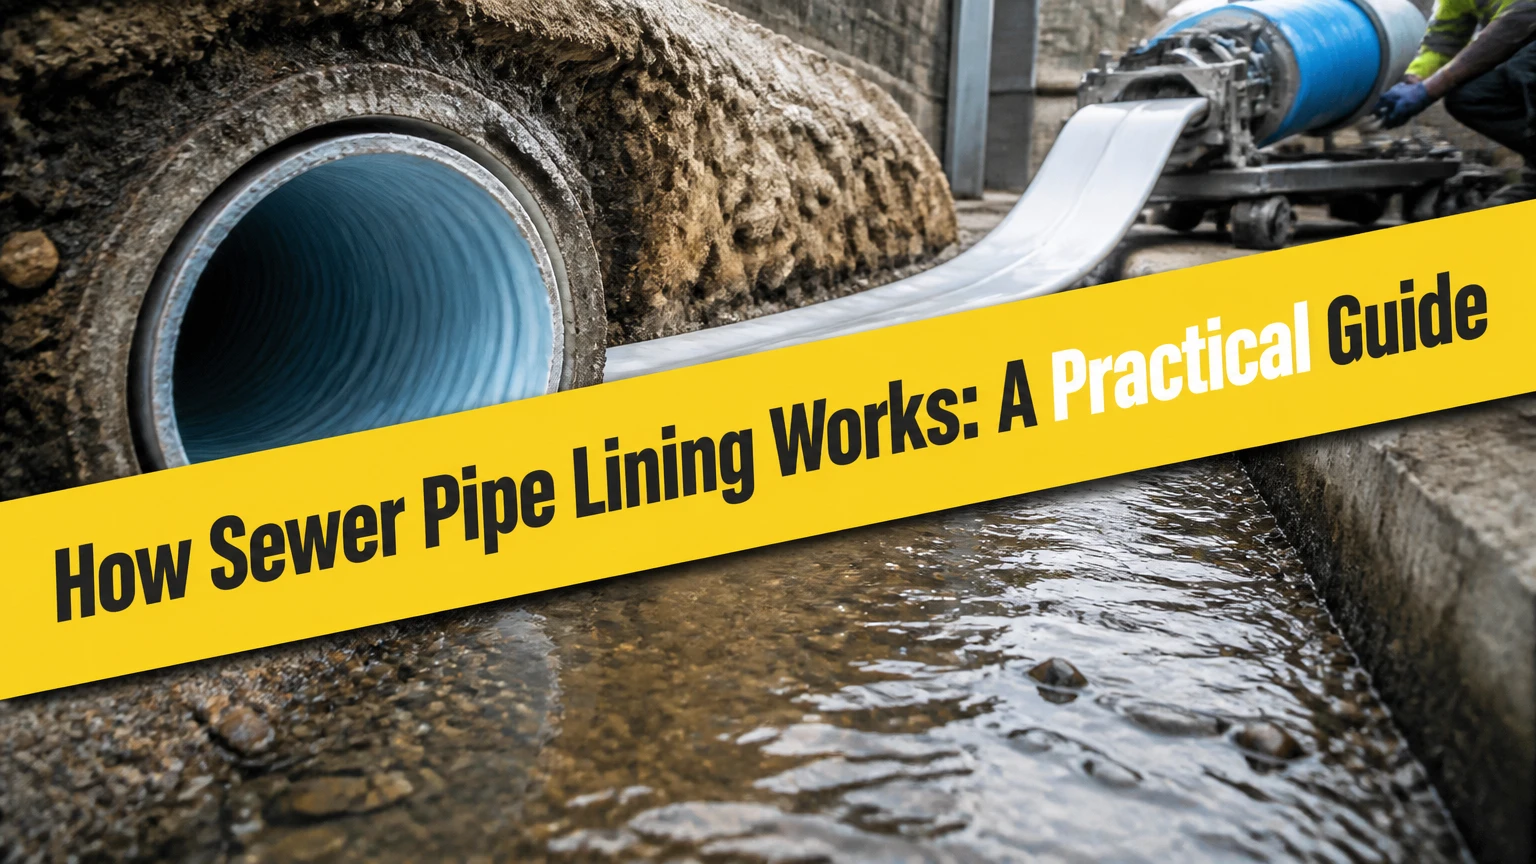
Sewer pipe lining repairs a damaged underground sewer by installing a resin-saturated tube inside the existing host pipe and curing it into a continuous structural pipe. Contractors inspect and clean the line, insert or invert the liner, hold it against the host pipe while the resin cures, reopen branch connections, and verify the finished passage with CCTV.
Key Facts
Cured-in-place pipe, or CIPP, creates a jointless liner inside an existing sewer pipe.
A typical residential lining project requires one access point or cleanout, professional cleaning, and a post-installation camera inspection.
Lining can seal cracks, leaking joints, and root-entry paths, but it cannot correct a persistent low spot or restore a pipe that has lost essential alignment.
Typical residential CIPP installation costs about $80-$250 per linear foot, with many projects totaling $4,000-$15,000.
The cured liner reduces the pipe’s internal diameter, but its smoother surface can offset some hydraulic loss.
A contractor must reopen every active lateral connection after curing, then document the result with a final CCTV recording.
What Is Sewer Pipe Lining?
Sewer pipe lining is a trenchless rehabilitation method that forms a new pipe inside an existing underground sewer. The most common version is cured-in-place pipe, where a flexible felt, polyester, or fiberglass tube carries liquid thermosetting resin into the damaged line; pressure holds the tube against the host pipe until the resin becomes rigid.
The old pipe remains in the ground and usually acts as a host, guide, or surrounding structural support. The liner covers openings that previously allowed groundwater out, sewage in, or tree roots through joints and cracks. Unlike a short epoxy patch, a properly designed CIPP liner can provide continuous structural support along the rehabilitated section.
Sewer pipe lining is not the same as pouring epoxy into a drain, replacing a pipe by excavation, or inserting a smaller pipe without resin. Those methods solve different problems and have different structural capacities.
What Problems Can a Liner Repair?
A structural liner can address longitudinal cracks, circumferential cracks, leaking joints, corrosion, minor deformation, and repeated root intrusion when the host pipe still provides a continuous path for installation. The liner also creates a smooth interior that reduces ledges where paper and solids can catch.
A liner cannot reliably repair every underground defect. A fully collapsed section may not admit the installation tube, and a severe offset can prevent the liner from seating correctly. A pronounced belly, also called a sag, remains a low spot after lining because a flexible liner follows the existing grade instead of lifting the pipe.
How Sewer Pipe Lining Works in Practice
CIPP installation follows six controlled operations: inspect, clean, measure, impregnate the liner with resin, insert and cure it, then reinstate connections and inspect the result. The most important success factor is not the speed of insertion; it is accurate diagnosis and preparation of the host pipe.
A residential crew may complete active installation in 6-10 hours, although the full project can take several days when permits, utility locating, engineering review, traffic control, or custom liner fabrication are required. Larger lines may require flow diversion or bypass pumping while the work proceeds.
Step 1: Inspect the Existing Sewer
A technician sends a CCTV camera through a cleanout, access vault, or another suitable opening. The recording identifies pipe material, diameter, length, access points, roots, deposits, cracks, offsets, water level, connections, and structural collapse.
The contractor should measure the rehabilitation segment from fixed reference points rather than estimate length from a property sketch. A camera report also reveals whether a line has an active lateral connection that the new liner will cover.
You will know the inspection is adequate when: the video shows the complete proposed section, the camera reaches the downstream endpoint, and the report marks defects and branch connections.
Common mistake: approving lining from a camera view that stops at standing water or a blockage. A partial video can miss a second break, a severe sag, or an inaccessible connection.
Step 2: Clean and Prepare the Pipe
High-pressure water jetting removes sludge, loose debris, roots, and some mineral deposits. Mechanical equipment, including chain cutters and descaling machines, may be needed for hard scale inside cast-iron pipe or heavily encrusted clay pipe.
Cleaning exposes the host-pipe wall so the liner can conform to its shape. It does not need to make the old pipe cosmetically new, but remaining scale must not create a ridge, void, or sharp obstruction. Root cutting before lining is essential because roots left between the liner and host can interfere with seating.
You will know preparation is adequate when: a second CCTV inspection shows an open, continuous bore with no material that can puncture, wrinkle, or displace the liner.
Common mistake: using water jetting alone on hard cast-iron scale. The crew may need mechanical descaling, followed by another camera inspection.
Step 3: Measure and Select the Liner
The contractor selects the liner diameter, wall thickness, resin system, length, and curing method from the measured pipe geometry and structural design requirements. A standard residential liner may be approximately 3-4.5 millimeters thick, but thickness varies with diameter, groundwater pressure, soil loading, host-pipe condition, and engineering requirements.
The liner must extend across the entire defective section and terminate at planned endpoints. Excess length can obstruct a public main or require difficult trimming; insufficient length leaves untreated pipe exposed to continued leakage and root entry.
Liner design should account for ovality, groundwater, live loads from vehicles, and whether the host pipe is fully supported by surrounding soil. A contractor who quotes only a thickness without explaining the design basis has not provided enough technical information.
Step 4: Wet Out the Tube With Resin
Wet-out saturates the dry liner with a measured quantity of resin. The crew mixes the resin and hardener at the manufacturer’s specified ratio, then uses rollers or calibrated equipment to distribute resin throughout the tube without dry zones or excessive pools.
Epoxy, polyester, and vinyl ester systems behave differently. Epoxy is common in smaller residential work because many formulations have low shrinkage and relatively low odor. Polyester and vinyl ester can be economical for larger infrastructure, but some formulations contain styrene and require controlled ventilation, worker protection, and odor management.
Resin temperature and working time matter. A resin that begins curing before insertion can form wrinkles or prevent full contact with the host pipe. A liner with dry fabric can delaminate or lack the designed wall strength.
You will know wet-out is controlled when: the contractor can identify the resin product, batch, mix ratio, working time, liner length, and installation temperature.
Step 5: Insert, Invert, or Pull the Liner Into Position
Inversion uses air or water pressure to turn the tube inside out as it travels through the host pipe. The resin-bearing surface is forced against the pipe wall, and an internal pressure column keeps the liner expanded during curing.
Pull-in-place installation uses a winch to pull a prepared liner through the host pipe. An inflatable bladder then presses the liner into contact with the wall. Pull-in-place methods can suit access conditions or pipe geometries that do not work well with inversion.
The installation crew controls pressure, speed, alignment, and endpoint position. Excessive pressure can damage a weak host pipe or distort the liner, while insufficient pressure can leave voids, folds, or incomplete wall contact.
Step 6: Cure the Resin
Curing changes liquid resin into a hardened polymer tube. Ambient systems cure at surrounding temperature, while hot-water or steam systems accelerate the chemical reaction; ultraviolet or LED systems use light-sensitive resin and a light train pulled through the liner.
Typical cure durations vary substantially. Ambient curing may require 4-8 hours, steam or hot-water curing often takes about 2-4 hours, and UV curing may take roughly 10-30 minutes after the liner and light train are correctly positioned. These are typical field ranges, not universal guarantees.
Temperature, pressure, resin chemistry, liner thickness, and groundwater conditions determine the actual cure. A fast cure is not automatically a better cure. The contractor should record cure temperature and time, pressure, resin batch, and installation conditions.
Step 7: Reopen Laterals and Verify the Finished Pipe
The cured liner can cover openings from toilets, sinks, floor drains, or other building branches. A robotic cutter reopens each active lateral from inside the main line, producing a smooth connection rather than leaving a sealed branch or a rough flap.
A final CCTV run checks the full liner for wrinkles, lifts, voids, resin-rich areas, open connections, end seals, and remaining obstructions. The video should be supplied to the property owner with the invoice, not retained only by the contractor.
You will know completion is acceptable when: the final camera reaches both endpoints, every required lateral is open, the liner has no obstructive ridge, and the contractor provides cure and material records.
Which Lining Methods Are Available?
CIPP is the main structural lining method for residential sewer rehabilitation, but epoxy coating, slip lining, spiral-wound systems, and pipe bursting may fit other conditions. The correct selection depends on pipe geometry, structural loss, access, required diameter, flow, and whether the existing alignment is acceptable.
| Method | Structural role | Typical application | Main limitation |
|---|---|---|---|
| CIPP lining | Structural or semi-structural pipe-within-a-pipe | 3-8 inch residential and commercial sewers | Follows existing sags and reduces diameter |
| Epoxy coating | Usually non-structural corrosion barrier | 1.5-4 inch drains, stacks, pinhole leaks | Cannot bridge major missing wall sections |
| Slip lining | Independent smaller pipe | Long, straight municipal or storm lines | Reduces diameter and requires insertion access |
| Pipe bursting | Full replacement without continuous trench | Collapsed or badly deteriorated lines | Needs entry and receiving pits; creates ground forces |
| Spiral-wound lining | Formed liner inside host pipe | Larger circular or non-circular infrastructure | Requires suitable access and specialized equipment |
CIPP Lining
CIPP uses a resin-saturated flexible tube that hardens against the host pipe. Felt liners work well across many residential diameters, while fiberglass or reinforced systems can provide greater stiffness for demanding structural conditions.
CIPP is effective when the pipe has enough remaining geometry for the liner to pass and expand. It is usually the leading option when excavation would disturb a driveway, mature tree, sidewalk, finished floor, or foundation.
Epoxy Spray or Brush Coating
Epoxy coating applies resin directly to the interior surface through a rotating spray head, brush, or spin-casting tool. It can seal small leaks and corrosion in narrow lines where a tube would be difficult to install, including some vertical stacks and interior building drains.
Coating is not equivalent to a structural CIPP liner. If a host pipe has lost its bottom, has large holes, or is under significant external loading, a thin coating may fail because it lacks a reinforcing matrix and independent wall thickness.
Slip Lining
Slip lining inserts a continuous HDPE or PVC pipe inside the old pipe, then may fill the annular gap with grout. The method provides a durable new carrier pipe, but the replacement diameter is smaller unless the host pipe is substantially oversized.
Slip lining needs a relatively straight route and sufficient access for the new pipe. It suits long municipal lines more often than small residential laterals, where the diameter loss and access pits may outweigh the excavation savings.
Pipe Bursting
Pipe bursting fractures the old pipe outward while pulling a new HDPE pipe into the resulting path. It is technically trenchless replacement rather than lining because the new pipe replaces the old one instead of forming a thin internal wall.
Bursting can preserve or increase flow diameter and can handle a host pipe that is too damaged for CIPP. Entry and exit pits remain necessary, and nearby utilities, shallow services, soil conditions, and property boundaries require careful review.
How Do Methods Compare on Cost, Time, and Risk?
CIPP commonly costs more per linear foot than basic open-trench replacement before restoration, but total project cost can be lower when excavation would remove concrete, landscaping, pavement, or mature vegetation. Price depends on access, cleaning difficulty, diameter, liner thickness, bypass requirements, and lateral reinstatement.
| Project factor | CIPP lining | Open-trench replacement | Pipe bursting | Epoxy coating |
|---|---|---|---|---|
| Typical residential cost | $4,000-$15,000 | $3,000-$12,000 before major restoration | $6,000-$20,000 | $2,000-$8,000 |
| Typical active installation | 6-10 hours | 1-3 days | 1-2 days | 1-2 days |
| Typical access | Existing cleanout or two small openings | Continuous trench | Entry and receiving pits | Cleanout or interior access |
| Diameter change | About 3-9 millimeters per wall | None | Same or larger diameter possible | Usually under 2 millimeters |
| Structural capacity | High when engineered correctly | High | High | Low to moderate |
| Best fit | Cracks, roots, leaking joints | Severe collapse or bad grade | Collapse and undersized replacement | Corrosion and pinholes |
Typical CIPP pricing of $80-$250 per linear foot should be treated as a planning range rather than a bid. A short project can have a high effective per-foot price because mobilization, cleaning, camera work, resin preparation, and lateral cutting are largely fixed costs.
Does Lining Reduce Sewer Flow?
A cured liner reduces internal diameter, but the smooth resin surface can reduce friction compared with rough, scaled cast iron or jointed clay. Whether capacity rises or falls depends on original roughness, liner thickness, pipe diameter, slope, and solids transport.
For example, removing heavy scale from a 4-inch cast-iron line may improve practical flow even after a liner occupies several millimeters of wall thickness. A smooth liner cannot compensate for a flat grade or a persistent belly, because gravity drainage still depends on elevation and slope.
An engineer should evaluate capacity where the line carries substantial commercial flow, stormwater, or multiple buildings. A contractor should not promise increased flow from lining without comparing diameter, roughness, and grade.
Which Sewer Pipes Can Be Lined?
Clay, cast iron, concrete, Orangeburg, PVC, and some ductile iron lines can be candidates when the pipe has a continuous route and acceptable geometry. Material alone does not determine eligibility; the CCTV findings and cleaning results matter more than the pipe label.
| Host-pipe condition | Lining suitability | Required preparation | Likely alternative |
|---|---|---|---|
| Clay with open joints and roots | Often suitable | Root cutting and descaling | Spot repair or excavation if offset |
| Cast iron with scale and pinholes | Often suitable | Mechanical descaling and cleaning | Coating or replacement |
| Orangeburg with deformation | Conditional | Measure ovality and collapse | Excavation or bursting |
| PVC with separated joints | Often suitable | Cleaning and connection mapping | Spot repair |
| Concrete with cracks | Often suitable for larger lines | High-pressure cleaning | Slip lining or structural replacement |
| Fully collapsed section | Usually unsuitable | Locate and expose damage | Excavation or pipe bursting |
| Persistent belly or back-pitch | Usually unsuitable as a grade repair | Survey elevation and water level | Excavation and regrading |
A partial collapse may still be repairable if the crew can restore a continuous opening with cutting or localized excavation before lining. A severe offset can create a step that the liner cannot bridge without wrinkling, so “trenchless” does not mean “no excavation under every condition.”
What Does Sewer Pipe Lining Cost and How Long Does It Last?
Typical residential sewer lining costs $4,000-$15,000 overall, or approximately $80-$250 per linear foot, while active installation often occupies 6-10 hours. Properly designed and installed liners are commonly assigned service lives of 50 years or more, but actual durability depends on resin, loading, chemical exposure, workmanship, and maintenance.
Cost rises when the line is deep, long, difficult to clean, beneath a public roadway, or connected to many laterals. Traffic control, permits, bypass pumping, access-pit construction, difficult root removal, and post-installation cutting can add thousands of dollars.
A warranty is not the same as a service-life prediction. Ask whether the warranty covers leaks, delamination, wrinkles, open joints, and lateral connections, and whether the contractor or resin manufacturer is responsible for each defect.
What Should a Written Quote Include?
A defensible quote identifies the host-pipe diameter, liner length, liner material, resin system, designed thickness, curing method, access points, lateral reinstatement, cleaning, final CCTV, and warranty terms. It should also state whether permits, traffic control, bypass pumping, and restoration are included.
Ask for the resin manufacturer’s installation requirements and the records that will be delivered after curing. A low price that excludes lateral cutting or final inspection is not comparable with a complete rehabilitation proposal.
What Are the Main Failure Modes?
Most liner failures arise from unsuitable host conditions, poor cleaning, incorrect resin handling, inadequate pressure, or missing quality checks. A seamless finished surface does not prove that the liner bonded correctly or reached its designed cure.
- Under-cleaning: Scale, roots, and debris create voids or sharp ridges. The remedy may require additional cleaning before installation or mechanical removal of a post-cure obstruction.
- Wrinkling: A fold can reduce flow and catch solids. Minor ridges may be milled, but severe folds can require sectional repair or failed-liner removal.
- Delamination: The liner separates from resin or host contact because of dry fabric, contamination, poor cure, or groundwater intrusion. A camera may show bubbles, blisters, or an irregular surface.
- Missed lateral: An unreopened branch causes an immediate backup or loss of service to a fixture. Robotic cutting and a second CCTV inspection are required.
- Short liner: Untreated pipe remains exposed at an endpoint, allowing roots or leaks to return.
- Overlong liner: Material can protrude into a public main or obstruct a downstream connection, requiring municipal intervention.
- Incomplete cure: Incorrect mix ratio, low temperature, excess water, or premature pressure release can leave resin soft or weak.
Chemical odor inside a home is not proof of failure, but it requires attention. Unsealed traps, cracked vent piping, or styrene-containing resin can move odors indoors. Contractors should isolate the work area, maintain ventilation, and follow the product’s safety data sheet rather than dismissing the smell.
How Can a Property Owner Check the Work?
A property owner should request the pre-installation and post-installation CCTV videos, liner and resin specifications, cure records, and a marked drawing showing endpoints and reopened laterals. These records provide stronger evidence than a verbal statement that the pipe is now “like new.”
Use this completion checklist:
- Confirm the final video reaches the planned downstream endpoint.
- Match every active lateral to the contractor’s reinstatement record.
- Look for a continuous, smooth liner without an obstructive fold.
- Request resin batch, mix ratio, cure temperature, and cure duration.
- Confirm the warranty covers the installed section and named defects.
- Keep the videos with property records for future sale or maintenance.
- Ask who pays if a camera later finds a missed connection or failed cure.
Two expert rules prevent many disputes. First, never accept a lining recommendation without seeing the full CCTV run. Second, never compare bids using linear-foot price alone, because a quote that omits cleaning, lateral cutting, or restoration can appear artificially cheap.
Is Sewer Pipe Lining Better Than Digging?
Sewer pipe lining is usually better when the existing route and grade are acceptable and excavation would damage costly surfaces. Open excavation is better when the pipe is collapsed, badly offset, incorrectly graded, inaccessible, or structurally disconnected from the intended route.
Lining avoids a continuous trench, but it does not eliminate all surface work. Contractors may still need to expose a buried cleanout, create access pits, remove a small section of pavement, or excavate a collapsed point.
Choose CIPP When
- The pipe has cracks, roots, leaking joints, or corrosion.
- CCTV confirms a continuous and reasonably aligned bore.
- The line passes below a driveway, patio, roadway, or mature landscaping.
- The owner wants a structural rehabilitation with minimal restoration.
- The diameter reduction is acceptable for the expected flow.
Choose Excavation or Bursting When
- A pipe has a major collapse or severe offset.
- The line has a persistent sag that causes backups.
- The route must be regraded or relocated.
- The current pipe is too small for present or planned demand.
- A new full-diameter pipe is required.
The most honest limitation is simple: trenchless installation preserves the existing route, so it also preserves many existing geometry problems. A new liner seals the wall; it does not raise a low section or change the underground slope.
The Bottom Line
How sewer pipe lining works is straightforward in principle but highly dependent on preparation: a camera defines the defect, cleaning exposes the host pipe, resin saturates a flexible liner, pressure seats the liner, curing creates the new pipe wall, and robotic cutting restores branch connections. The best candidates have structural damage without destructive collapse and an acceptable existing grade.
Before signing, compare the complete scope rather than the advertised price. Require a full CCTV diagnosis, a liner design, resin and cure records, lateral reinstatement, a final video, and warranty language that identifies the responsible party.
FAQ
Can Tree Roots Grow Through a Sewer Liner?
A properly cured, continuous CIPP liner blocks the cracks and joints that normally admit tree roots. Roots can still return through an untreated endpoint, a missed lateral, a failed end seal, or a defective installation. Root cutting before lining and a complete final camera inspection reduce those risks.
Can a Sewer Liner Be Installed Through a 90-Degree Bend?
A liner can navigate some bends, but feasibility depends on diameter, bend radius, access, liner stiffness, and the installation method. Pull-in-place systems and epoxy coatings may suit tighter geometry than larger CIPP tubes. CCTV and a test pull are safer than assuming every bend is passable.
Does a Sewer Liner Stop Leaks Into the Groundwater?
A cured structural liner is designed to seal many cracks, joints, and infiltration paths, provided the liner is continuous and properly sealed at its endpoints. Groundwater under pressure can interfere with resin cure or create voids, so active infiltration may require temporary control before installation.
How Often Should a Lined Sewer Be Cleaned?
A lined sewer usually needs the same sensible maintenance as any other sewer, including prompt removal of grease, wipes, and foreign objects. High-pressure cleaning should follow the liner manufacturer’s pressure and nozzle guidance. Routine root cutting should become less necessary when all entry paths were sealed correctly.
Can a Failed Liner Be Removed?
A failed liner can sometimes be milled, patched, over-lined, or removed with specialized equipment, but the remedy depends on the defect and remaining diameter. A severe wrinkle, delamination, or blocked connection may require excavation. The original CCTV, cure records, and warranty determine how efficiently the problem can be diagnosed.