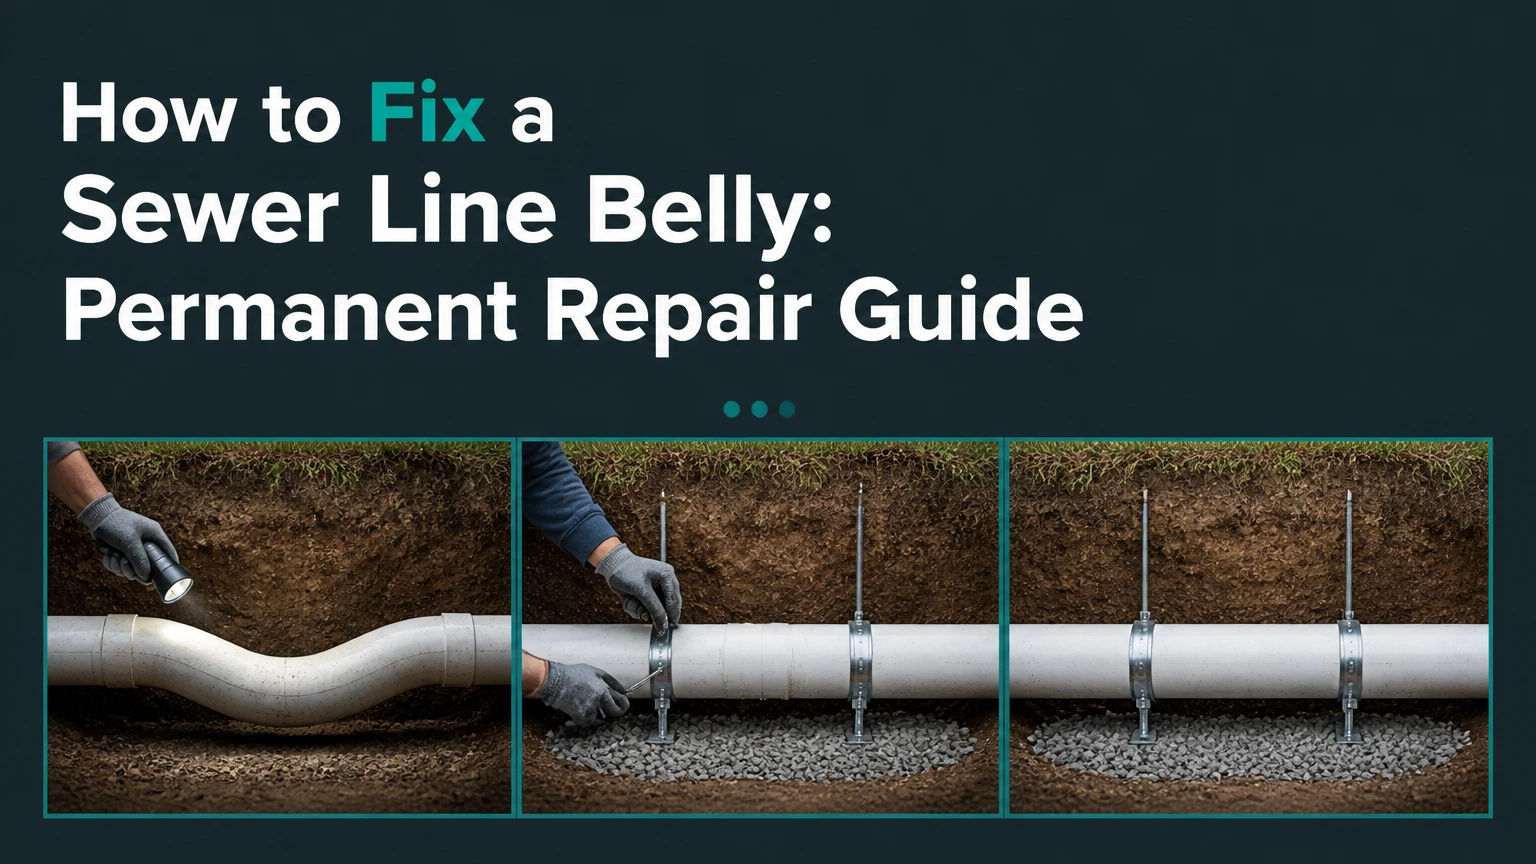
To fix a sewer line belly permanently, expose the sagged section, remove the unstable bedding, rebuild a compacted pipe foundation, and install replacement pipe at the designed grade. A camera inspection must first confirm the belly’s location, length, depth, and severity because snaking, hydro-jetting, and most pipe liners remove symptoms without restoring the sewer line’s slope.
Key facts at a glance
A sewer line belly is a settled section of pipe that holds wastewater after fixtures stop discharging.
Standing water on camera suggests a low spot, but underwater footage alone does not prove a structural belly.
Open excavation is the most dependable way to rebuild the bedding and correct a deep sag.
Pipe bursting can reduce surface damage, but a deep belly may require excavation to correct the new pipe’s grade.
CIPP lining seals many cracks and root pathways, but it normally follows the old pipe’s profile instead of restoring its slope.
Typical localized repair costs range from $3,000-$6,000, while extensive replacement can exceed $25,000.
What Is a Sewer Line Belly?
A sewer line belly, also called a pipe sag, is a section of underground drainpipe that has settled below the intended continuous grade. Gravity sewer pipes need a designed fall so wastewater carries suspended solids toward the municipal main, septic tank, or other approved outlet.
A low spot holds a residual pool after normal flow ends. Paper, sludge, grease, grit, and other solids then collect in that pool, reducing the pipe’s usable opening and increasing the likelihood of recurring blockages. A belly can occur in a house lateral, building sewer, private sewer main, or septic conveyance line.
The term does not describe every pipe that contains water. A properly functioning sewer may retain a small amount of water at joints, fittings, or the downstream connection, and a camera can also enter water because the line is flowing during inspection. The important question is whether water remains trapped in a localized depression and whether the depression causes functional problems.
Why Does a Sewer Line Belly Form?
Soil settlement, poor trench preparation, groundwater erosion, leaking joints, root disturbance, overloaded fill, and installation errors can allow a sewer pipe to lose support. Older clay, cast-iron, concrete, and fiber pipes are especially vulnerable when joints separate or bedding deteriorates, although newer PVC can sag when installed over uncompacted soil.
A deep excavation beside a foundation, driveway, or utility trench can also disturb the pipe’s supporting soil. In areas with expansive clay, freeze-thaw movement, high groundwater, or repeated vehicle loading, the original trench may shift unevenly.
The pipe material alone rarely explains the problem. A strong PVC pipe can still deform or settle if the trench bottom was not shaped, bedded, and compacted correctly.
Why Does a Sewer Line Belly Cause Repeated Clogs?
A sewer line belly causes recurring clogs because the low section behaves like a sediment trap. Wastewater slows when it enters the standing pool, heavier material settles, and each additional discharge carries more debris into the same restricted area.
Grease can coat accumulated solids, while roots exploit separated joints or cracks around the sag. Over time, cleaning restores the opening temporarily, but the depression continues to collect material. The interval between blockages often shortens as the deposit becomes thicker.
Typical warning signs include:
- A main sewer backup every few months after repeated cleaning
- Several fixtures gurgling or draining slowly together
- Toilet water movement when a nearby sink or washing machine discharges
- Sewer odor near a cleanout, crawlspace, floor drain, or yard
- A camera that repeatedly submerges at the same location
- Wet or unusually green ground above a leaking sewer lateral
These symptoms also occur with roots, grease, a collapsed pipe, undersized piping, or a municipal sewer problem. A symptom pattern cannot identify a belly without inspection.
How Is a Belly Confirmed?
A sewer camera inspection confirms a belly by documenting a persistent low section, its boundaries, and its effect on flow. The inspection should begin from an accessible cleanout and include a recorded video, distance counter, camera direction, pipe material, and above-ground locating marks.
A camera that disappears underwater and later emerges has encountered a possible sag. That observation becomes more persuasive when the same location contains settled debris, the camera must push through accumulated material, or the technician documents a level change and a measurable length.
Camera footage has limitations. Water flowing into the line can create a temporary pool, and a camera head may dip when passing a fitting. Ask the contractor to distinguish a static low spot from normal operating water.
What Testing Should a Contractor Provide?
Request these diagnostic outputs before authorizing structural work:
- Recorded camera footage: The video should show the defect from both directions when access permits.
- Location and depth: A sonde locator should mark the belly’s ground position and approximate burial depth.
- Length measurement: The report should identify the upstream and downstream limits, not merely label the pipe “bellied.”
- Pipe description: The proposal should identify material, diameter, joint condition, roots, cracks, offsets, and collapse.
- Flow assessment: The technician should explain whether the line drains between discharges or retains water.
- Post-cleaning inspection: Roots and deposits can hide the pipe profile, so cleaning may be necessary before final diagnosis.
Some inspection cameras include an inclinometer, but readings can vary with camera movement, cable tension, and calibration. A negative displayed slope may support the diagnosis, yet the repair decision should also use footage, geometry, and observed performance.
A dye test can help identify leaks or flow paths, but a colored pool alone does not measure pipe grade. Do not accept a static dye demonstration as a substitute for a professional camera report.
Which Repair Method Fits the Property?
Open excavation is usually the best choice for a deep or long belly because workers can remove failed soil, rebuild the bedding, and set a new grade directly. Pipe bursting can protect a driveway or patio when the replacement path remains geometrically suitable, while CIPP lining is generally a sealing method rather than a grade-correction method.
| Repair method | Typical access | Grade correction | Typical duration | Best application |
|---|---|---|---|---|
| Open-trench replacement | Continuous trench | Direct and measurable | 2-4 days | Deep sag in lawn or unstable soil |
| Spot repair | One localized excavation | Direct over a defined section | 1-2 days | Short belly with sound pipe nearby |
| Pipe bursting | Two pits, sometimes a belly pit | Limited by existing alignment | 1-2 days | Replacement beneath hardscape |
| CIPP lining | Existing cleanout or access pit | Usually none | 1 day | Cracks, roots, and leaks without major sag |
Actual time includes permitting, utility marking, pumping, restoration, weather, and access constraints. A contractor who promises a fixed duration before locating the pipe and reviewing the footage is estimating too early.
Pipe Bursting: When Does It Work?
Pipe bursting replaces the old sewer with HDPE or another approved product while avoiding a continuous trench. A bursting head fractures or displaces the existing pipe as a winch pulls the new pipe through the established route.
Pipe bursting does not automatically regrade the trench. A replacement pipe can follow the old sag, particularly when the belly is deep, the surrounding soil is weak, or the new pipe lacks adequate support. A targeted excavation at the low point may be necessary before or during bursting.
Pipe bursting is often appropriate beneath driveways, sidewalks, or mature landscaping when the contractor can demonstrate that the new line will have proper grade and clearance. The proposal should state pit locations, replacement diameter, pull length, required upsizing, and how the belly will be corrected.
Why Does Pipe Lining Usually Fail to Correct Grade?
CIPP lining usually fails to correct a sewer belly because the resin tube conforms to the host pipe’s existing shape. After curing, the liner creates a new watertight passage, but it normally preserves the low point rather than lifting or supporting it.
Lining may be reasonable for a shallow depression when flow remains reliable and the primary defect is cracking, leakage, or root intrusion. No universal “half-inch” threshold determines suitability; the acceptable depth depends on diameter, slope, flow, liner system, structural design, and local approval.
A liner also reduces the internal diameter. In a 4-inch pipe, even a modest liner thickness changes hydraulic capacity, so the contractor should provide the proposed finished inside diameter and verify that fixtures and code requirements remain satisfied.
Practitioner rule: If a proposal says lining will “remove” a deep belly without explaining how grade or support changes, obtain another opinion.
How Do You Permanently Repair a Sewer Line Belly?
A permanent repair replaces the defective section and stabilizes the soil beneath it. The work normally follows seven actions, although access, depth, permits, and pipe ownership can change the sequence.
Step 1: Inspect, Locate, and Plan
Inspect the entire accessible line before digging. Mark the belly’s endpoints, depth, nearby utilities, cleanouts, structures, easements, and the proposed excavation footprint.
Call 811 before excavation in the United States, then verify private utilities such as irrigation, landscape lighting, propane, and septic components separately. Confirm whether the municipality or homeowner owns the affected section, because responsibility often changes at the property line or sewer easement.
Success checkpoint: The written plan identifies the pipe diameter, material, belly length, excavation depth, connection points, and restoration scope.
Common mistake: Digging directly above the camera’s reported distance without accounting for the camera’s entry point, bends, and locating accuracy.
Step 2: Obtain Permits and Protect the Work Area
Obtain plumbing, excavation, right-of-way, or environmental permits required by the local authority. Arrange traffic control when work reaches a sidewalk or street and protect occupants from open trenches and contaminated soil.
For worker safety, OSHA requires protective systems in many excavations. OSHA 29 CFR 1926.652 requires employees in excavations to be protected from cave-ins except under specified conditions, and a competent person must evaluate changing trench hazards.
Success checkpoint: Utility marks, permit requirements, access rights, and trench-protection measures are documented before excavation begins.
Common mistake: Treating a five-foot trench as safe because the soil looks dry. Soil type, surcharge loads, water, and previous disturbance can make a shallower trench hazardous.
Step 3: Expose the Pipe Without Damaging Sound Sections
Remove sod, concrete, asphalt, or landscaping separately so the surface can be restored efficiently. Excavate wide enough to work safely around the pipe, using hand tools near marked utilities and the existing sewer.
Control groundwater and sewage with approved pumping and sanitation procedures. Do not enter a contaminated excavation or confined space without appropriate training and equipment.
Success checkpoint: The entire belly and stable pipe beyond both transitions are visible, and the trench bottom has not been undercut.
Common mistake: Exposing only the lowest point. A short patch cannot correct a gradual sag if the pipe remains low at either transition.
Step 4: Cut Out the Sagged Section and Failed Bedding
Cut the pipe beyond both ends of the defect, into sections with sound alignment and intact joints. Remove the settled pipe and excavate saturated, loose, organic, or otherwise unsuitable material beneath it.
The repair boundary should follow the actual structural defect, not an arbitrary one-foot or two-foot patch. If the camera shows multiple sags, widespread deformation, or separated joints, replacing a single low point may leave the underlying failure untreated.
Success checkpoint: The remaining pipe has stable edges, clean connection surfaces, and enough length for code-compliant couplings or new fittings.
Common mistake: Connecting new pipe to distorted or cracked pipe because it reduces excavation length.
Step 5: Rebuild the Bedding and Set the Grade
Shape the trench bottom and place approved granular bedding, often specified as sand, pea gravel, or crushed aggregate compatible with the pipe and local code. Compact the foundation in controlled layers, then establish the intended invert elevation with a laser, grade rod, or equivalent method.
For many residential gravity sewers, a 1/4-inch-per-foot fall is a common design value for smaller pipe, while 1/8-inch-per-foot is commonly used for 4-inch and larger pipe under plumbing codes and local standards. The governing design is the approved plan and local code, not a universal rule for every diameter or site.
Do not create an excessive slope to compensate for a belly. Very steep or uneven grade can allow liquid to outrun solids, producing deposition downstream.
Success checkpoint: Elevations at both connections and intermediate points demonstrate continuous, approved fall without a low point.
Common mistake: Measuring the pipe with a short bubble level while the bedding remains soft. The grade can change after the pipe is covered.
Step 6: Install and Connect Replacement Pipe
Install approved pipe, commonly PVC sewer pipe, using the diameter, wall class, and joint method required locally. Keep joints clean, fully seated, and aligned; use shielded transition couplings when joining dissimilar materials where permitted.
Provide lateral support around the pipe with selected material rather than throwing large rocks into the trench. Maintain the designed alignment through every connection, cleanout, bend, and fitting.
Success checkpoint: The pipe remains on grade after surrounding material is placed, and connections are secure, aligned, and accessible for testing.
Common mistake: Using an unshielded rubber sleeve or an improperly rated clamp underground. Transition products must match the pipe materials and installation conditions.
Step 7: Test, Inspect, and Backfill in Lifts
Test the repaired section according to local requirements, which may include a water test, air test, or low-pressure leakage test. Run a post-repair camera inspection to confirm the new section is continuous, unobstructed, properly connected, and free of a new sag.
Place initial shading and side support carefully around the pipe. Backfill with approved material in compacted lifts, commonly 6-12 inches, instead of dumping the entire excavation at once.
Success checkpoint: The final camera shows open flow, the test passes, and the surface is restored with the promised materials and finish.
Common mistake: Backfilling with excavated mud or unprocessed debris. Weak fill can recreate settlement above a correctly installed pipe.
How Much Does Sewer Belly Repair Cost?
Typical localized sewer belly repairs cost about $3,000-$6,000 for a short, accessible section, while extensive replacement can reach $8,000-$25,000 or more. Depth, hardscape removal, groundwater, shoring, utility conflicts, permits, disposal, and surface restoration create larger price differences than pipe material alone.
| Cost component | Typical residential range | Main price driver | Usually included |
|---|---|---|---|
| Camera inspection and locating | $250-$800 | Access and cleaning requirement | Video, distance, surface marks |
| Open-trench spot repair | $3,000-$6,000 | 10-15 feet, shallow lawn access | Excavation, pipe, bedding, backfill |
| Deep or difficult excavation | $6,000-$15,000 | Shoring, groundwater, depth | Structural repair before restoration |
| Pipe bursting | $150-$250 per linear foot | Length, diameter, access pits | New HDPE and pulling operation |
| Hardscape restoration | $1,000-$10,000+ | Concrete, asphalt, masonry, landscaping | Only when listed in contract |
| Whole-line replacement | $8,000-$25,000+ | Length, depth, property constraints | Varies by scope and jurisdiction |
A quote should separate plumbing work from excavation, permits, engineering, traffic control, landscaping, concrete, asphalt, and cleanup. A low bid that excludes restoration may become the highest final cost.
Typical open-trench work takes two to four working days. A straightforward burst replacement may take one to two days, but permitting and concrete curing can extend the calendar time.
Can You Fix a Sewer Belly Yourself?
A homeowner should not perform a full sewer belly repair unless the line is shallow, the excavation is legally and physically safe, and a qualified professional controls pipe grading, connections, testing, and trench protection. Underground sewer repairs involve contaminated water, cave-in hazards, buried utilities, and code requirements.
A homeowner may reduce costs by documenting symptoms, obtaining camera footage, clearing surface access, or comparing restoration quotes. Hand excavation is not automatically safer or cheaper, especially when the trench exceeds a few feet or the soil contains utilities and groundwater.
Do not enter a trench without a compliant protective system and competent-person evaluation. Do not use chemical drain cleaners as a belly treatment because they cannot restore grade and can endanger workers during excavation.
What Can You Do Until Repair?
Snaking or hydro-jetting can restore flow temporarily when accumulated debris is blocking the belly, but cleaning does not remove the structural low point. Hydro-jetting can also expose weak joints or damage fragile, deteriorated pipe if pressure and nozzle selection are inappropriate.
Until permanent work begins:
- Reduce large simultaneous discharges from laundry, bathing, and dishwashing.
- Keep grease, wipes, paper towels, and food solids out of drains.
- Ask whether a temporary cleanout access plan or backwater valve is appropriate.
- Stop using fixtures if sewage rises through floor drains or backs up into living areas.
- Keep children and pets away from contaminated water.
- Photograph damage and retain invoices for possible insurance or warranty review.
A backwater valve can reduce reverse flow from a municipal surcharge in suitable systems, but it does not correct a private sewer belly. Municipal responsibility must be established before the homeowner pays for work on a public line.
How Do You Compare Contractor Proposals?
Compare proposals by technical scope rather than by the headline price. Require a copy of the camera video, a marked site plan, repair boundaries, pipe specifications, bedding material, grade verification method, testing method, permit responsibility, warranty, and surface restoration details.
| Proposal item | Acceptable detail | Warning sign | Question to ask |
|---|---|---|---|
| Diagnosis | Video, footage marks, depth, length | “Belly confirmed” without measurements | Where are both endpoints? |
| Grade | Laser or documented elevation checks | “Set by eye” | What slope will be installed? |
| Bedding | Named aggregate and compaction plan | Native mud reused | How is settlement prevented? |
| Connection | Approved shielded coupling or fitting | Generic rubber sleeve | Is the coupling rated for burial? |
| Verification | Leakage test and post-repair camera | No final inspection | What proves the repair worked? |
| Restoration | Square-foot quantities and materials | “Restore area” only | What exactly is included? |
Expert insight: A proposal that prices a fixed number of replacement feet before the camera boundaries and excavation are established transfers uncertainty to the homeowner. The contractor should identify an allowance or explain the change-order process.
Expert insight: The most important part of a belly repair is often below the pipe. Replacing PVC over inadequately compacted bedding can reproduce the same defect even when the new pipe and fittings are high quality.
Expert insight: Hydro-jetting immediately before a camera inspection can improve visibility, but a clean video can hide the functional significance of grade unless the report documents water retention and pipe elevation.
What Are the Main Failure Modes?
A sewer belly may continue causing trouble after repair when the wrong defect was treated or the new installation was not verified. The common failures below are preventable.
| Failure mode | Why it happens | Corrective response | Typical consequence |
|---|---|---|---|
| Cleaning treated as repair | Debris was removed without correcting grade | Replace or regrade the affected section | Backup returns in weeks or months |
| Liner installed over deep sag | Liner follows the host pipe | Obtain structural and hydraulic review | Smaller opening with retained low spot |
| Short patch misses transition | Replacement ends in unstable pipe | Extend repair into sound alignment | New offset or second belly |
| Native soil used as bedding | Saturated fill settles again | Excavate unsuitable soil and compact aggregate | Repeat excavation |
| No post-repair camera | Obstruction or offset remains hidden | Inspect and test before final payment | Latent defect |
| Utility or permit failure | Work began without coordination | Stop, disclose, and obtain approvals | Delay, fines, property damage |
A deep sag can also indicate a broader trench or drainage problem. If the same route contains multiple bellies, the correct solution may be a longer replacement or engineered reconstruction rather than several isolated patches.
Frequently Asked Questions
Does a sewer line belly always need replacement?
A deep or symptomatic belly generally needs replacement or engineered grade correction because cleaning cannot remove the depression. A shallow, stable low spot without recurring blockage may be monitored after professional evaluation, particularly when lining or spot rehabilitation addresses separate cracks. The decision should follow documented flow performance, not camera appearance alone.
How long can a sewer belly go untreated?
A sewer belly can remain functional for months or years, but no reliable lifespan applies because soil movement, pipe diameter, waste loading, and cleaning frequency differ. Repeated backups, sewage odors, root growth, or visible pipe deformation justify prompt repair planning. Continued use increases the chance of contamination and emergency excavation.
Will tree roots cause a sewer line belly?
Tree roots usually enter through cracks, separated joints, or service connections, while roots alone do not normally create a sag in intact pipe. Root growth can worsen an existing belly by destabilizing soil, enlarging joints, and trapping debris. Camera footage should identify both root intrusion and pipe-grade loss.
Is a sewer belly covered by homeowners insurance?
Homeowners insurance often excludes gradual wear, soil settlement, and deferred maintenance, but policies differ and sudden water damage may receive separate treatment. Ask the insurer about service-line endorsements, excavation coverage, and resulting-damage coverage before assuming the repair is covered. Municipal lines and sewer backups may follow different rules.
What should I do if the belly is under a driveway?
Obtain an open-trench price and a pipe-bursting price that includes access pits and any required excavation at the sag. Bursting can reduce driveway removal, but it is suitable only when the new pipe can achieve acceptable alignment and grade. Confirm who restores concrete and whether the warranty covers settlement after paving.
Can a sewer belly be prevented in a new installation?
Proper trench design, stable bedding, controlled compaction, correct pipe joints, and documented grade checks reduce the risk of a new belly. The installer should keep unsuitable soil and groundwater out of the bedding zone, support the pipe evenly, and compact backfill in lifts. A final inspection catches problems before the trench disappears.
The Bottom Line
The reliable way to fix a sewer line belly is to confirm the low spot with recorded camera footage, locate its full boundaries, remove unstable support, and install replacement pipe on verified grade. Open excavation offers the clearest structural correction; pipe bursting can preserve hardscape when the alignment permits it; CIPP lining usually seals a pipe without correcting a deep sag. Compare proposals by bedding, grade verification, testing, restoration, and post-repair inspection, not by price per foot alone.