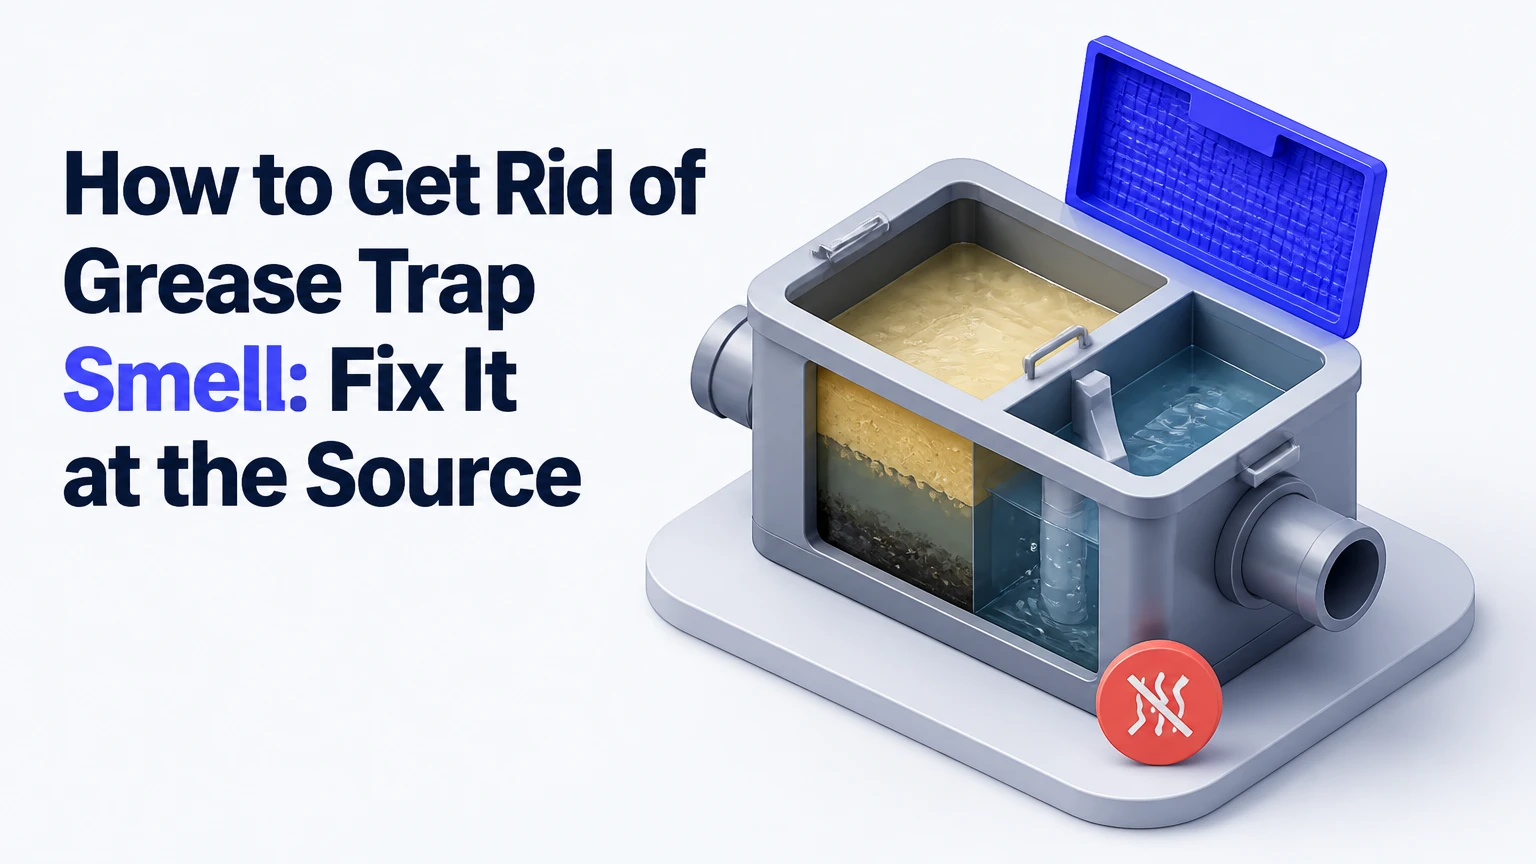
A grease trap smell usually comes from decomposing food solids and fats, oils, and grease inside an overdue, poorly sealed, or inadequately ventilated trap. Remove the accumulated waste mechanically, clean the baffles and lid seal, restore the water barrier, and then use source control or a compatible biological treatment to prevent the odor from returning.
Key Facts at a Glance
- A grease trap odor is usually caused by organic waste decomposing under low-oxygen conditions, not by grease alone.
- Mechanical emptying is the primary fix; enzyme products cannot replace pumping or manual removal.
- Clean a trap when grease and solids approach 25% of its liquid depth, unless the local authority requires a stricter interval.
- A damaged lid gasket, missing baffle, dry trap, blocked vent, or downstream drain buildup can preserve odors after cleaning.
- Never pour boiling water, chemical drain opener, solvents, or concentrated disinfectants into a grease trap.
- A small indoor trap typically takes 45-90 minutes to clean, while an outdoor interceptor usually requires a licensed pumping contractor.
What Causes a Grease Trap Smell?
A grease trap smells because bacteria break down retained food residue and grease, producing volatile sulfur compounds and other sewer gases. Hydrogen sulfide often creates a rotten-egg odor, while rancid fats, proteins, and stagnant wastewater contribute sour, meaty, or sewage-like smells.
A grease trap slows wastewater so FOG floats, dense food particles settle, and partially clarified water exits through a baffled outlet. That separation process also concentrates organic material in a warm, wet, oxygen-poor container. Once the accumulated layer becomes thick, anaerobic decomposition accelerates and odor escapes through the lid, drain opening, or plumbing vent.
Hydrogen sulfide deserves particular caution. A strong rotten-egg smell can indicate its presence, but smell is not a reliable safety meter because high concentrations can reduce the sense of smell. Leave the area if workers experience dizziness, headache, nausea, eye irritation, or breathing difficulty. Outdoor underground interceptors are confined-space hazards and should not be entered.
An odor can originate outside the trap. A dirty sink basket, dishwasher hose, floor drain, failed plumbing vent, or grease-coated branch line may smell identical to an under-sink interceptor. Diagnose the source before buying an odor-control product.
How Does a Grease Trap Separate Waste?
A grease interceptor separates wastewater through retention time, density differences, and baffles. Grease rises, food solids settle, and the middle water layer leaves through an outlet positioned below the floating FOG layer.
The basic path has four parts:
- Wastewater enters from a sink, dishwasher, prep sink, or floor drain.
- Reduced flow allows floating fats and oils to separate from water.
- Heavy food particles settle on the tank floor.
- An outlet baffle draws water from the middle zone toward the sewer line.
A missing, loose, or incorrectly installed baffle defeats that process. Grease can then pass into the downstream pipe, where it cools and sticks to the walls. Cleaning only the trap will not remove that downstream film, so a persistent smell may require drain cleaning or a plumbing inspection.
A grease trap is not a sealed storage tank. The lid, gasket, inlet connection, outlet connection, and venting arrangement must all work together. Odor control therefore requires both waste removal and mechanical integrity.
Which Grease Trap Do You Have?
Trap type determines whether a careful operator can clean it or whether a waste contractor should pump it. Under-sink hydromechanical units commonly hold 10-50 gallons, while outdoor gravity interceptors often hold 500-5,000 gallons or more.
| Trap type | Typical capacity | Normal access | Typical service approach |
|---|---|---|---|
| Under-sink hydromechanical trap | 10-50 gallons | Removable bolted lid | Manual cleaning every 2-4 weeks in busy food service |
| Floor-mounted manual trap | 20-100 gallons | Hinged or bolted cover | Manual removal or wet vacuum, depending on local rules |
| Automatic grease removal device | 15-40 gallons | Service lid and internal scraper | Scheduled scraping plus manufacturer-specific maintenance |
| Outdoor gravity interceptor | 500-5,000+ gallons | Buried access covers | Vacuum pumping by a licensed waste contractor |
| Large institutional interceptor | 1,000-10,000+ gallons | Multiple heavy covers | Pumping, manifesting, and inspection under local requirements |
Capacity does not determine the cleaning interval by itself. A 20-gallon trap in a busy restaurant can fill faster than a 50-gallon trap in a lightly used café. Track actual accumulation, menu volume, dishwashing activity, and the percentage of solids entering the drain.
Before You Start Cleaning
Time: 45-90 minutes for a small indoor trap
Difficulty: Moderate, with unpleasant waste handling
Typical DIY material cost: $25-$75, excluding waste disposal
Best conditions: No food preparation, no dishwashing, and wastewater cooled for at least 30 minutes
Use these materials:
- Chemical-resistant gloves, eye protection, and waterproof clothing
- A correctly sized wrench or non-sparking hand tool
- Plastic scraper and small scoop
- Lidded buckets or heavy-duty, leak-resistant bags
- Absorbent material such as oil-absorbent pads or kitty litter
- Wet/dry vacuum with suitable filters, if permitted and available
- Stiff nylon brush, paper towels, and mild degreasing dish detergent
- Replacement lid gasket if the existing seal is brittle, flattened, or torn
Check the manufacturer’s instructions and local wastewater rules first. Some jurisdictions prohibit putting grease-trap waste in ordinary trash, while others require a licensed hauler even for small commercial units.
How to Get Rid of Grease Trap Smell Safely
Follow the sequence below for a removable indoor or under-sink trap. Do not open an underground interceptor alone, enter the tank, or use a household vacuum that is not rated for wet waste.
Step 1: Stop Wastewater Flow
Stop using connected sinks, dishwashers, garbage disposals, and floor drains for at least 30 minutes. Cooling allows surface grease to thicken, reduces splash risk, and gives the wastewater level time to stabilize.
Success checkpoint: No connected fixture is discharging water when the lid is opened.
Common mistake: Starting while a dishwasher is running, which can flood the open trap with hot, contaminated water.
Step 2: Open the Lid and Inspect the Seal
Put on gloves and eye protection before loosening the lid. Lift it slowly because gas and liquid may be trapped beneath the cover; keep your face away from the opening.
Inspect the gasket, fasteners, cover, inlet pipe, outlet pipe, and baffles. Photograph the internal arrangement before removing parts so the baffles return to their original positions.
Success checkpoint: The lid opens without bending, and the gasket remains continuous around the entire rim.
Common mistake: Prying against a plastic cover until it cracks, creating a permanent odor leak.
Step 3: Measure and Record the Layers
Insert a clean measuring stick vertically into the trap and mark the total liquid depth, the floating grease depth, and the settled solids depth. The commonly used 25% rule means service is due when the combined grease and solids occupy about one-quarter of the operating depth, but local authorities may define the measurement differently.
Record the date, depths, waste volume, and staff member. A simple log reveals whether the interval should be shortened.
Success checkpoint: You have a written measurement before disturbing the layers.
Common mistake: Measuring only the grease cap and ignoring the heavy solids at the bottom.
Step 4: Remove the Floating FOG Layer
Scoop the grease layer into a lined, leak-resistant container. Work slowly from the edges toward the center, and keep the scoop below the surface so the layer does not break apart and spread through the tank.
Do not dilute grease with boiling water. Heat liquefies FOG temporarily, allowing it to move into the building drain where it can cool and harden.
Success checkpoint: No substantial floating cap remains, and the waste container does not leak.
Common mistake: Pouring the collected grease into a sink, toilet, storm drain, or outdoor soil.
Step 5: Remove Water and Bottom Solids
Remove the middle wastewater layer with a bucket or approved wet vacuum, then evacuate the settled food solids from the bottom. A complete cleaning removes both layers because bottom solids also generate odor and reduce available capacity.
Keep liquids and solids contained for legal disposal. Do not discharge them into another drain or onto the ground.
Success checkpoint: The tank floor, corners, and spaces around the baffles are visible.
Common mistake: Skimming only the top and leaving a thick anaerobic sludge layer beneath it.
Step 6: Scrape the Walls, Baffles, and Connections
Scrape the tank walls, lid underside, baffles, inlet, and outlet using a plastic scraper. Follow with a stiff nylon brush, warm tap water, and a small amount of mild degreasing detergent.
Avoid bleach, caustic drain opener, petroleum solvents, and acid cleaners. These chemicals can damage seals, kill biological treatment organisms, create hazardous reactions, or move grease into downstream plumbing without removing it.
Success checkpoint: The surfaces are free of thick, soft grease and loose food sludge.
Common mistake: Using a metal tool that scratches plastic or damages a manufacturer-applied coating.
Step 7: Reinstall the Parts, Refill, and Seal
Inspect baffles for cracks and confirm that the outlet fitting is secure. Replace a flattened or damaged gasket, reinstall the lid evenly, and tighten fasteners in a cross pattern without overtightening plastic hardware.
Refill the trap with clean water until the normal operating level is restored. The water helps maintain the designed hydraulic barrier and prevents abnormal gas movement through the fixture.
Success checkpoint: The cover sits flat, the gasket contacts continuously, and no water leaks during a brief fixture test.
Common mistake: Leaving the trap dry after cleaning, especially in a rarely used facility.
Which Odor-Control Method Works Best?
Mechanical cleaning works best for an existing strong odor because it physically removes the grease and solids producing the gases. Biological treatments can reduce future accumulation, while automatic dosing improves consistency, but neither option replaces scheduled pumping or inspection.
| Method | Typical cost | Best use | Main limitation |
|---|---|---|---|
| Manual cleaning | $25-$75 in materials | Small indoor traps | Requires labor and legal waste disposal |
| Biological enzyme or bacterial product | $30-$80 per month, typical | Preventive maintenance after cleaning | Does not remove a full grease cap or sludge bed |
| Automatic dosing pump | $150-$400 equipment, plus product | Busy kitchens with consistent overnight dosing | Requires calibration, refills, and compatible chemistry |
| Professional indoor trap service | $150-$300 per visit, typical | Businesses lacking safe labor or disposal access | Recurring cost and scheduling |
| Outdoor interceptor pumping | $400-$1,000+ per visit, typical | Buried tanks and high-volume sites | Local frequency and manifest rules apply |
Biological products are not interchangeable. Check whether the product contains enzymes, nonpathogenic bacteria, or both; confirm that the manufacturer allows use in grease interceptors; and follow the label dose rather than increasing it because the odor is strong.
Biological treatment also works poorly immediately after bleach or disinfectant use. Chemical residue can suppress the organisms, while excessive dosing can create foaming or move partially degraded grease downstream. Treat these products as maintenance controls, not emergency cleaners.
How Often Should a Grease Trap Be Serviced?
Service a grease trap before the combined grease and solids layer reaches approximately 25% of the trap’s operating depth, then adjust the schedule using measured accumulation and local requirements. Commercial kitchens often need service every 2-8 weeks, while lightly used units may run longer.
| Setting | Typical service interval | Main driver | Recommended control |
|---|---|---|---|
| Home kitchen with a small interceptor | 1-3 months | Cooking volume and food waste | Wipe pans and inspect monthly |
| Small café | 2-4 weeks | Coffee, dairy, frying, and dishwashing | Measure layers each service |
| Food truck | 1-3 weeks | Compact capacity and high turnover | Clean before the trap reaches 25% |
| Busy restaurant | 2-6 weeks | Frying, menu volume, and dishwasher load | Use a written inspection log |
| Hotel or institutional kitchen | 30-60 days, typical | Large flow and multiple fixtures | Coordinate pumping with local rules |
| Outdoor gravity interceptor | 30-90 days, typical | Tank size, FOG load, and municipal code | Use a licensed pumper and retain records |
The 25% threshold is a management trigger, not a universal law. Municipal sewer authorities may require a fixed calendar, a different percentage, or documented pumping by an approved contractor. The local rule controls.
Why Does the Smell Remain After Cleaning?
A grease trap can remain odorous after cleaning when the lid gasket leaks, the trap is not water-filled, the baffles are defective, or grease has accumulated in the connected drain line. A clean tank does not correct a blocked plumbing vent or contaminated floor drain.
Use this diagnostic order:
- Smell at the lid: Replace the gasket and check cover fasteners.
- Smell at the sink opening: Clean the drain basket, tailpiece, and nearby branch line.
- Smell from a floor drain: Add water to a dry trap, then inspect for sludge or a missing trap seal primer.
- Slow drainage plus odor: Have the downstream line mechanically cleaned or inspected.
- Odor throughout the building: Check plumbing vents and sewer-gas pathways.
- Odor after rain or pumping: Inspect outdoor interceptor covers, risers, cracks, and displaced seals.
A dry trap needs clean water, but the quantity depends on its size. For a small under-sink unit, fill to the manufacturer’s operating level rather than blindly adding a fixed amount. A large interceptor should be refilled according to its design and service instructions.
What Should You Never Put in a Grease Trap?
Never use boiling water, solvent, bleach, acid, or chemical drain opener as a substitute for grease removal. These substances can transport grease into sewer lines, damage plumbing components, create toxic mixtures, or interfere with biological maintenance products.
Avoid these common failures:
| Mistake | Immediate effect | Better recovery |
|---|---|---|
| Pouring boiling water down the drain | Liquefies FOG and moves it downstream | Stop heat input and arrange line inspection if flow slows |
| Using caustic drain opener | Creates chemical exposure and may damage seals | Flush only under professional direction |
| Adding bleach to suppress odor | Masks odor briefly and disrupts biological activity | Clean waste physically and improve sealing |
| Pouring grease into a second drain | Transfers the blockage to another pipe | Contain it for approved disposal |
| Cleaning only the surface cap | Leaves odor-producing sludge below | Remove grease, water, and bottom solids |
| Applying enzyme product to a full trap | Cannot overcome excessive accumulated waste | Pump or empty first, then dose preventively |
Baking soda and vinegar are also poor grease-trap remedies. Their foaming reaction may loosen light drain residue, but it does not empty a trap, remove settled solids, or correct a failed gasket. Never combine vinegar with bleach or commercial drain chemicals.
How Do Homes, Cafés, and Restaurants Differ?
Residential kitchens should prioritize source control because many homes do not need a dedicated grease interceptor unless plumbing design or local code requires one. Commercial kitchens need documented maintenance because flow rate, frying volume, and regulatory obligations make occasional household cleaning inadequate.
Residential Kitchen
Wipe frying pans and greasy plates with paper towels before washing. Store used cooking oil in a sealed container for trash disposal or a local recycling program. Clean the sink strainer weekly and investigate odors from dishwashers, garbage disposals, and floor drains separately.
Do not install a commercial-sized interceptor solely to hide a drain odor. A correctly sized and code-compliant plumbing repair usually solves a residential odor more effectively.
Café or Food Truck
Assign one person to record the trap depth, date, waste quantity, and observed condition. Scrape plates into the waste bin, keep fryer oil out of sinks, and schedule cleaning before the 25% threshold.
A biological product may help between cleanings when the trap manufacturer and local authority permit it. Apply it during low-flow or overnight periods and avoid using disinfectants at the same time.
Restaurant or Institutional Kitchen
Use a recurring pumping contract for outdoor interceptors and retain invoices, manifests, depth measurements, and inspection notes. Train staff to control FOG at the source because no dosing system can compensate for large quantities of fryer oil or food solids entering the plumbing.
Automatic dosing is most useful when staffing changes frequently or overnight application is difficult. It does not eliminate the need for pumping, lid inspection, baffle checks, or downstream pipe maintenance.
When Should You Call a Professional?
Call a licensed plumber or grease-waste contractor when the trap is underground, the odor returns within days, wastewater backs up, the lid cannot seal, or the building has suspected sewer gas. Professional help is also appropriate when workers would need to enter a confined space or handle a large interceptor.
Stop DIY work immediately when:
- Anyone feels dizzy, nauseated, confused, or short of breath.
- The trap is an underground tank with a large or heavy cover.
- Wastewater overflows into food-preparation areas.
- The outlet line remains slow after the trap is emptied.
- A chemical drain product was recently added.
- The cover, baffles, tank, or plumbing connections are cracked.
Typical professional pricing varies by region, access, waste volume, and disposal requirements. Small indoor service commonly costs $150-$300 per visit, while large outdoor interceptor pumping often costs $400-$1,000 or more. Ask whether the quote includes disposal, emergency response, documentation, gasket replacement, and downstream line cleaning.
A Practical Prevention Routine
A reliable odor-prevention routine combines source control, measurement, cleaning, sealing, and selective biological maintenance. The routine should be based on measured FOG accumulation rather than a product label or an arbitrary calendar alone.
- Scrape plates and pans before washing.
- Collect fryer oil and cooking fat separately.
- Check sink strainers and dishwasher screens daily.
- Inspect the lid, gasket, and visible baffles during each service.
- Measure grease and solids before removing them.
- Clean before the combined layer reaches 25% of operating depth.
- Record waste volume, odor intensity, and any slow drainage.
- Use a compatible biological product only after physical cleaning.
- Review the schedule after menu changes, seasonal demand, or equipment installation.
- Arrange professional inspection when odors persist despite a clean, sealed trap.
The best practitioner rule is simple: shorten the interval when the trap reaches the threshold, not when the odor becomes unbearable. Odor is a late warning because grease may already have entered the downstream line by the time staff notice it.
FAQ
Can I pour hot water into a grease trap?
Use only warm tap water during cleaning, not boiling water. Boiling water temporarily liquefies grease and can carry it beyond the interceptor, where the grease cools and adheres to sewer-pipe walls. Mechanical removal prevents relocation of the blockage.
How long does grease trap odor take to disappear?
A strong odor usually improves immediately after complete removal of the grease cap, wastewater, and bottom solids. If the smell remains after several hours, inspect the gasket, drain line, floor drains, baffles, and plumbing vents rather than repeatedly adding deodorizer.
Can I clean a grease trap with a wet/dry vacuum?
A wet/dry vacuum can remove liquid and sludge from some small indoor traps when the equipment is rated for wet waste and the waste is disposed of legally. Do not use a household vacuum for hazardous gas environments, and never vacuum an underground interceptor without professional controls.
Are enzyme products safe for restaurant grease traps?
Compatible enzyme or bacterial products can support preventive maintenance after a trap is emptied. Safety and effectiveness depend on the product formulation, dose, temperature, wastewater flow, and local rules. Enzymes cannot replace pumping and may be impaired by bleach or disinfectants.
Why does my sink smell even though the grease trap is clean?
A clean grease trap does not rule out a dirty sink basket, grease-coated branch line, dry floor drain, dishwasher hose, blocked vent, or leaking cover. Locate the strongest odor first, then inspect each connected component in the direction of wastewater flow.
Does every home need a grease trap?
Most residential homes do not need a commercial grease trap unless local code, a private wastewater system, or a specific plumbing design requires one. Wiping grease from cookware and disposing of cooking oil separately usually prevents household FOG problems more effectively.
The Bottom Line
To get rid of grease trap smell, empty the accumulated grease and food solids, scrub the tank and baffles, repair the lid seal, restore the water level, and inspect connected drains and vents. Keep FOG out of the plumbing, service the trap before the combined layer reaches about 25%, and use biological treatment only as a preventive aid after mechanical cleaning.