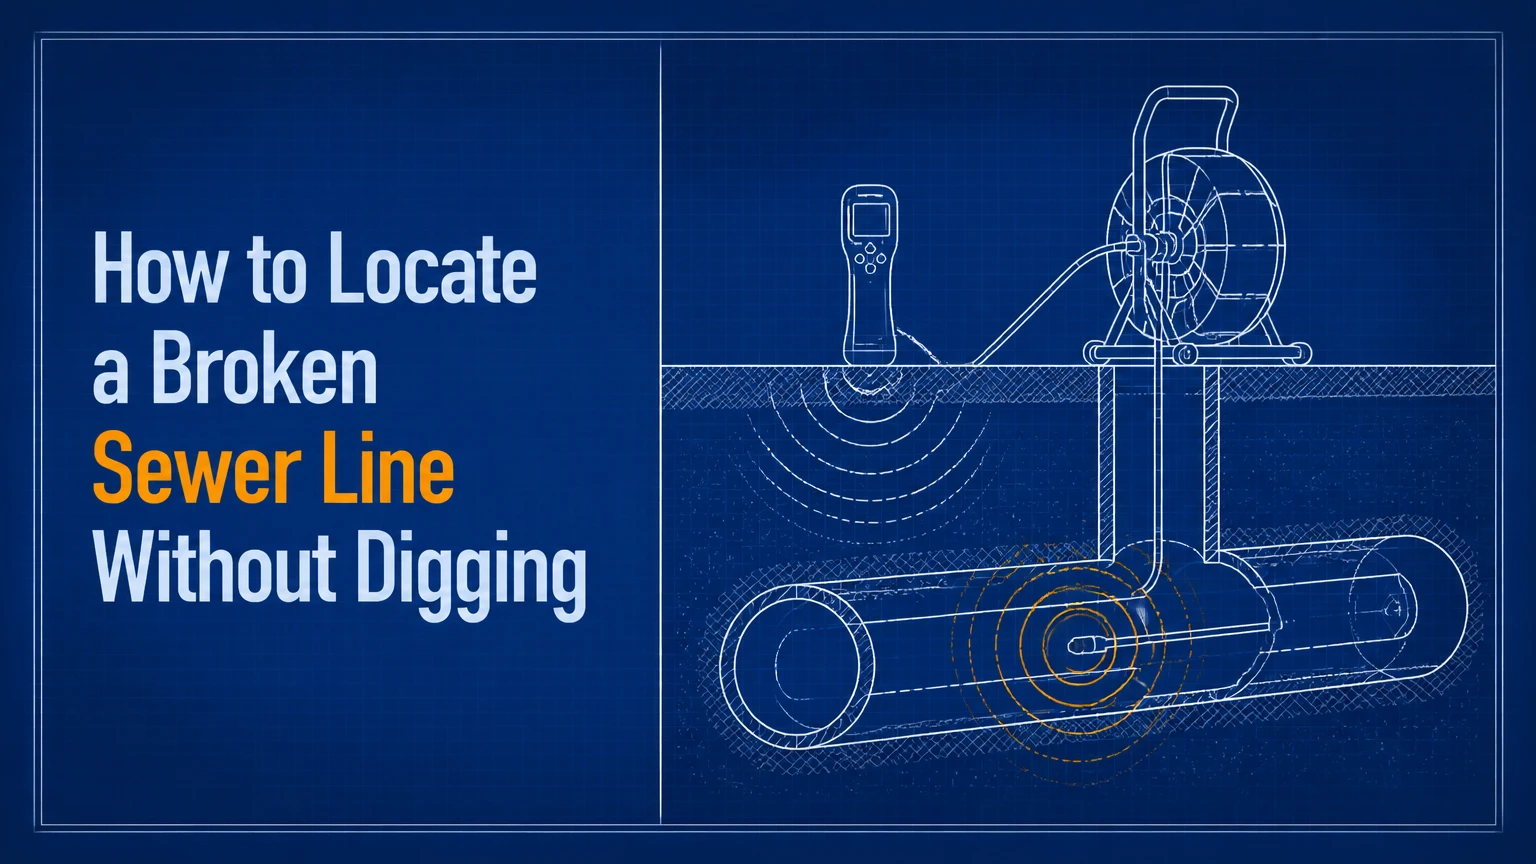
To locate a broken sewer line, a plumber inserts a waterproof CCTV camera with a radio sonde through a cleanout, stops at the suspected defect, and traces the sonde from the surface with an electronic receiver. The technician marks the pipe route, break position, and estimated depth before excavation, reducing the risk of digging in the wrong place.
Key Facts at a Glance
- A CCTV camera shows whether a sewer line has a crack, collapse, root intrusion, offset joint, or blockage.
- A sonde transmits a radio signal that allows a receiver to locate the camera head above ground.
- The sonde identifies the camera position, so the reported break location depends on the camera’s distance from the defect.
- Typical residential camera inspection and locating costs range from $250-$800, with access and cleaning affecting the total.
- A professional locator commonly reports lateral accuracy within several inches, but soil, depth, metal, and electrical interference can reduce precision.
- Call 811 before excavation, and arrange a private utility locate for buried lines that public utility marking does not cover.
What Does Sewer-Line Locating Actually Identify?
Sewer-line locating identifies the underground pipe’s horizontal route, approximate vertical depth, access points, and relationship to a structural defect. Locating a broken sewer line is different from merely finding where the pipe leaves the house, because a repair crew needs the defect’s position and depth.
A useful inspection report should identify the upstream access point, camera distance, pipe material if visible, direction of travel, defect type, clock-face position, and depth at the marked surface location. “Break in the yard” is too vague for excavation planning.
Common sewer defects include:
- Cracked clay, cast-iron, PVC, or ABS pipe
- Separated or offset joints
- Root intrusion through joints or cracks
- A collapsed section that blocks the camera
- A sag, also called a belly, where wastewater and debris collect
- Missing pipe sections caused by erosion or previous repairs
- Grease, scale, wipes, or foreign objects that imitate a structural failure
Surface symptoms can support the diagnosis, but they rarely pinpoint the defect. A green strip may result from wastewater, irrigation, a leaking water service, or natural drainage. A soggy patch may indicate groundwater entering a cracked pipe, yet the wettest area can be several feet away from the actual break.
How does a broken sewer line differ from a clogged line?
A clog restricts flow without necessarily damaging the pipe, while a broken line allows soil, roots, groundwater, or wastewater to move through a structural opening. Repeated backups after snaking, ground settlement over the route, and camera-visible defects make a break more likely than an isolated stoppage.
A single slow sink usually indicates a fixture branch or local drain problem. Several fixtures backing up together, especially toilets, tubs, and floor drains on the lowest level, point toward the building drain or sewer lateral.
A root mass can create both conditions. Mechanical cutting may restore flow temporarily, but the roots often return because the pipe joint or wall remains open. Camera inspection after clearing the obstruction is the practical way to distinguish recurring root growth from a complete collapse.
How Does Electronic Sewer Locating Work?
Electronic sewer locating combines a push camera, a sonde transmitter, and a receiver wand. The camera travels inside the pipe, while the receiver detects the sonde’s radio signal through soil and reports the transmitter’s surface position and estimated depth.
A sonde is usually positioned behind or within the camera head. Many systems use frequencies such as 512 Hz, 640 Hz, 8 kHz, or 33 kHz, depending on the equipment and tracing conditions. The frequency is not universal, so a receiver and sonde must be compatible.
The technician normally pauses the camera at the defect, places a surface mark over the strongest signal, and records the displayed depth. A skilled locator may also take readings from several directions, because a single peak can be distorted by reinforcing steel, fences, utility cables, wet soil, or nearby transmitters.
The camera monitor provides the visual evidence. The receiver provides the underground position. Neither tool alone gives a complete repair layout.
Why can the marked spot differ from the visible defect?
The marked spot can differ because the camera may continue moving after the defect, the sonde may sit behind the lens, or the operator may estimate the camera distance incorrectly. A technician should stop the camera at the defect and confirm the sonde position rather than locate the point from memory.
Camera push rods also bow inside large or deep pipes. The rod’s measured length is therefore an estimate of travel distance, not a surveyed horizontal distance. Bends, junctions, reverse grades, and abandoned connections can further complicate the route.
For major excavation, ask the technician to mark both the pipe route and the defect. Request a second depth reading at the defect and at least one nearby point. Those checks reveal whether the reported depth is stable or affected by signal distortion.
How to Locate a Broken Sewer Line Step by Step
A professional can often complete a standard residential inspection and locate in 1-2 hours when a cleanout is accessible and the pipe is passable. The most important success factor is a clear camera view combined with a confirmed sonde reading at the defect.
Before You Start
| Item | Typical requirement | Why it matters |
|---|---|---|
| Inspection and locating time | 1-2 hours | Covers camera work and surface tracing |
| Typical service cost | $250-$800 | Access, cleaning, and travel change the price |
| Camera access | 3-4 inch cleanout or removed toilet | The camera needs a suitable entry point |
| Safety equipment | Gloves, eye protection, disinfectant | Sewage can contain harmful microorganisms |
| Excavation planning | 811 plus private locate | Public marking may not identify private utilities |
Do not excavate based only on a wet lawn, odor, or a historic plumbing sketch. Confirm the pipe and defect first.
Step 1: Check Whether the Main Sewer Is Involved
Run a controlled fixture test while watching the lowest drain. If a toilet flush causes a basement floor drain to rise, or several fixtures discharge slowly at the same time, stop using the building and arrange a main-line diagnosis.
Do not repeatedly flush toilets into a suspected collapse. Additional wastewater can overflow indoors or force contaminated water into soil through a damaged lateral.
Success checkpoint: The symptom pattern identifies the likely section, such as a fixture branch, building drain, private lateral, or municipal main.
Common mistake: Treating every backup as a broken sewer line. A local kitchen blockage does not justify sewer excavation.
Step 2: Find and Open the Best Access Point
Look for a capped cleanout near the foundation, in a basement, crawlspace, garage, side yard, or buried utility box. Indoor cleanouts may be located near the main stack, while exterior cleanouts often sit several feet from the foundation.
Open the cap slowly and stand to the side. A full pipe can hold wastewater under pressure, especially after fixtures have been used. If sewage rises immediately, close the cap and have a plumber control the discharge.
Success checkpoint: The access point exposes a pipe large enough for the camera and shows the direction toward the street or property line.
Common mistake: Removing a brittle or glued cap with excessive force. A broken cleanout fitting can create a larger repair than the original diagnostic problem.
Step 3: Clear Only Enough Obstruction for Inspection
A camera needs a visible path. A plumber may use a drain cable to open a narrow passage or hydro-jetting to remove grease, sludge, and loose roots before scoping.
Cleaning is not automatically safe. High-pressure water can expose weak pipe walls, dislodge fragile joints, or push debris into a collapsed section. The operator should select pressure and nozzle type for the pipe material and condition.
Success checkpoint: The camera can advance far enough to view the suspected area, and the monitor shows the pipe wall rather than opaque sewage.
Common mistake: Using a large cutting head as a substitute for diagnosis. A cable can punch through soft debris while concealing a separated joint or void.
Step 4: Push the Camera to the Structural Defect
Feed a self-leveling, waterproof camera slowly. Record the distance counter when the lens reaches cracks, offsets, root masses, standing water, or a collapse.
The technician should describe the defect on video and identify orientation using a clock-face position. For example, roots entering at the 2 o’clock position provide more repair information than “roots visible.” A belly should be measured by its beginning, deepest area, and exit point when the camera can pass.
Success checkpoint: The video shows the defect clearly, and the distance counter is recorded at the exact camera position.
Common mistake: Reporting the first obstruction as the break. A camera may stop at roots or debris several feet upstream of the actual structural failure.
Step 5: Trace the Sonde Above Ground
Stop the camera at the defect and activate the compatible receiver. Walk a small grid around the expected route instead of sweeping randomly across the property. The strongest signal generally identifies the sonde’s horizontal position.
Mark the surface with temporary utility marking paint or flags, then record the displayed depth. Take readings from more than one direction and note interference from chain-link fences, vehicles, electrical equipment, rebar, and other buried conductors.
Success checkpoint: The marked point corresponds to the defect shown on video, and the route from the cleanout to that point is also marked.
Common mistake: Marking where the signal first appears rather than where it peaks. The first audible signal is not the transmitter’s centerline.
Step 6: Verify the Mark Before Excavation
Reverse the camera slightly and relocate the sonde. Then advance it back to the same defect and compare the readings. If the mark moves substantially, request a second locating method or a more experienced operator.
For a planned spot repair, expose a small test area only after 811 and private utility marking are complete. Excavation should begin wider and shallower than the pipe’s expected centerline, then proceed carefully as the pipe depth approaches.
Success checkpoint: The pipe route, defect mark, depth, access point, and utility clearances appear on one site sketch or report.
Common mistake: Digging directly over the painted mark without accounting for trench width, shoring, pipe bedding, or nearby utilities.
Which Tools Are Used to Find a Sewer Break?
A camera with an integrated sonde is the standard choice because it provides both visual proof and an above-ground location. Conductive tracing, smoke testing, dye testing, acoustic equipment, and records research become useful when the camera cannot pass or the pipe is inaccessible.
| Method | Typical result | Typical time | Main limitation |
|---|---|---|---|
| CCTV camera plus sonde | Defect image, route, depth | 1-2 hours | Camera cannot pass severe collapse |
| Conductive fish tape | Route and approximate depth | 1-3 hours | Requires an inserted conductor |
| Hydrostatic isolation test | Confirms leakage in isolated section | 1-6 hours | Does not pinpoint the opening |
| Smoke testing | Indicates leaks or illegal connections | 1-3 hours | Smoke may not identify pipe depth |
| Dye testing | Shows flow path or cross-connection | 30-90 minutes | Dye does not prove structural integrity |
Can you find the pipe without excavation?
You can usually trace a sewer line without excavation if the line is accessible and a sonde, conductive tracer, or metal pipe provides a detectable signal. A camera sonde is the most informative approach because it can locate the route while displaying the defect.
A sewer pipe made from PVC, ABS, clay, or vitrified material does not itself carry an electromagnetic signal. A locator therefore cannot reliably find an empty plastic pipe from the surface alone. The transmitter must be inside the pipe, attached to a camera, or connected to a conductive rod.
Municipal maps, cleanout locations, plumbing plans, and the line’s slope can estimate a route, but they do not prove the actual as-built position. Previous additions may have changed the lateral.
How are plastic sewer pipes traced?
Plastic sewer pipes are traced by placing a sonde or conductive tracer inside the pipe. A push camera with a sonde works when the camera can reach the suspected area; a conductive rod or fish tape can help when a camera cannot travel far enough.
A metal fish tape should not be inserted casually into a line containing standing sewage, sharp pipe fragments, or electrical hazards. A professional must also avoid confusing the fish tape’s position with the pipe’s centerline when the tape bows or stops at a bend.
High-frequency signals can travel differently through wet soil and crowded utility corridors. The operator should document the method, frequency, depth, and any areas where the reading is unreliable.
What Does Sewer-Line Locating Cost?
Typical residential sewer-camera inspection and locating costs range from $250-$800, with many straightforward jobs falling near $350-$500. Cleaning, difficult access, toilet removal, travel, after-hours service, and written mapping can raise the invoice.
| Service or complication | Typical cost range | Typical added time | Pricing variable |
|---|---|---|---|
| Basic camera inspection | $250-$500 | 45-90 minutes | Accessible cleanout |
| Camera inspection with locating | $350-$800 | 1-2 hours | Defect marking and depth |
| Mechanical cable clearing | $150-$500 | 30-120 minutes | Roots and obstruction density |
| Hydro-jetting before camera work | $300-$800 | 1-3 hours | Pipe size and access |
| Toilet removal for access | $150-$400 | 30-90 minutes | Reinstallation and seal |
| Private utility locating | $150-$500 | 1-3 hours | Property size and utility count |
These figures are typical practitioner ranges, not a guaranteed national price. A written quote should state whether video delivery, locating, depth measurement, cleanup, traffic control, and return visits are included.
What should a sewer inspection report contain?
A useful report includes the video file, access point, camera distance, defect description, pipe material, approximate diameter, route markings, depth readings, photographs, and a repair recommendation. The report should distinguish observed facts from opinions about cause or responsibility.
Ask whether the camera distance begins at the cleanout or at the lens after the push rod enters. That distinction matters when another contractor uses the report to find the same location.
Which Method Should You Use?
Use CCTV with a sonde for most accessible residential sewer breaks, hydrostatic testing to confirm a concealed under-slab leak, and conductive tracing when a nonmetallic line needs route mapping but the camera cannot reach the target. No single method both proves every leak and identifies every break.
| Situation | First choice | Confirmation method | Excavation expectation |
|---|---|---|---|
| Yard lateral with cleanout | CCTV plus sonde | Second sonde reading | Small targeted excavation |
| Pipe under concrete slab | CCTV if accessible | Hydrostatic isolation test | Slab opening or trenchless repair |
| PVC line with blocked camera | Conductive tracer | Small exploratory exposure | Route verification required |
| Suspected illegal connection | Smoke testing | Dye or camera inspection | Usually none initially |
| Collapsed line near street | Camera to collapse | Surface route tracing | Utility and permit review |
| Unknown route with no cleanout | Records plus camera access | New cleanout or toilet access | Possible access excavation |
Hydrostatic testing fills an isolated drainage section with water and monitors whether the level falls. The test can confirm leakage, but it cannot identify whether the opening is beneath a bathroom, foundation edge, or exterior cleanout.
Smoke testing can reveal cracks, disconnected fittings, or improper connections when smoke exits through soil, cleanouts, or indoor traps. Smoke location is an indicator, not a depth measurement. Dye testing has a similar limitation.
How Accurate Is a Sewer Locator?
A well-executed sonde locate may place a shallow, accessible defect within several inches laterally, while deeper lines and electrically noisy sites can produce larger errors. Depth readings are estimates, not a substitute for careful excavation or survey-grade utility detection.
Accuracy depends on:
- Pipe depth and soil composition
- Sonde frequency and receiver quality
- Nearby cables, metallic pipes, fences, and reinforced concrete
- Whether the sonde is centered or tilted inside the pipe
- Camera rod flex and distance-counter accuracy
- Operator training and signal interpretation
- Whether the camera stopped exactly at the visible defect
A technician should mark uncertainty when the signal is distorted. A professional report that states “approximately 4 feet deep, plus or minus 6 inches” is more useful than false precision.
The locator also cannot identify the pipe’s full trench width, bedding condition, voids, or utility separation. Those conditions become visible only during excavation or specialized subsurface investigation.
What Happens When the Camera Cannot Pass?
When a camera cannot pass, the first response is to identify why it stopped, not to force it. Roots, grease, a sharp offset, a collapsed crown, standing water, or an undersized access opening each require a different next step.
A plumber may clear soft blockage, use a smaller camera, access the line from a downstream manhole, or insert a conductive tracer. If the pipe is completely collapsed, the camera may locate the upstream edge of the collapse, but the exact center of the damaged section may require a second access point or controlled exposure.
Do not force a rigid rod through a fragile clay or severely offset pipe. The camera head can become trapped, and further pressure can enlarge the failure.
What if there is no cleanout?
A plumber can access the sewer through a removed toilet, an interior branch cleanout, a basement drain, or a newly installed exterior cleanout. Toilet removal adds labor and requires a new wax or rubber seal during reinstallation.
A missing cleanout is itself useful planning information. Installing one after the repair can reduce future diagnostic cost and provide safer access for maintenance.
What Must Happen Before Digging?
Call 811 before excavation in the United States and follow the local waiting period, which varies by state and project type. Public utility marking generally covers utility-owned lines, while private sewer laterals and private electric, gas, irrigation, and septic components may require a separate locating service.
The Common Ground Alliance promotes the national 811 process for requesting utility marks before digging. The 811 ticket does not authorize excavation outside the marked tolerance zone, remove the need for hand digging, or guarantee that every privately installed line will be identified.
Before a shovel enters the ground:
- Obtain the 811 ticket and wait until all listed utilities respond.
- Hire a private locator for homeowner-owned or unmarked services.
- Check local permits, easements, right-of-way rules, and sidewalk requirements.
- Mark the sewer route separately from utility marks.
- Plan trench access, soil stability, water control, and shoring.
- Keep the camera video and depth report available for the excavator.
Who Pays for a Broken Sewer Lateral?
Responsibility depends on local ordinances, property boundaries, easements, and utility ownership. Many municipalities maintain the public sewer main, while the property owner maintains the private lateral, but some jurisdictions assign responsibility to a particular connection point.
Do not assume the nearest manhole defines ownership. Obtain the sewer department’s written policy, inspect the property survey, and check recorded easements. Insurance coverage also varies: sudden damage may receive different treatment from gradual root intrusion, poor maintenance, or normal deterioration.
A located break under a public sidewalk may require right-of-way permission even when the homeowner owns the pipe. A break beneath a neighbor’s easement may require access coordination before repair.
Common Mistakes and How to Fix Them
| Mistake | Why it fails | Better correction | Verification |
|---|---|---|---|
| Digging at the wettest soil | Water can migrate from the defect | Camera-locate the sonde | Video and depth mark |
| Scoping a full pipe | Opaque sewage blocks the lens | Control flow and clear the line | Visible pipe wall |
| Using a generic metal detector | Sewer pipe may be plastic or clay | Use a compatible sonde receiver | Detected transmitter |
| Locating only the cleanout | The break may be far downstream | Trace the camera at the defect | Route plus defect mark |
| Calling 811 after excavation begins | Utilities may remain unmarked | Request marks first | Completed utility responses |
| Trusting a sketch from decades ago | Remodels may reroute plumbing | Verify with camera and tracing | Current site map |
Two practitioner rules prevent many expensive errors. First, a cable that restores flow does not prove the pipe is sound. Second, a surface depression identifies a possible void or leak zone, not necessarily the pipe centerline.
A third rule matters under structures: a pressure test can establish that a concealed section leaks, but only a camera, tracer, or carefully planned exposure can locate the repair point.
Situations That Need a Different Plan
Sewer break under a driveway
Locate the route and defect before cutting concrete. Ask the contractor to compare spot excavation, pipe bursting, and cured-in-place lining, because access pits, pipe condition, diameter, bends, and municipal approval determine whether trenchless work is feasible.
Sewer line beneath a foundation slab
Use camera inspection through an accessible drain when possible, then isolate and pressure-test the suspected section if the camera cannot provide a complete answer. Slab removal should follow documented evidence, not only moisture staining.
Sewer line near a tree
Roots commonly enter through joints or cracks, so root cutting alone is temporary when the opening remains. Camera footage should show whether the pipe has a repairable joint defect, widespread fractures, deformation, or collapse.
Intermittent sewer odor without backups
Odor alone does not prove a buried sewer break. Check dry traps, venting, cleanout caps, roof drainage, and indoor leakage before ordering excavation; smoke testing can help identify hidden openings or illegal connections.
The Bottom Line
To locate a broken sewer line, inspect the pipe with a CCTV camera, stop the camera at the confirmed defect, trace its sonde from the surface, record the depth, and verify the mark before excavation. Camera evidence prevents confusion between a clog and a structural failure, while 811 and private utility locating reduce excavation risk. Use hydrostatic, conductive, smoke, or dye testing when access or pipe condition limits camera inspection.
Frequently Asked Questions
Can a sewer camera see a leak underground?
A sewer camera can see structural openings, cracks, separated joints, root intrusion, and collapse inside the pipe, but it may not visibly show every groundwater leak. A small infiltration path can be hidden by standing water or sediment, so pressure testing and flow observation may supplement the video.
How deep are residential sewer lines usually buried?
Residential sewer laterals often lie approximately 2-6 feet below finished grade, but depth varies with foundation elevation, local frost requirements, street connection, slope, and municipal standards. A camera locator should measure the actual depth at the defect rather than rely on a typical burial estimate.
Can tree roots break a sewer pipe?
Tree roots can enter through joints and cracks, enlarge openings, displace pipe sections, and contribute to collapse. Roots usually exploit an existing defect rather than fracture an intact modern pipe immediately, so recurring root removal should be followed by camera inspection and structural repair planning.
Does hydro-jetting find a broken sewer line?
Hydro-jetting cleans and opens a sewer line, but it does not locate a break by itself. Jetting can improve camera visibility, although aggressive pressure may damage fragile or badly separated pipes. The locating step still requires a camera sonde, tracer, or another mapping method.
How long does a sewer-line repair locate take?
A straightforward camera inspection and sonde locate typically takes 1-2 hours after the technician reaches a usable cleanout. Toilet removal, blockage clearing, difficult landscaping, deep pipe placement, traffic control, and private utility marking can extend the appointment or require a separate visit.
Should a home buyer get a sewer scope?
A home buyer should obtain a sewer scope when the property has an older lateral, mature trees, recurring drainage problems, a long connection to the street, or no accessible cleanout. The inspection can identify defects before closing, when repair responsibility and price negotiations remain available.