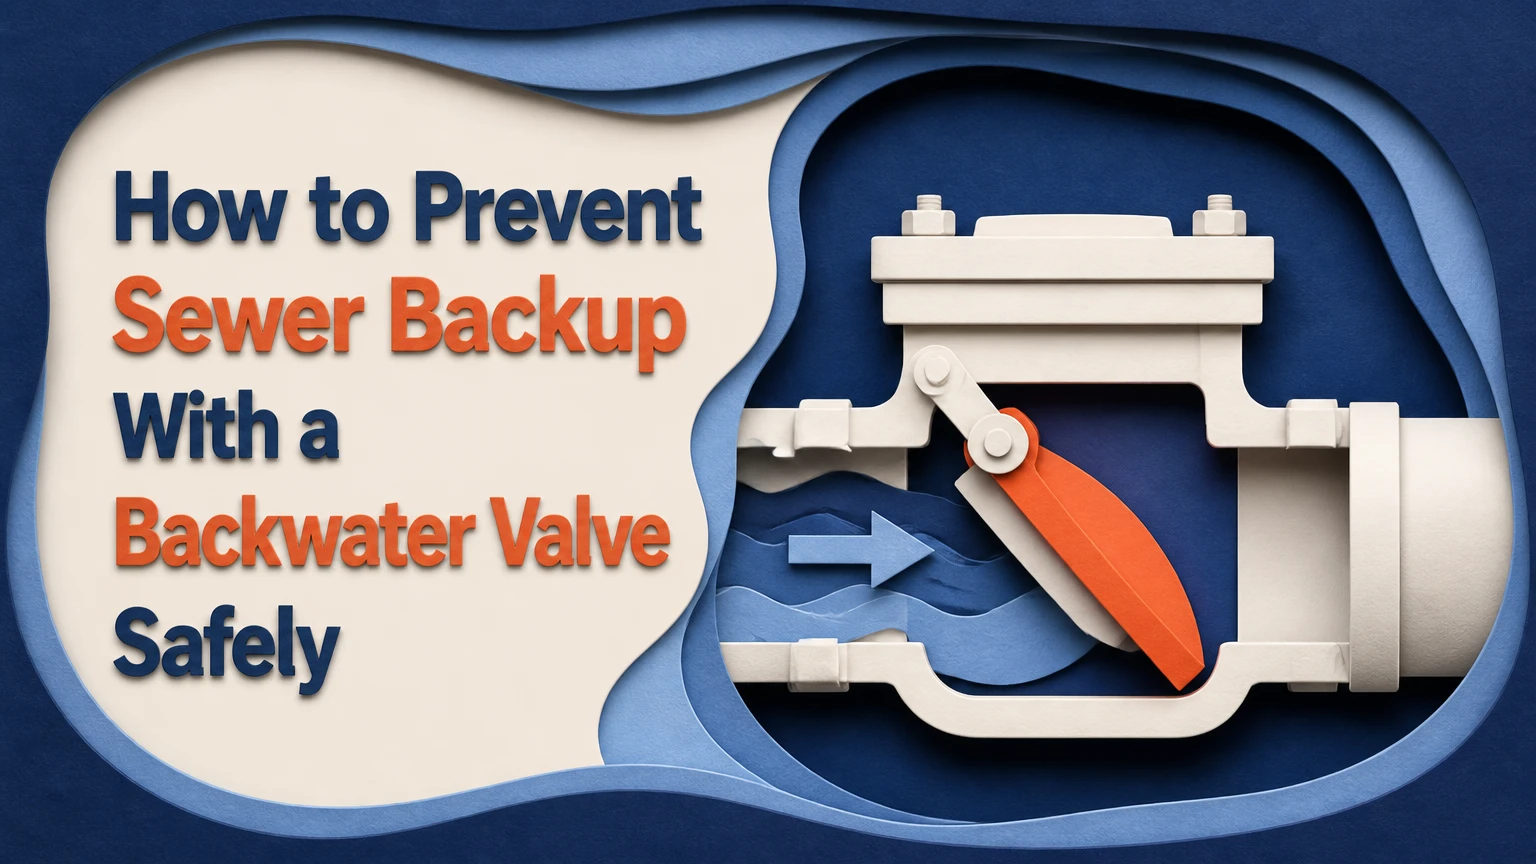
A backwater valve prevents sewer backup by allowing household wastewater to flow toward the municipal sewer while blocking reverse flow into the building drain. For most basement homes, a licensed plumber installs a correctly sized, normally open valve downstream of protected fixtures, adds accessible maintenance access, and tests the flapper before restoring the floor.
Key Facts at a Glance
- A backwater valve protects only the drainage fixtures located upstream of the valve.
- A normally open valve permits gravity drainage and closes when sewage reverses toward the building.
- A retrofit through a basement slab typically costs about $1,500-$4,000, depending on excavation and restoration.
- When the valve is closed, residents must stop using toilets, sinks, showers, washing machines, and other connected fixtures.
- Valve size, orientation, access, and placement must comply with the local plumbing code and the manufacturer’s instructions.
- A backwater valve does not repair a blocked private sewer lateral or prevent every form of basement water entry.
What Does a Backwater Valve Do?
A backwater valve is a one-way drainage device installed in a building sewer or building drain to stop sewage from flowing backward. The valve normally remains open so wastewater can leave the property by gravity, but a flapper or gate moves into a seat when downstream flow reverses.
The City of Toronto describes a backwater valve as “a device that prevents sewer water from backing up into your home.” The practical qualification is important: the device protects only the fixtures connected upstream of its location. A basement bathroom, laundry drain, or floor drain connected downstream can remain exposed even when the valve is functioning correctly.
Sewer backup commonly occurs when a municipal sewer reaches capacity during intense rainfall, when a public main is obstructed, or when a private sewer lateral cannot carry flow. A backwater valve addresses reverse pressure from the downstream sewer. It does not increase the capacity of a damaged pipe, remove a tree root, or stop groundwater entering through foundation cracks.
How the valve works
Under normal conditions, water from toilets, sinks, showers, and appliances moves through the building drain toward the street. That flow passes through the open valve with relatively little obstruction when the valve has the correct diameter and remains free of debris.
During reverse flow, sewage pushes the flapper toward its seat. The flapper closes the passage, preventing contaminated water from traveling toward protected fixtures. When downstream pressure falls and household drainage is no longer opposed, the flapper opens again.
Most residential backwater valves are passive mechanical devices. They do not require electricity, internet service, a pump, or a phone application. The valve does not necessarily create an airtight seal, and rising pressure should not be treated as proof of a perfect seal. A damaged seal, trapped solids, or an incorrectly installed body can still allow leakage.
Who Benefits Most From a Backwater Valve?
Homes with below-grade plumbing fixtures, a basement bathroom, or a history of sewage intrusion usually receive the greatest benefit. Risk increases when the lowest drain or fixture sits near, or below, the elevation of the nearby street sewer.
A municipal sewer surcharge can affect an entire neighborhood, but local risk depends on more than rainfall. Street elevation, sewer design, foundation drainage, private lateral condition, and the location of the building connection all influence the result. A plumber or municipal sewer professional should map the drainage system before selecting a valve.
A backwater valve is less useful when the primary problem is groundwater, rainwater entering through window wells, or a sanitary lateral blocked between the valve and the street. Those conditions require different controls.
Which Valve Type Fits a Home?
A normally open, full-port backwater valve is generally the appropriate starting point for a residential main building drain because it permits normal drainage and can vent the drainage system through the open passage. A normally closed check valve is more suited to selected branch applications, but local code and the drainage design determine whether it is acceptable.
| Valve arrangement | Typical application | Main advantage | Main limitation |
|---|---|---|---|
| Normally open flapper | 4-inch residential building drain | Permits continuous gravity drainage | Requires inspection and debris removal |
| Normally closed check valve | Isolated branch or fixture drain | Blocks reverse flow by default | Can restrict flow and trap solids |
| Manual gate or slide valve | Special commercial or industrial system | Provides deliberate shutoff | Requires a person to operate it |
| Motorized or monitored valve | Special engineered installation | Can provide alarms or remote status | Needs power, controls, and service |
A manual gate valve is not automatically a safer residential choice. Closing a main sanitary valve can stop outgoing drainage, and leaving it shut can create a wastewater problem inside the building. Motorized products also need a documented failure position, backup power strategy, and maintenance plan.
What is a full-port design?
A full-port valve has an internal passage intended to preserve the effective flow area of the connected drain. “Full port” does not mean zero restriction. A flapper, hinge, access chamber, and changes in pipe geometry still create locations where wipes, grease, and sediment can collect.
Never select a valve solely by price. Confirm the nominal pipe diameter, approved orientation, flow direction, material compatibility, access requirements, and certification recognized by the local authority.
Where Should a Backwater Valve Be Installed?
The valve should be installed in the building drain or sewer lateral so every fixture that needs protection is upstream of it, while the valve remains accessible for inspection. The exact location depends on the plumbing layout, cleanouts, elevation, structural slab, and local code.
A camera inspection helps identify pipe material, breaks, roots, offsets, standing water, and the connection between basement fixtures and the street. A technician should also trace branch lines, because installing the valve upstream of only one fixture can leave another low-level drain unprotected.
Do not rely on a universal “2 feet from every junction” rule. A fixed distance is not a substitute for hydraulic design or code compliance. Keep the valve away from locations where fittings, branch discharge, or structural movement could interfere with the flapper, but let the installer document the reason for the selected position.
| Design factor | Typical residential value or requirement | Why it matters |
|---|---|---|
| Main drain diameter | Commonly 4 inches, sometimes 3 or 6 inches | Determines valve size and flow capacity |
| Installation orientation | Usually horizontal, as the manufacturer specifies | Allows the flapper to seat correctly |
| Access opening | Manufacturer-sized cover at finished-floor level | Permits inspection and cleaning |
| Protected fixtures | Basement drains and fixtures upstream of valve | Defines the actual protection zone |
| Pipe material | PVC, ABS, clay, or cast iron | Determines adapters and connection method |
| Code approval | Local plumbing authority and listed product | Controls lawful installation and inspection |
A valve must remain accessible after flooring, storage, or furniture changes. Carpet, tile, cabinets, or a permanent platform should never conceal the inspection cover.
How to Prevent Sewer Backup With a Backwater Valve: Six Steps
Professional installation usually takes several hours of active work, but a retrofit can occupy a full day once inspection, excavation, testing, concrete work, and cleanup are included. The factor that most determines success is not the valve brand. It is placing the valve so all intended fixtures are protected without disrupting normal drainage.
Before You Start
| Requirement | Typical planning value | Verification |
|---|---|---|
| Professional labor | 4-8 active hours | Contractor site assessment |
| Retrofit budget | $1,500-$4,000 | Written excavation and restoration quote |
| New-construction budget | $500-$800 typical | Foundation and drain plans |
| Permit review | 3-10 business days typical | Local building or plumbing office |
| Slab opening | About 2-4 feet wide in many retrofits | Confirm after pipe locating |
| Safety equipment | Gloves, eye protection, boots, respirator where required | Contamination and dust control |
Do not excavate until the installer has located the drain, checked utility information, identified the protected branches, confirmed valve approval, and obtained any required permit.
Step 1: Map the drainage system
Have the plumber camera-scope the private sewer lateral and trace every basement fixture. The camera should identify whether the pipe has roots, cracks, belly sections, grease, or an existing obstruction that would undermine the installation.
You will know this step is complete when the technician can mark the pipe route, valve position, flow direction, and protected fixtures on a plan. A common mistake is installing a valve over a convenient pipe section without confirming that the basement toilet joins upstream.
Step 2: Select and orient the valve
Choose a valve with the pipe’s actual internal and nominal dimensions, not an assumed four-inch size. Confirm the arrow showing normal flow, the approved installation angle, the access clearance, and the manufacturer’s replacement parts.
The valve should sit level and in the orientation specified for its model, which is commonly horizontal for a main building drain. You will know the selection is correct when the flapper moves freely, rests open during normal flow, and can reach its seat without scraping the housing.
A common mistake is installing a vertical check valve in a location designed for a horizontal flapper. Gravity can hold the mechanism in the wrong position, reduce flow, or prevent reliable closure.
Step 3: Expose the building drain
For a slab retrofit, the crew cuts a controlled opening in the concrete, removes the slab, and excavates carefully around the pipe. Dust control, temporary shoring where needed, and contamination precautions matter because sanitary drainage can contain pathogens.
You will know the excavation is adequate when the installer has enough room to cut, couple, level, and service the valve without stressing the existing pipe. A common mistake is making the opening too small, then forcing couplings or leaving the access chamber misaligned.
Step 4: Cut in the valve
The plumber isolates water use, cuts out the required pipe section, and connects the valve with approved couplings or solvent-welded fittings appropriate to the pipe material. Cast-iron, clay, PVC, and ABS require different connection methods, and transition couplings must match the materials.
The installer should verify the arrow, gasket seating, pipe support, slope, and clean internal passage before backfilling. You will know the splice is sound when the valve sits without pipe strain and a controlled flow test shows no leakage at the joints.
A common mistake is cutting the pipe before confirming the valve’s insertion length. The result can be a forced connection, reduced slope, or a valve that sits under mechanical stress.
Step 5: Build accessible inspection access
Install a riser, sleeve, or access chamber from the valve to the finished floor, using the configuration approved for the product. The cover must remain removable without destroying flooring, and the chamber should not collect groundwater or surface wash unless designed for that condition.
You will know access is adequate when an inspector can see the flapper, remove debris, and replace service components without breaking concrete. A common mistake is burying the cover beneath laminate or placing it under a fixed cabinet.
Step 6: Test, document, and restore the floor
Test normal discharge, reverse-flow closure, joints, and the access cover before backfilling. Restore the excavated material in compacted lifts and replace concrete after the valve has passed inspection and the installer has recorded its location.
You will know the job is complete when the permit authority, where required, has inspected it, the valve model and size are documented, and the owner has written instructions for cleaning and emergency water shutdown. A common mistake is treating concrete replacement as the final test instead of testing first.
How Much Does Installation Cost and Take?
A typical basement retrofit costs approximately $1,500-$4,000, while new-construction installation commonly costs about $500-$800 because the drain is accessible before the slab is poured. Local labor rates, pipe depth, finished-floor restoration, cast-iron work, permits, and lateral repairs can move the total substantially.
| Cost component | Typical range | Cost increases when |
|---|---|---|
| Backwater valve | $150-$900 | Larger diameter or commercial-rated product is required |
| Camera inspection | $150-$500 | Access is difficult or a detailed report is requested |
| Slab excavation and pipe work | $900-$2,500 | Pipe is deep, cast iron, or surrounded by obstructions |
| Concrete and floor restoration | $300-$1,200 | Tile, engineered flooring, or finished rooms are involved |
| Permit and inspection | $50-$150 typical | Local fees or multiple inspections apply |
These are planning ranges, not a national price schedule. A rebate may reduce the owner’s cost, but programs are local and may require preapproval, an approved contractor, inspection records, or installation before reimbursement.
Active installation often takes 4-8 hours. Permit approval may take 3-10 business days, and concrete generally needs at least 24-48 hours before normal heavy loading, according to the restoration product and contractor.
What Should You Do When the Valve Closes?
Stop all water use immediately when the backwater valve closes or a sewage alarm activates. Do not flush toilets, run a washing machine, use sinks, shower, or operate appliances that discharge into the protected drain system.
The valve prevents municipal sewage from entering, but it also prevents your wastewater from leaving while closed. Continued household use can fill the building drain and force sewage out through a basement toilet, floor drain, or cleanout.
Use this emergency sequence:
- Tell everyone in the property to stop using plumbing.
- Confirm whether the valve is closed, without opening an exposed contaminated chamber.
- Call the municipality if a public sewer surcharge is suspected.
- Call a licensed plumber if the valve is stuck, leaking, or inaccessible.
- Keep people and pets away from sewage.
- Photograph damage and contact the insurer before discarding affected materials, unless immediate safety action requires removal.
Never stand in contaminated water near electrical equipment. A sewage cleanup contractor should handle porous materials and disinfection when contamination has occurred.
What a Backwater Valve Cannot Prevent
A backwater valve cannot prevent a private sewer blockage located downstream of the valve. If roots, grease, collapsed pipe, or a belly obstructs the lateral between the valve and the street, household wastewater may back up inside the property even though municipal sewage cannot reverse through the valve.
The device also does not stop:
- Rainwater entering through foundation cracks or window wells.
- Roof downspouts connected improperly to a sanitary drain.
- Sump-pump discharge overwhelming a drainage system.
- Backup from an unprotected basement fixture.
- Sewage discharged by occupants while the valve is closed.
- Odors caused by a dry trap, damaged vent, or poor plumbing maintenance.
This limitation changes the protection plan. A basement may need a sump pump, foundation drainage, a sewage ejector system, a properly trapped floor drain, downspout disconnection, or lateral rehabilitation in addition to a backwater valve.
Backwater Valve Versus Other Protection Options
A backwater valve is strongest against reverse flow from a public sewer, but it is not the only basement-flooding control. The right combination depends on whether the property has gravity drainage, below-grade fixtures, stormwater exposure, or recurring private-line blockages.
| Protection measure | Main threat addressed | Typical cost range | Key limitation |
|---|---|---|---|
| Backwater valve | Reverse sanitary sewer flow | $1,500-$4,000 retrofit | Does not stop groundwater |
| Sump pump system | Groundwater and footing-drain water | $1,000-$4,000 | Needs power and discharge capacity |
| Sewage ejector pump | Below-grade fixtures | $2,000-$6,000 | Requires tank, pump, alarm, and maintenance |
| Sewer lateral repair | Roots, cracks, collapse, blockages | $2,000-$15,000+ | Does not stop a municipal surcharge |
| Floor-drain check valve | Local branch reverse flow | $100-$800 installed | Protects only that branch |
A check valve in one basement floor drain cannot substitute for a main-line backwater valve when multiple fixtures require protection. Conversely, a main valve cannot solve groundwater entering through a foundation wall.
How Often Should You Clean and Test the Valve?
Inspect the valve according to the manufacturer’s schedule and local program requirements, with annual inspection a sensible minimum for many homes and more frequent service appropriate after a backup or in a grease-heavy household. Some municipal programs recommend periodic maintenance, but a universal biannual interval does not apply to every product.
The maintenance visit should include:
- Opening the approved access cover safely.
- Checking that the flapper moves freely.
- Removing wipes, hair, grease, sediment, and stones.
- Inspecting hinges, floats if present, seals, and fasteners.
- Checking for cracked housings or displaced couplings.
- Confirming that the access cover remains watertight and reachable.
- Recording the date and any replacement parts.
Use mechanical cleaning and the manufacturer-approved cleaner. Avoid caustic chemical drain openers, which can damage seals, attack some pipe materials, and expose workers to corrosive residue.
Do not reach into a contaminated chamber without appropriate protective equipment. If the flapper is broken, the valve body leaks, or sewage is actively flowing, close the access cover and call a qualified plumber.
Common Failure Modes and Repairs
| Symptom | Likely cause | Appropriate response |
|---|---|---|
| Gurgling at basement drain | Partial obstruction or restricted venting | Stop water use and arrange inspection |
| Slow drainage after installation | Undersized valve, debris, poor slope, or pipe belly | Camera-scope and verify sizing |
| Sewage enters during city surcharge | Valve absent, reversed, bypassed, or downstream fixture unprotected | Map branches and inspect installation |
| Valve remains closed | Debris, damaged hinge, displaced seal, or continuing surcharge | Stop water use and service the mechanism |
| Odor near access cover | Dirty chamber, failed gasket, dry trap, or vent problem | Clean, inspect seal, and check venting |
| Leaking pipe joint | Incorrect coupling, damaged gasket, or pipe movement | Shut down use and have the joint rebuilt |
A partially closed flapper can explain gurgling, but gurgling is not proof of one specific fault. The same symptom can result from a blocked lateral, restricted vent, or excessive discharge from an upper fixture.
One practitioner rule matters here: never “test” a valve by forcing sewage backward through the drainage system. Use the manufacturer’s test method, a controlled inspection, or a plumber’s diagnostic equipment.
Can You Install a Backwater Valve Yourself?
A technically experienced homeowner may understand the mechanical steps, but a main-line retrofit is usually poor DIY work because it involves sanitary contamination, concrete excavation, pipe cutting, drainage design, permits, and inspection. A licensed plumber is the safer choice for an occupied home or any installation serving multiple fixtures.
DIY errors can remain hidden until the next surcharge. The most expensive failures are often invisible: the valve protects the floor drain but not the basement bathroom, the body is reversed, the pipe slope is reduced, or the access cover is permanently buried.
Ask the contractor for a written scope that identifies the valve brand and model, pipe size, protected fixtures, access location, testing method, permit responsibility, restoration work, warranty, and maintenance instructions.
FAQ
Will a backwater valve stop sewage from coming through a toilet?
A backwater valve can protect a toilet only when that toilet’s drain connects upstream of the valve and the valve closes correctly. If the toilet discharges downstream, or if occupants flush while the valve is shut, sewage can still appear at that fixture. A drainage map is necessary before installation.
Does a backwater valve need electricity?
A standard passive backwater valve does not need electricity because gravity and reverse hydraulic flow operate the flapper. An electronic alarm or motorized valve does require power, and a motorized system should have a documented response to power loss, battery failure, sensor failure, and manual override.
Can a backwater valve prevent a sewer lateral clog?
No. A backwater valve blocks reverse flow but cannot clear or repair a root intrusion, grease accumulation, pipe collapse, or sagging lateral. If multiple fixtures drain slowly when no municipal surcharge exists, arrange a camera inspection and cleaning rather than replacing the valve alone.
Should a basement floor drain have its own check valve?
A branch check valve can protect an isolated floor drain when the drainage design and local code permit it, but it does not replace whole-building protection. A main-line backwater valve is normally more appropriate when a basement bathroom, laundry, utility sink, and floor drain share the building drain.
Does homeowners insurance cover sewer backup?
Coverage varies by policy, location, deductible, exclusions, and endorsement. Standard policies often treat sewer backup separately from ordinary water damage, so ask the insurer whether sewer-backup coverage includes cleanup, finished-floor replacement, personal property, and additional living expenses.
Is a backwater valve worth installing in a house without a basement?
The benefit is usually lower when all plumbing fixtures are well above the municipal sewer elevation, but a valve can still protect a low crawlspace, slab-level fixture, or vulnerable building drain. A plumber should compare the installation cost with local surcharge history and the elevation of the lowest drain.
The Bottom Line
To prevent sewer backup with a backwater valve, install a correctly sized, normally open device on the building drain so every intended basement fixture remains upstream and the inspection cover stays accessible. Have the system camera-inspected, permitted where required, professionally tested, and maintained on the manufacturer’s schedule.
A backwater valve is one layer of protection, not a complete flood-control system. Pair it with a sound sewer lateral, working sump-pump or ejector equipment where applicable, disconnected downspouts, accessible cleanouts, alarms, and a strict no-water-use plan whenever the valve closes.