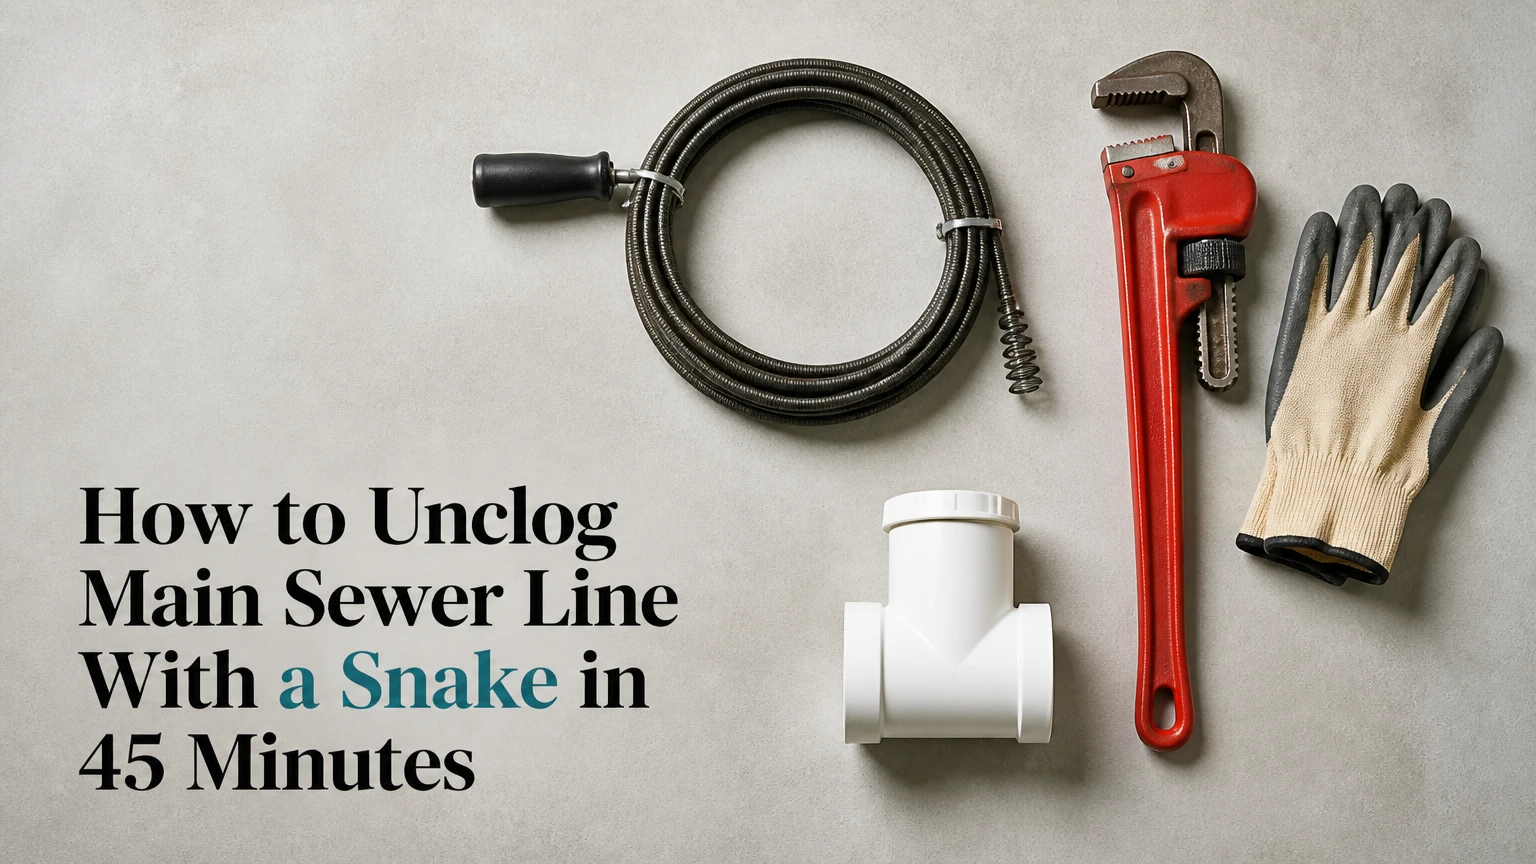
To unclog a main sewer line with a snake, use a properly sized motorized drain-cleaning machine through an accessible cleanout, feed the cable slowly in forward rotation, work the cutter through the obstruction, then flush and verify the line. The process typically takes 30-90 minutes, but roots, fragile pipe, sewage exposure, and structural damage make professional help safer in many homes.
Key facts at a glance
A residential building sewer commonly measures 4 inches, while some older or larger systems use 5-6-inch pipe.
A 5/8-inch cable is a typical rental choice for a sound 4-inch residential main; 3/4-inch cable is stiffer and harder to control.
A hand-crank sink auger cannot reliably clear a buried main sewer lateral.
Open the cleanout slowly because the pipe may contain standing wastewater, even though the line is not normally pressurized like a water pipe.
A snake creates a passage through debris but may leave grease, scale, or root fragments on the pipe wall.
Repeated backups, concrete-like resistance, or broken pipe fragments justify a sewer camera inspection.
Is a Main Sewer Line Snake Different From a Drain Snake?
A main sewer line snake is a motorized drain-cleaning machine with a long steel cable and interchangeable cutting head. The machine rotates the cable so the head can pierce, cut, loosen, or retrieve an obstruction inside a buried building sewer.
A small sink auger usually carries a 1/4-inch or 3/8-inch cable for short branch drains. A main-line machine commonly uses a 5/8-inch cable over 75-100 feet, although the correct specification depends on the machine manufacturer, pipe diameter, access point, and blockage.
A sewer snake does not inspect or repair the pipe. It can restore flow while leaving a cracked joint, root entry, heavy scale, or collapsed section in place. That limitation matters when the same line blocks again weeks or months later.
What blockage can a snake remove?
| Blockage type | Useful cutter | Typical result | Limitation |
|---|---|---|---|
| Soft wipes or rags | Retriever or boring bulb | Pulls or breaks apart material | May push part of the mass downstream |
| Grease accumulation | C-cutter or U-cutter | Opens a channel through grease | Often leaves wall deposits behind |
| Fine tree roots | Root saw or spiral cutter | Cuts roots across the pipe | Roots usually return without pipe repair |
| Mineral scale | Descaling cutter | Breaks loose deposits | Can damage weak clay or cast iron |
| Broken pipe or concrete | None recommended for DIY use | Stop and investigate | Cutting may worsen a collapse |
Which Sewer Snake and Cable Size Should You Rent?
Rent a commercial drum machine with a 5/8-inch cable for a typical, accessible 4-inch residential main made from sound PVC, ABS, or cast iron. Choose a 3/4-inch cable only when the machine and pipe are rated for it and the operator can manage its additional weight and torque.
The cable must be large enough to remain stable in the pipe but small enough to travel through bends. A 1/4-inch or 3/8-inch cable can loop inside a 4-inch sewer, while an oversized root cutter can become trapped in a damaged or sharply offset line.
| Machine type | Cable arrangement | Typical use | Main drawback |
|---|---|---|---|
| Drum machine | Cable enclosed in rotating drum | Homeowner rental, 4-inch laterals, 75-100 feet | Heavy and difficult to clean |
| Sectional machine | Separate 10-15-foot cable sections | Long runs and professional work | Exposed cable requires more training |
| Manual auger | Hand-fed cable and crank | Branch drains under 3 inches | Usually inadequate for a main sewer |
| Mini drum machine | Compact drum, commonly 3/8-1/2-inch cable | Short residential lines | Limited stiffness and cutting power |
Check the rental manual for approved cable diameter, maximum reach, cutter size, and rotation controls. Rental listings often describe a machine as suitable for 4-6-inch lines, but that does not prove the cable will pass every cleanout, bend, reducer, or damaged joint.
Which cutting head matches the obstruction?
Use a spear or spade head to make a pilot opening in a soft or dense blockage, then change to a wider cutter suited to the material. Use a retriever for cloth-like obstructions, a grease cutter for wall deposits, and a root cutter only after confirming that the machine and pipe can tolerate it.
Do not begin with the largest root cutter simply because it looks more powerful. A head that matches the pipe diameter can wedge at an offset joint, especially in old vitrified clay or Orangeburg pipe.
What should you prepare before snaking the line?
Prepare the cleanout, machine, electrical protection, containment materials, and sanitation supplies before starting. Typical homeowner preparation requires 30-60 minutes, while active cable work takes another 20-60 minutes depending on distance and resistance.
Before-you-start checklist
Difficulty: High, because the cable can transmit sudden torque.
Time: 30-90 minutes for a clear-access, single-story residential line.
Typical rental: $50-$100 per day for a suitable motorized machine.
Machine: 75-100-foot drum unit rated for the pipe diameter.
Cable: Usually 5/8 inch for a sound 4-inch main.
PPE: Eye protection, waterproof boots, protective clothing, and manufacturer-approved drain-cleaning gloves.
Supplies: Heavy tarp, buckets, plastic sheeting, disinfectant, rags, hose, flashlight, and replacement cleanout gasket if applicable.
Electrical: GFCI-protected outlet, weather-safe extension arrangement if permitted by the machine manual.
People: One operator at the cable and one person controlling fixtures or observing flow.
Keep children, pets, and unnecessary people away from the machine. Sewage can contain pathogens, and a rotating cable can catch loose clothing, jewelry, hair, or gloves that are not designed for drain cleaning.
Step 1: Confirm the Main-Line Backup
Confirm that several fixtures are affected before renting equipment. A toilet gurgling when a washing machine drains, sewage rising in a basement floor drain, and slow flow from multiple fixtures point toward the building sewer rather than one sink or shower trap.
Stop using all water immediately. Do not run a dishwasher, washing machine, shower, or toilet while the line is obstructed because additional water can raise contaminated wastewater inside the building.
A single slow sink usually indicates a branch-drain problem. A whole-house backup indicates a main-line problem, but a blockage on the municipal side can produce the same symptoms.
You will know this step is complete when: multiple fixtures show related symptoms and water use has stopped.
Common mistake: Renting a main-line machine for one isolated fixture. Test other fixtures without adding significant water, then choose equipment based on the confirmed scope.
Step 2: Locate and Open the Main Cleanout
Locate the cleanout in the basement, crawlspace, garage, foundation wall, or yard, often within a few feet of the building exit. Outdoor cleanouts commonly have a threaded plastic or metal cap, while indoor access may use a plug or a two-way fitting.
Place a tarp and bucket around the opening. Stand to the side, wear eye protection, and loosen the cap slowly with the correct wrench. Stop if wastewater begins escaping rapidly, and allow the level to fall before removing the cap completely.
A cleanout usually contains standing wastewater rather than dangerous compressed pressure. The slow-opening procedure still matters because the water column can spill suddenly, and a blocked line may be full from the lowest fixture to the cleanout.
You will know this step is complete when: the cap is removed, the area is contained, and you can identify the direction toward the street and the direction toward the house.
Common mistake: Using excessive force on a brittle plastic cap. Replace a damaged cap rather than cracking the cleanout fitting or pipe.
Step 3: Position and Inspect the Sewer Machine
Place the drum machine within 2-3 feet of the cleanout so almost no cable is exposed between the machine and the pipe. Keep the machine stable, position the foot pedal where you can release it instantly, and connect power through GFCI protection.
Inspect the cable for kinks, flattened sections, broken wires, corrosion, or a loose connection at the drum. Fit the smallest appropriate head first, and confirm that the cutter locking mechanism is secure.
The machine should remain aligned with the cleanout. A sideways entry can force the cable against the fitting and increase the chance of a kink.
You will know this step is complete when: the machine cannot roll, the foot pedal is under your foot, the cable enters straight, and the cutter is locked.
Common mistake: Placing the machine several feet from the opening. An exposed rotating cable can form a dangerous loop before the operator can release the pedal.
Step 4: Feed the Cable Into the Line
Push 3-5 feet of cable into the cleanout before starting the motor, or follow the rental machine’s specific starting procedure. Select forward rotation, then activate the motor with the foot pedal while feeding the cable in controlled 6-12-inch increments.
Keep both hands on the cable only where the machine design allows safe manual feeding. Do not wrap the cable around your hands, hold it against your body, or force it forward when resistance rises.
Forward rotation drives the cutter into the obstruction. Reverse is generally for brief recovery from a jam, and the machine manual controls the permitted duration. Continuous reverse can loosen or damage some wound cables.
You will know this step is complete when: the cable advances smoothly through the first bend without buckling, whipping, or excessive vibration.
Common mistake: Shoving cable while the head is not rotating. Stop the motor, withdraw enough cable to remove the loop, and restart with a straight, controlled feed.
Step 5: Work Through the Obstruction
When the cutter meets the blockage, stop advancing and let the rotating head work against the resistance for 20-60 seconds. Withdraw the cable 4-6 inches, then advance it slowly in a short sawing motion rather than applying force.
A successful clearing commonly produces a sudden reduction in cable resistance and a drop in standing wastewater. That first opening may be narrow, so continue with controlled passes instead of immediately shutting down.
Root intrusion feels springy or fibrous, while a hard stop that does not change after several careful passes may indicate a broken pipe, offset joint, concrete, or a buried object.
You will know this step is complete when: the cable passes the original resistance and water begins draining consistently.
Common mistake: Holding the cutter against a hard stop indefinitely. Stop after several controlled attempts if the resistance remains fixed, especially in clay, Orangeburg, or visibly damaged pipe.
Step 6: Pass the Blockage and Verify the Line
Continue feeding the cable beyond the blockage rather than stopping at the first opening. A typical 4-inch residential lateral may require 50-100 feet of cable, but the correct distance is the measured route to the property connection, not an assumed number.
Run clean water briefly through a nearby fixture while the cable remains beyond the obstruction. Have an observer watch the cleanout and the lowest indoor drain for rising water.
Do not send a full bathtub or several fixtures at once until flow is confirmed. A partially opened grease or wipe blockage can reseal when a larger volume of water reaches it.
You will know this step is complete when: water moves away from the cleanout, fixtures drain without gurgling, and the cable has reached a known or reasonable downstream distance.
Common mistake: Feeding until the drum is empty without tracking distance. Mark cable depth or count sections so you can relate resistance to a location for later camera inspection.
Step 7: Retrieve, Flush, and Sanitize
Turn the machine off or place it in the manufacturer-approved neutral position before changing heads or handling a stuck cable. Retrieve the cable slowly according to the machine instructions, cleaning contaminated cable as it emerges instead of allowing sewage to spread across the floor.
Flush the line with moderate clean water after the cable is removed. Inspect the retrieved material for roots, wipes, grease, gravel, clay fragments, or black pipe pieces because the debris can reveal the underlying failure.
Disinfect hard surfaces with a product labeled for sewage cleanup, wash reusable protective equipment separately, and discard contaminated porous materials. Never mix disinfectant with drain chemicals or other cleaners.
Replace the cleanout cap with its original gasket or seal. Thread tape is appropriate only when the fitting design calls for it, and a plastic cap should be tightened enough to seal without cracking.
You will know this step is complete when: the line accepts water, the cleanout does not leak, and the work area has been cleaned and disinfected.
Common mistake: Replacing the cap while the line still drains slowly. Test with gradually increasing flow first.
How much does main-line snaking cost and how long does it take?
A typical DIY rental costs approximately $50-$100 per day, while a standard professional main-line clearing commonly falls around $250-$600 before difficult access, after-hours labor, excavation, or camera inspection. Active DIY work often takes 30-90 minutes, excluding cleanup and travel.
| Service or item | Typical price | Typical time | Main price variable |
|---|---|---|---|
| 5/8-inch drum rental | $50-$100/day | 1 rental day | Local equipment inventory |
| Professional cable cleaning | $250-$600 | 1-3 hours | Access and emergency timing |
| Sewer camera inspection | $150-$400 | 30-90 minutes | Travel and recording package |
| Hydro jetting | $500-$1,200 | 1-4 hours | Pipe size, access, and buildup |
| Excavation or repair | $2,000-$15,000+ | 1-7 days | Depth, surface, and pipe length |
Prices are typical North American planning ranges, not fixed tariffs. A cleanout inside the basement generally costs less to access than a buried or flooded access point, while nights, weekends, roots, and long cable runs raise labor charges.
The lowest initial price is not always the lowest total cost. Repeated snaking without identifying a collapsed section can create several service calls while the underlying defect remains.
Snake, hydro jet, or chemical treatment: which option fits?
A mechanical snake is the best first clearing method for a one-time blockage in a sound line, while hydro jetting is better for heavy wall deposits and chemical root treatments are preventive rather than emergency clearing tools. A camera inspection should precede aggressive cleaning when pipe condition is unknown.
| Method | Removes | Typical cost | Main risk or limitation |
|---|---|---|---|
| Cable snake | Roots, wipes, soft obstructions | $50-$600 | Opens a path without fully washing walls |
| Hydro jetting | Grease, sludge, scale, root residue | $500-$1,200 | High pressure can expose weak pipe |
| Enzyme treatment | Some organic residue | $15-$50 | Slow and ineffective for solid blockage |
| Foaming root treatment | Small recurring root growth | $30-$100 | Does not repair failed joints |
| Camera inspection | No blockage removal | $150-$400 | Requires a usable access point |
Hydro jetting commonly operates at several thousand pounds per square inch, but nozzle pressure and flow must be selected for the pipe condition. High pressure is not a safe substitute for diagnosis in old clay, Orangeburg, cracked cast iron, or a line with a known collapse.
Chemical drain opener is a poor choice for a blocked main sewer. The product may not reach the obstruction, and residual chemicals create a splash and exposure hazard when someone later opens the cleanout or uses a cable machine.
What if the cable gets stuck or the backup returns?
Stop the motor immediately when the cable becomes trapped, the drum spins without cable movement, or the cable begins twisting outside the pipe. Use only the rental machine’s documented recovery procedure, which may involve a brief reverse pulse and gentle withdrawal, never forceful pulling.
| Symptom | Likely cause | Safe response | Escalation point |
|---|---|---|---|
| Cable loops outside pipe | Machine too far away or feed too fast | Release pedal, straighten cable | Kinked or damaged cable |
| Drum spins, cable stalls | Clutch slip or obstruction | Stop, inspect, follow manual | Repeated clutch slipping |
| Cable will not withdraw | Cutter wedged in roots or damage | Brief approved reverse, gentle pull | No movement after controlled attempt |
| Water rises again | Narrow passage or second clog | Stop water, rework with suitable head | Two failed clearing attempts |
| Mud or pipe pieces appear | Structural failure | Stop immediately | Camera inspection required |
A backup that returns after successful drainage often indicates roots, grease left on the walls, a sag, or a partially collapsed line. The correct next step is usually a camera inspection from the cleanout, not a larger cutter.
A professional should take over when the blockage is beyond the available cable, the line contains sewage that cannot be contained, the pipe material is fragile or unknown, or the machine cannot be controlled safely. Never continue against concrete-like resistance.
How should you handle difficult situations?
What if the house has no accessible cleanout?
Do not remove a toilet as a casual substitute for a main cleanout. A sewer machine can damage the toilet trap, bathroom, floor, or wax seal, and the available opening may not provide a straight route to the building sewer.
A plumber can expose or install a cleanout, use a camera to locate the line, or select equipment designed for a specific access route. The cost of creating access may prevent repeated damage and simplify future maintenance.
What if the sewer line contains mature tree roots?
Roots enter through failed joints, cracks, or deteriorated connections, not through intact pipe walls. A root cutter can restore flow temporarily, but annual backups indicate a defect that needs camera evidence and possibly trenchless or excavated repair.
Record the approximate cable distance where roots begin. That measurement helps correlate the obstruction with a cleanout, property feature, or camera image.
What if the pipe is clay, Orangeburg, or old cast iron?
Use extra caution with old clay and Orangeburg pipe because aggressive cutting can enlarge a defect or strip away weakened material. Orangeburg, a fiber conduit saturated with bitumen, can deform and collapse with age; snaking it is a temporary clearing attempt, not a dependable repair strategy.
Cast iron may contain scale that narrows the passage. A root cutter or descaling tool can remove material, but a camera should guide the choice when the pipe condition is uncertain.
What if the blockage is on the city side?
If the cleanout and the private building sewer drain normally but the municipal connection or street main is blocked, the property owner may not be responsible for the repair. Contact the water or sewer utility after confirming that the private line is open, and document the backup location and time.
Local responsibility rules vary by municipality and by the location of the property-line cleanout. Do not assume a street problem is private or public without checking the local utility policy.
What are the most common sewer-snaking mistakes?
- Using a sink auger in a main line: A small cable lacks the stiffness and head size needed for a 4-inch buried sewer. Rent a machine rated for the actual pipe.
- Working without a cleanout plan: Opening the lowest access point without a tarp, bucket, and protective clothing can spread sewage through a basement.
- Forcing resistance: Force transfers torque into the cable and pipe. Short, rotating passes are safer than pushing through a fixed obstruction.
- Running continuous reverse: Reverse can help free a cutter briefly, but prolonged reverse can damage cable construction and reduce control.
- Stopping after the first water drop: A pinhole through grease or wipes may close again. Pass the obstruction and test with increasing water volume.
- Ignoring retrieved debris: Roots, gravel, clay, and pipe fragments provide diagnostic information. Photograph or retain unusual material for the plumber.
- Using chemical opener first: Residual chemicals increase exposure risk and rarely solve a fully blocked main sewer.
One practitioner rule is especially useful: if the cable behaves differently at the same distance on two separate passes, suspect a changing obstruction such as roots or wipes; if it stops at exactly the same distance with a hard, unchanging feel, suspect pipe geometry or structural damage.
FAQ
Can I unclog a main sewer line with a regular drain snake?
A regular hand snake is suitable for short sink, tub, and branch-drain clogs, not most buried main lines. A building sewer typically needs a motorized machine with a longer, stiffer cable and a cutter sized for 4-inch pipe. Using a small auger can leave the blockage untouched or create a cable loop.
How far should a sewer snake go into the cleanout?
Feed the cable far enough to pass the obstruction and reach the downstream connection, often 50-100 feet in a typical residential layout. Measure the route rather than relying on a standard distance, because the property cleanout may be close to the street or far behind the house.
Should I flush a chemical drain cleaner before snaking?
No. Chemical drain cleaner usually cannot reach a fully blocked main line, and the residue can splash from the cleanout or contaminate the cable. If a chemical product was already used, tell the rental company or plumber before anyone opens the line.
Can a sewer snake remove tree roots permanently?
No. A root cutter removes or cuts the intrusion temporarily, but roots normally entered through a crack, failed joint, or deteriorated connection. Recurring root blockages require a camera inspection and a repair or approved maintenance plan.
How do I know whether the sewer line collapsed?
A collapsed line may produce fixed, concrete-like resistance, repeated backups, mud, gravel, or fragments of clay or pipe on the cable. A camera inspection is the reliable confirmation. Stop snaking when those signs appear because additional force can enlarge the failure.
Is professional hydro jetting better than snaking?
Hydro jetting is better for extensive grease, sludge, and residue coating the pipe, while a mechanical snake is usually cheaper and more practical for a single obstruction. Neither method repairs a collapsed or badly offset line, so unknown pipe condition should be assessed before high-pressure cleaning.
The Bottom Line
To unclog main sewer line with a snake, use a correctly rated motorized machine through a cleanout, usually with a 5/8-inch cable for a sound 4-inch residential line. Feed in forward rotation, let the cutter work without force, pass the blockage, flush gradually, and inspect unusual debris. Stop for fixed resistance, fragile pipe, sewage-control problems, or recurring backups, then arrange a camera inspection rather than repeating blind snaking.